Why this operation has been suggested
The Achilles tendon is the strong cord at the back of your ankle that lets you push off when you walk or run. When it tears completely, this operation stitches the two torn ends back together. For a recent tear, surgery may be recommended straight away, without a trial of non-operative care first. Non-surgical treatment in a brace or boot is not inferior to surgery for one-year outcomes, so we will discuss both paths with you. Open repair lowers the chance of the tendon tearing again, though it carries a higher chance of wound problems. The main aim is a tendon that holds, so you can bear weight and return to your usual activities.
Before the operation
In the days before surgery, follow the preparation instructions we give you. You will need to stop eating and drinking seven hours before your operation. We ask for seven hours so you can be brought forward if the theatre list runs early. Your surgeon will tell you which of your regular medicines to stop and when. Bring a written list of everything you take, and arrange for someone to drive you home afterwards. Wear loose, comfortable clothing. Scans such as an X-ray, ultrasound or MRI may be used to plan the operation. If you have other medical conditions, you may need blood tests or a review with the anaesthetist before surgery.
On the day
You arrive at the hospital's surgical admissions unit, where you are checked in and prepared for theatre. You will then meet the anaesthetist, the doctor who puts you to sleep and looks after your pain. This operation is done under general anaesthetic. A regional nerve block is sometimes added for post-operative pain relief; the anaesthetist will discuss this with you on the day. You are then taken into the operating theatre, where the operation is performed.
When the operation is finished, you wake up in the recovery area. Nurses stay with you there while the anaesthetic wears off. Once you are stable, you either go to a ward or go home, depending on the procedure and how your recovery is going.
What the operation involves
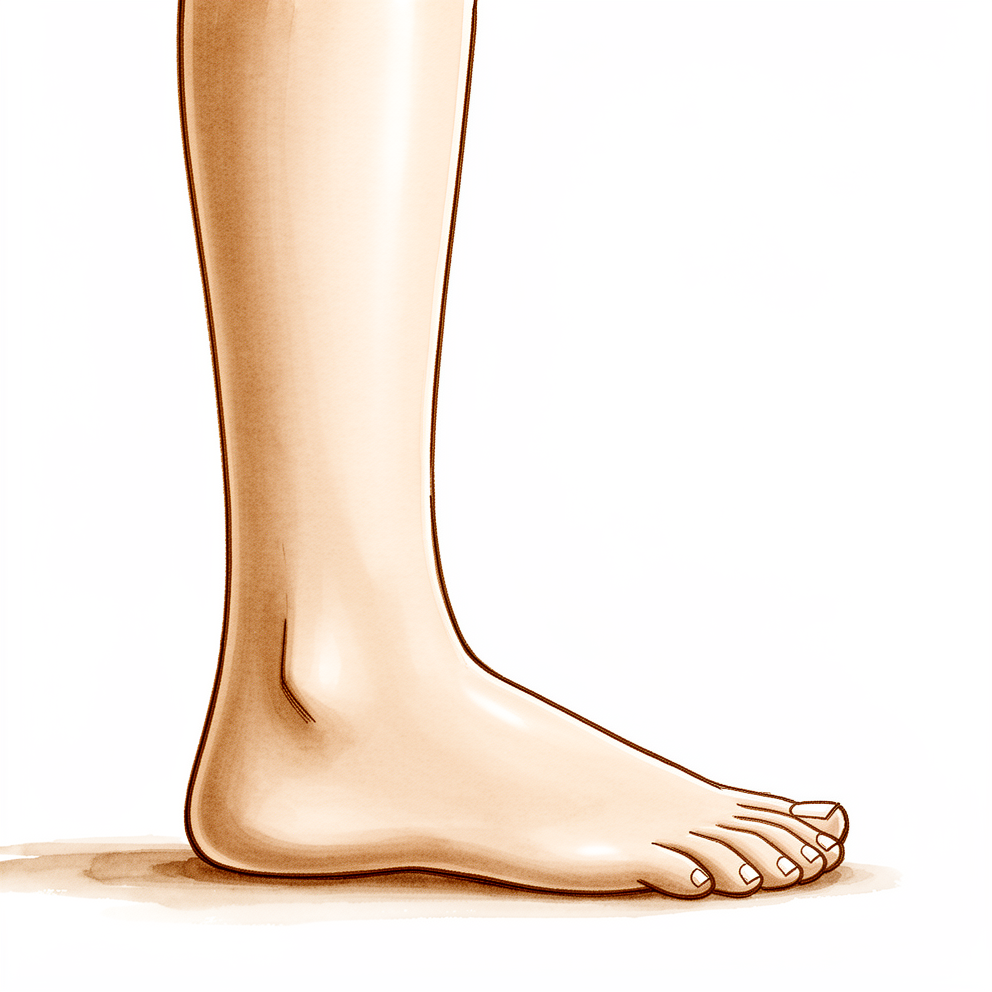
The Achilles tendon is the strong cord at the back of your ankle. When it tears, the two ends pull apart like a frayed rope. This operation stitches those ends back together.
Your surgeon makes a small cut over the tendon at the back of your ankle. In a minimally invasive repair, the cut is smaller, and the stitches are passed through the skin with little or no opening of the tendon sheath. The surgeon may use a thin camera to check that the torn ends are joined correctly. Strong stitches bridge the gap between the healthy tendon above and the heel bone below, holding the ends together while they heal.
Once the tendon ends are joined, the stitches are tied off and the cut is closed with stitches and a dressing. You will leave theatre with your ankle in a protective position so the repair is not strained.
Some repairs use a technique that lets you put weight on the foot earlier than a traditional open repair. Your surgeon will tell you which approach is planned for you and why.
After the operation
You will wake up in the recovery area with nurses nearby while the anaesthetic wears off. Your ankle will be in a dressing and resting in a protective position so the repair is not strained. We give you pain relief to keep you comfortable, and we will check the foot's blood supply, feeling and movement before you leave. Someone should stay with you for the first 24 hours after you get home. Your team will tell you whether you go home the same day or stay one night in hospital. For the first two weeks, keep your weight off the foot unless your team tells you otherwise. We leave the dressing on for about 10 days; please do not take it off before then unless we tell you to. We change or remove it when we see you.
Recovery
For the first few days your ankle will be sore and swollen. Pain relief keeps this comfortable, and resting with your foot raised helps the swelling settle. Some bruising around the ankle and into the foot is normal and fades over time.
You will leave hospital with your ankle resting in a protective position so the repair is not strained. For the first two weeks, keep your weight off the foot unless your team tells you otherwise. We leave the dressing on for about 10 days and change or remove it when we see you. After that, your physiotherapist will guide you through gentle ankle movements. You will start by pointing your foot down freely, while keeping it from bending up too far. As healing progresses, you will put more weight through the foot and begin walking further. Some repairs let you bear weight earlier than others; your surgeon will tell you what is planned for you.
Day to day, you will need help with stairs, shopping and showering at first. Sleeping on your back with your foot raised is often more comfortable. You can usually return to desk work and everyday routines as your movement and comfort allow, and build back to sport once your strength and balance are back. Many people return to sport from around four months after a minimally invasive repair.
Recovery varies from person to person. Your timeline may differ, and your surgeon and physiotherapist will guide you at each step.
What can go wrong
Most patients do well, but problems can occasionally happen. Your surgeon and the team monitor you closely to spot any issue early.
Wound problems are the ones to watch. The skin over the Achilles tendon has a poor blood supply, so the cut can be slow to heal or the edges can break down. Watch for redness spreading out from the wound, oozing or discharge, increasing pain, or a fever. If you notice any of these, call the clinic rather than waiting for your next visit. Some health conditions, including diabetes and smoking, make wound problems more likely, so we will talk with you about your own risks before surgery.
Infection can develop in the wound or deeper around the tendon. It usually feels like a deep, throbbing pain that does not ease with simple painkillers, along with warmth, swelling and redness. It may come with a fever or feeling generally unwell. Deep infection needs prompt treatment, so contact the clinic the same day, or go to the emergency department if you cannot reach us.
The stitches hold the tendon ends together while they heal, and the tendon can tear again before it is fully strong. This usually happens with a sudden push-off, a stumble or a fall. You would feel a sharp snap or pop in the back of your ankle, with sudden weakness and trouble pushing off. If that happens, contact the clinic straight away or go to the emergency department.
The nerve that runs along the outside of the ankle can be irritated during repair. This can cause numbness, tingling or a burning feeling down the outer side of your foot. Mention it at your next review, or call sooner if it is severe.
Blood clots can form in the deep veins of the calf after this injury and surgery. Warning signs include sudden swelling, tenderness or heaviness in the calf, and breathlessness or chest pain if a clot travels to the lungs. Breathlessness or chest pain means going to the emergency department immediately. Calf symptoms mean calling the clinic promptly.
Scar tissue can sometimes stick the tendon to the surrounding tissue, causing a clicking or grinding feeling or stiffness with movement. Bring this up at your next review.
The complications table on this page lists typical rates if you want the specifics.
When to call us
Call us straight away if you have a fever, or if redness, discharge or pain around the wound is getting worse. Call us promptly if your calf becomes swollen, tender or heavy. Go to the emergency department if you become breathless or have chest pain, if you feel a sudden snap or pop in your ankle with weakness, or if you lose feeling in your foot or cannot move it. If you cannot reach us, go to the emergency department.
Evidence & references
This is the clinical evidence summary written for health professionals. It is technical, and it lists the research this page was built from. You do not need to read it to understand your treatment or to make a decision about it.
Anatomy & Pathophysiology
Bony Anatomy
- The ankle mortise is formed by the tibial plafond, medial malleolus, and lateral malleolus [3].
- The ankle mortise articulates with the dome of the talar body [3].
- The talar dome is wider anteriorly and narrower posteriorly [3].
- The ankle mortise widens 1 to 1.5 mm during motion from plantar flexion to dorsiflexion [3].
- Medial and superior clear spaces appear wider with the foot in plantar flexion [3].
- The distal fibula has a convex medial surface that articulates with the concave incisura fibularis of the distal lateral tibia [3].
- The fibula rotates approximately 2 degrees within the incisura during ankle motion and ambulation [3].
- Ankle dorsiflexion results in external rotation and proximal translation of the fibula [3].
Ligamentous Anatomy
- The lateral ankle ligaments function as restraints to varus and inversion forces at the ankle [3].
- The anterior talofibular ligament (ATFL) originates from the anteroinferior aspect of the lateral malleolus, 1 cm proximal to its tip, and extends to the lateral aspect of the talar neck [3].
- The calcaneofibular ligament (CFL) extends from the tip of the lateral malleolus to the lateral aspect of the calcaneus [3].
- The posterior talofibular ligament (PTFL) extends from the posterior lateral malleolus to the posterolateral talus [3].
- The ATFL is the weakest ankle ligament [3].
- The PTFL is the strongest ankle ligament [3].
- The distal tibiofibular joint and fibula provide stability against lateral talar translation [3].
- The deltoid ligament complex is the primary ankle stabilizer during stance [3].
- The deep deltoid ligament extends from the apex of the medial malleolus to the medial talar body [3].
- The deep deltoid ligament functions primarily to resist lateral talar translation and external rotation [3].
- The posterior deep deltoid is the most important component of the deep deltoid ligament [3].
- The superficial deltoid ligament extends from the distal medial malleolus to the navicular bone, sustentaculum tali of the calcaneus, medial talus, and spring ligament [3].
- The superficial deltoid ligament functions primarily to resist valgus and eversion ankle forces [3].
- The deltoid ligament consists of superficial and deep layers, with at most six bands of which only three are constant: the tibionavicular ligament, tibiospring ligament, and deep posterior tibiotalar ligament [8].
- The tibiocalcaneal portion of the superficial deltoid ligament is the strongest component and resists eversion of the calcaneus [8].
- The deep portion of the deltoid ligament is organized into two short, thick, discrete bands: the anterior and posterior deep tibiotalar ligaments [8].
- The anterior and posterior deep tibiotalar ligaments are intra-articular but extrasynovial [8].
- The deep posterior band comprises the largest band of the deltoid complex [8].
- The deep deltoid ligament has the highest load to failure at 713.8 N ± 69.3 compared with the lateral collateral ligaments [8].
- The dominant mode of failure for the deep deltoid ligament is an intrasubstance rupture near its talar insertion [8].
- The failure of the superficial deltoid ligament is most commonly at its insertion on the anterior malleolus [8].
- Valgus tilting of the talus within the mortise requires complete rupture of both the superficial and deep deltoid ligaments [8].
Neurovascular Anatomy
- The superficial peroneal nerve penetrates the deep fascia and lies subcutaneously 8 to 10 cm proximal to the tip of the lateral malleolus, anterior to the subcutaneous border of the fibula shaft [6].
- The deep peroneal nerve accompanies the anterior tibial artery between the tendons of the anterior tibial and extensor digitorum longus muscles, just lateral to the extensor hallucis longus tendon [6].
- The saphenous nerve is located just medial or posterior to the saphenous vein in a slightly deeper plane, 3 to 5 cm proximal to the tip of the medial malleolus [6].
Biomechanics
- The ankle joint is responsible for most sagittal plane motion of the foot and ankle [3].
- Ankle plantar flexion ranges from 23 to 48 degrees [3].
- Ankle dorsiflexion ranges from 10 to 23 degrees [3].
- The ankle joint also contributes to inversion, eversion, and rotation [3].
Investigations
- MRI is sensitive for detecting osteochondral lesions of the ankle, but the edema pattern frequently overestimates the severity of the injury [12, 13].
- Linear fluid signal deep to subchondral bone on MRI indicates an unstable osteochondral lesion [12, 13].
- MRI has a sensitivity of 92% for predicting stable versus unstable osteochondral lesions [12, 13].
- CT scans are helpful for evaluating bony lesions, determining the integrity of subchondral bone, identifying cysts, and preoperative planning for osteochondral lesions [12, 13].
- AP, mortise, and lateral weight-bearing ankle x-rays may not demonstrate subtle osteochondral lesions [12, 13].
- Advanced imaging is often helpful in the diagnosis of foot and ankle injuries when combined with a thorough clinical examination [16].
- MRI is used for the evaluation of chronic Achilles tendon ruptures [1].
- MRI is used for the evaluation of traumatic ligamentous injuries of the ankle and foot [1].
- MRI is used for the evaluation of musculotendinous structures of the ankle [1].
- MRI is used for the evaluation of sports injuries involving the ankle [1].
- MRI is used for the pre-operative evaluation of the anterior talofibular ligament in chronic ankle instability [1].
- MRI is used for the evaluation of anterolateral soft tissue impingement of the ankle [1, 18].
- MRI is used for the evaluation of osteochondral lesions of the talus [1].
- MRI is used for the evaluation of posterior tibial tendon dysfunction [1].
- MRI is used for the diagnosis of plantar plate injury with reference to intraoperative findings [1].
- MRI is used for the evaluation of tibiofibular syndesmotic ligaments [1].
- MRI is used for the evaluation of chronic lateral ankle instability in conjunction with stress radiography [1].
- MRI is used for the evaluation of associations between imaging findings and symptoms in patients with chronic ankle sprain [1].
- MRI is used for the evaluation of accuracy in diagnosing ligamentous and chondral pathology in the ankle [1].
- MRI is used for the evaluation of peroneal tendon abnormalities on routine imaging of the foot and ankle [15].
- MRI is used for the evaluation of entrapment neuropathies of the lower extremity, including the knee, leg, ankle, and foot [19].
- Ultrasonography is used for the examination of the deltoid ligament in bimalleolar equivalent fractures [17].
- Ultrasonography is used for the point-of-care diagnosis and management of superficial peroneal nerve entrapment [19].
- MRI lacks additional diagnostic value for stability assessment of the ankle mortise in supination-external rotation-type ankle fractures [17].
- CT imaging is used to evaluate normal tibiofibular relationships at the syndesmosis [17].
- Preoperative computed tomography scans are used in operative planning for malleolar ankle fractures [17].
- Radiographic evaluation of the normal distal tibiofibular syndesmosis is a standard investigative approach [17].
- Fluoroscopy is used to assess if the syndesmosis is reduced [17].
- Radiographic identification of primary lateral ankle structures is possible [2].
- Gravity stress radiographs are used to assess the effect of ankle position on deltoid ligament integrity and medial clear space measurements [2].
- Stress radiography is used in the evaluation of chronic lateral ankle instability [1].
- The use of advanced imaging is often helpful in diagnosis when combined with a thorough clinical examination for foot and ankle disorders [16].
Treatment
Operative Technique: Lindholm Repair
- The patient is positioned prone for the procedure [14].
- A posterior curvilinear incision is made extending from the midcalf to the calcaneus [14].
- The deep fascia is incised in the midline to expose the tendon rupture [14].
- Ragged ends of the tendon are debrided [14].
- Tendon ends are apposed using a box type of mattress suture made of heavy nonabsorbable suture material or wire [14].
- Fine interrupted sutures are also used to appose the tendon ends [14].
- Two flaps are fashioned from the proximal tendon and gastrocnemius aponeurosis [14].
- Each flap is approximately 1 cm wide and 7 to 8 cm long [14].
- The flaps are left attached at a point 3 cm proximal to the site of rupture [14].
- Each flap is twisted 180 degrees on itself so that its smooth external surface lies next to the subcutaneous tissue [14].
- The flaps are turned distally over the rupture [14].
- Each flap is sutured to the distal stump of the tendon and to one another [14].
- The flaps cover the site of rupture completely [14].
- The wound is closed with care taken to approximate the tendon sheath over the site of repair [14].
Operative Technique: Lynn Repair
- The tendon sheath is opened in the midline [14].
- The foot is held in 20 degrees of plantar flexion during the repair [14].
- The ends of the Achilles tendon are sewn together with 2-0 absorbable sutures without excising the irregular edges [14].
- If the plantaris tendon is intact, its insertion on the calcaneus is divided [14].
- The plantaris tendon is fanned out to form a membrane using forceps, beginning distally [14].
- The fanned-out plantaris membrane is placed over the repair of the Achilles tendon [14].
- The plantaris membrane is sutured in place with interrupted sutures [14].
- When possible, the Achilles tendon is covered for 2.5 cm both proximal and distal to the repair [14].
- If the plantaris tendon is ruptured, it is dissected free from the Achilles tendon for several centimeters [14].
- The ruptured plantaris tendon is divided proximally using a tendon stripper [14].
- The plantaris tendon is pulled distally into the incision and fanned out as a free graft [14].
- The sheath of the Achilles tendon is closed as far distally as possible without tension [14].
Postoperative Care
- Postoperative care for these repairs is the same as that used after treatment of acute rupture of the Achilles tendon [14].
References
[1] Campbell S Operative Orthopaedics 4 Volume Set. REFERENCES > FOOT AND ANKLE.
[2] Campbell S Operative Orthopaedics 4 Volume Set. REPAIR OF ACUTE RUPTURE OF LATERAL LIGAMENTS > ACUTE ANKLE LIGAMENT INJURIES, CHRONIC ANKLE INSTABILITY.
[3] Miller S Review Of Orthopaedics. SECTION 16 PATELLAR TRACKING IN TOTAL KNEE ARTHROPLASTY > BIOMECHANICS OF THE FOOT AND ANKLE.
[6] Campbell S Operative Orthopaedics 4 Volume Set. MULTIPLE Z-PLASTY RELEASE OF A CONGENITAL RING > ANKLE BLOCK.
[8] Orthopaedic Knowledge Update Sports Medicine 6. Ankle and Foot Injuries and Other Disorders > Ankle Sprains > Medial Ankle Injury.
[12] Miller S Review Of Orthopaedics. SECTION 16 PATELLAR TRACKING IN TOTAL KNEE ARTHROPLASTY > OSTEOCHONDRAL LESIONS.
[13] Miller S Review Of Orthopaedics. OSTEOCHONDRAL LESIONS.
[14] Campbell S Operative Orthopaedics 4 Volume Set. ULNAR COLLATERAL LIGAMENT REPAIR WITH AN INTERNAL BRACE > OPEN REPAIR OF ACHILLES TENDON RUPTURE—LINDHOLM.
[15] Campbell S Operative Orthopaedics 4 Volume Set. MULTIPLE Z-PLASTY RELEASE OF A CONGENITAL RING > PERONEAL TENDONS.
[16] Orthopaedic Knowledge Update Sports Medicine 6. Ankle and Foot Injuries and Other Disorders > Summary.
[17] Orthopaedic Knowledge Update Trauma. Ankle Fractures > Annotated References.
[18] Campbell S Operative Orthopaedics 4 Volume Set. ARTHROSCOPIC EXAMINATION AND DEBRIDEMENT OF THE ANKLE JOINT > IMPINGEMENT.
[19] Campbell S Operative Orthopaedics 4 Volume Set. COMBINED HAMMER TOE AND MALLET TOE DEFORMITY WITH ASSOCIATED DOUBLE CORNS > REFERENCES > TARSAL TUNNEL SYNDROME.