Shoulder Replacement for Fracture PDF Evidence
Rehabilitation after hemiarthroplasty or reverse shoulder replacement for a proximal humerus fracture — slower than elective replacement while the tuberosities heal.
This protocol guides your recovery after a shoulder replacement performed for a broken shoulder (a proximal humerus fracture) with Dr Kieran Hirpara at Mater Private Hospital Rockhampton. Depending on the fracture, the replacement may be a reverse shoulder replacement or a hemiarthroplasty (replacing the ball of the joint only) — the rehabilitation journey has the same shape for both, because what sets the pace is the healing of the bone fragments, not the type of implant. Each phase below opens with a plain-English explanation of what is happening and what matters most, followed by the structured protocol written for your physiotherapist — bring this page or its PDF to your first physiotherapy visit so your rehabilitation stays coordinated. Your physiotherapist may adjust the plan depending on how your recovery progresses.
If you have any concerns about your wound after surgery, get in touch with the rooms. It is often helpful to take a photo of the wound and email it for review.
Why recovery is slower after a fracture
When a shoulder is replaced electively for arthritis or a worn rotator cuff, the bone around the new joint is intact, and rehabilitation can move at the pace of soft-tissue healing. After a fracture it is different. The two bony knobs at the top of the arm bone — the greater and lesser tuberosities, where the rotator cuff muscles attach — have usually broken free, and during your operation they are stitched back into position around the new prosthesis. Those fragments must now heal onto the bone and the implant, just like any other fracture, and that typically takes a number of weeks to months.
Published rehabilitation protocols for shoulder replacement performed for fracture are consistent on this point: how well the shoulder works afterwards depends heavily on whether the tuberosities heal in position, and early or forceful movement — even passive movement — can pull on the repair and put that healing at risk. The protocol therefore follows the same path as the elective reverse shoulder replacement protocol — after a fracture, the same journey runs more slowly because the bone fragments must heal first. Each step up in your rehabilitation is gated on two things together: enough time passing, and X-rays showing that the bone is healing, as confirmed at your review with Dr Hirpara.
What to expect
You will have a numb arm when you wake up, and the feeling should start to return after about 24 hours. There may be some numbness or weakness for up to a week.
When you wake up from your operation, you will be in a sling, with a big pad over your shoulder. This pad will be removed before discharge. Underneath will be a waterproof dressing covering a surgical glue strip, which can be left alone for 2 weeks. Your stitches are dissolvable and do not need removing, but there may be some tails of stitch at each end of the wound that can be cut flush with the skin after 2 weeks. You will be booked to see our nurse for a wound check 1–2 weeks after your surgery. If you are unable to attend the dressing check, you can remove your dressing yourself after 2 weeks.
Approximate timeframes for return to activities — slower than after an elective replacement, and always subject to how your bone is healing:
- Driving — not while you are wearing the sling. Most people return somewhere between 6 and 12 weeks, once movement and control are back; discuss this at your review.
- Swimming — breaststroke from about 4 months; freestyle later, as guided at your review.
- Lifting — nothing heavier than a cup of coffee until about 12 weeks; light lifting builds gradually from 12 weeks; avoid lifting heavy items for 6 months.
- Work — sedentary job: from about 6 weeks, as comfort allows; manual job: guided by Dr Hirpara.
It is also worth setting expectations early: after a replacement for fracture, the shoulder typically does not regain the full range of an uninjured shoulder. Published results describe comfortable, pain-controlled use of the arm at waist and shoulder height — and often overhead — as the usual outcome, with movement and strength continuing to improve for 12–24 months after surgery.
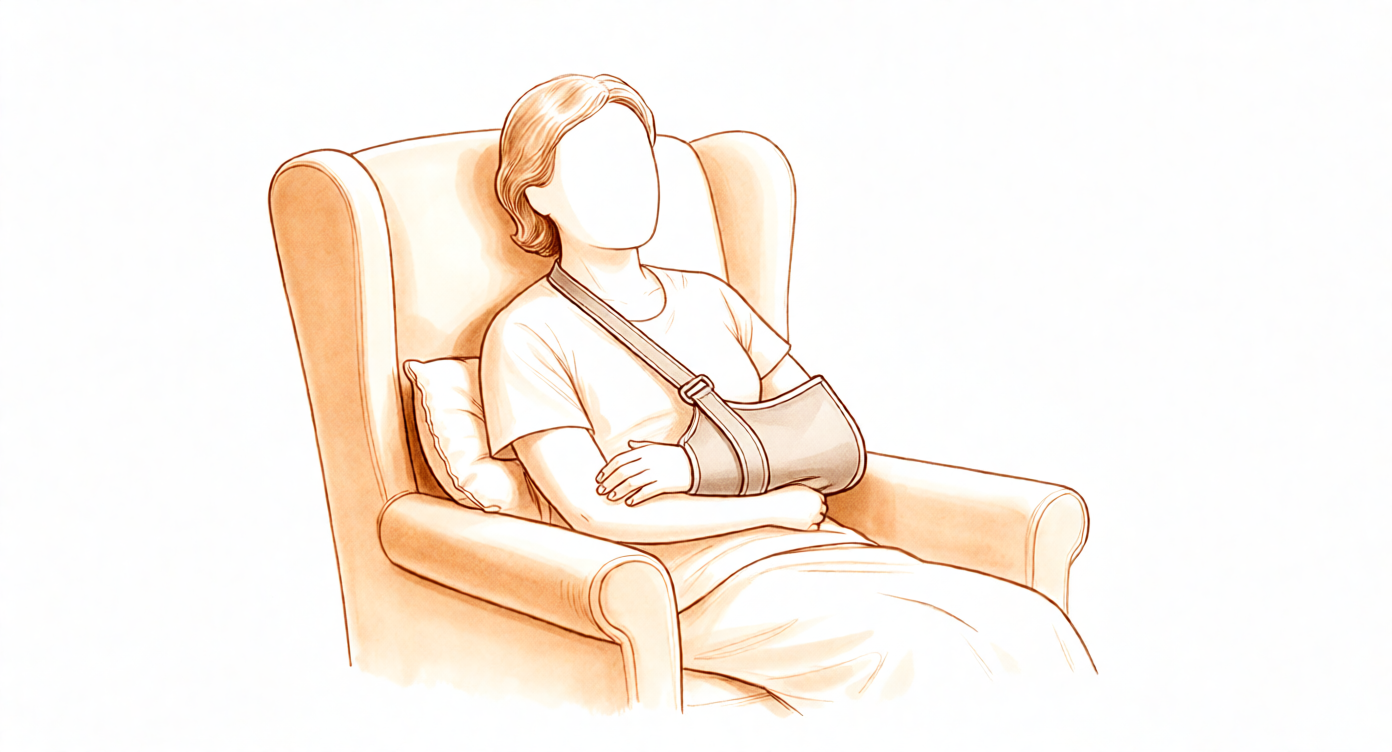
Wearing your sling
Your sling (shoulder immobiliser) supports your shoulder while the bone fragments heal. The rules are simple:
- Wear it for 6 weeks, including while sleeping.
- Take it off only for showers and for your exercises, once you have been shown how — and whenever the sling is off, keep your arm by your side.
- Resting at home, it can come off if you are sensible about it: arm supported on a pillow while sitting.
- Do not drive while you are wearing a sling.
- Use ice if the shoulder is swollen or sore, especially after exercise.
Your physiotherapist will help you put the sling on at first, and will teach you to manage it independently before you go home. Fitting it correctly matters — a loose sling does not support you properly:
- Always ensure that when fitting the sling, your elbow is positioned in the corner of the sling and well supported.
- The end of a well-fitted sling should rest comfortably at the knuckle of your little finger. If your hand extends too far out of the sling, it will not provide you with adequate support.
- Your sling has two Velcro straps — one which attaches around your neck and one around your waist.
- Once you have positioned your elbow and forearm correctly, use your non-operated arm to swing the upper strap around your neck to the front and attach it through the upper loop on the sling.
- Use the same method to attach the lower strap around your waist, securing through the lower loop on the sling.
During your time in the sling, be conscious of your posture at all times and avoid allowing your shoulders to adopt a slumped position. To achieve a good postural position, try to keep your ears, shoulders and hips in line — maintaining good posture is important for your back and will help prevent stiffness in your shoulder joint. A rolled-up towel placed in the small of your back when sitting can serve as a friendly reminder.
Your first days in hospital
Before you go home, the hospital physiotherapists will start you on a simple program. It helps to understand three terms they will use. Active range of motion means movement you do yourself, without aid or help. Active-assisted range of motion means using your other arm (or an object, such as a cane) to help move the arm. Passive range of motion means the arm stays completely relaxed while your other arm — or someone else — does 100% of the work. After a replacement for fracture, the operated shoulder is moved only passively, and only within gentle limits, for the first six weeks; the joints you move actively are your elbow, wrist and hand.
A few practical points for these first days:
- You need to sleep in the sling.
- Use ice for pain relief if needed.
- When wearing your sling, relax your shoulder and let the sling take the weight of your arm.
- Take your painkillers before you do your exercises, and before your physiotherapy appointments.
- You are allowed to take your arm out of the sling for your exercises and showering.
- You need to wear your sling for 6 weeks, especially when out of the house.
- Keep your hand on the operated side gently busy — writing, eating and using a phone while the arm rests in the sling are all encouraged.
- Unless you have chosen to arrange your own physiotherapy, an appointment has been made for you and is detailed in your discharge pack.
- If you have any problems, contact the office or let your physiotherapist know.
Phase I — Protection while the bone heals (Weeks 0–6)
Kieran Hirpara 4.0
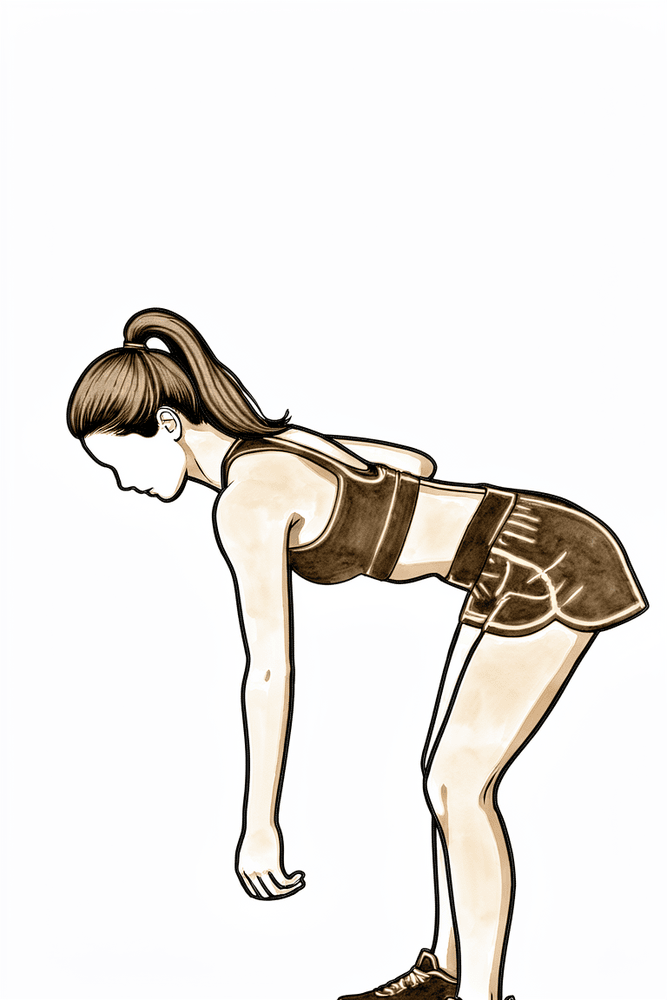
Pendulum exercises (fully relaxed)
Lean forward, supported on a table with your other hand, and let the operated arm hang completely relaxed. Make small circles by gently rocking your body — the arm swings passively and the shoulder muscles do no work at all. If the arm is not staying relaxed, stop and ask your physiotherapist to check your technique.
As guided by your physiotherapist
Kieran Hirpara 4.0
Active elbow bends
With the arm out of the sling and the upper arm resting by your side, bend the elbow as far as it will comfortably go, then straighten it fully. Only the elbow moves — keep the shoulder still and the arm by your side.
As guided by your physiotherapist
Kieran Hirpara 4.0
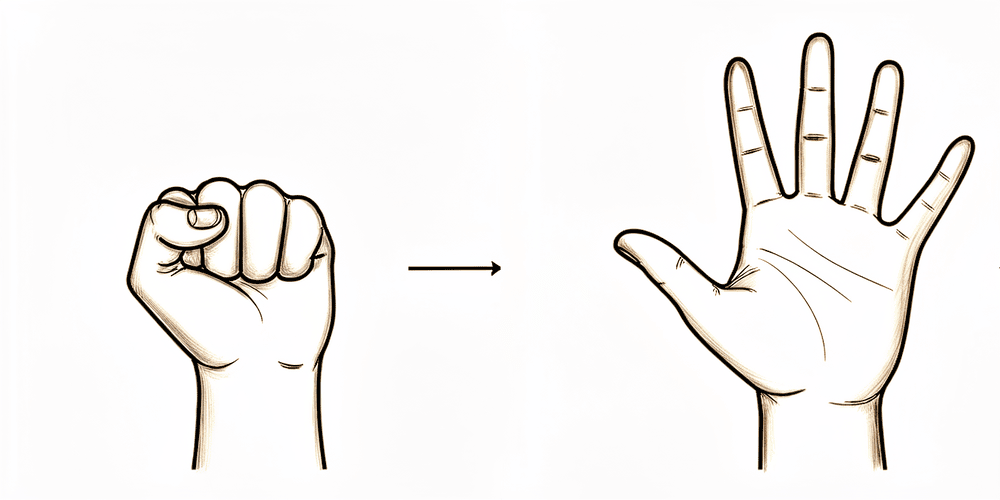
Open and close hand
Make a tight fist, then open the hand and spread the fingers fully. Keep the hand gently busy through the day — writing, eating and using a phone while the arm rests in the sling are all encouraged.
As guided by your physiotherapist
Kieran Hirpara 4.0
Wrist movement
With the arm out of the sling and resting by your side, keep the wrist moving by bending it forwards, backwards and gently side to side. Like the elbow and hand work, this keeps the lower arm supple while the shoulder is protected.
As guided by your physiotherapist
Kieran Hirpara 4.0
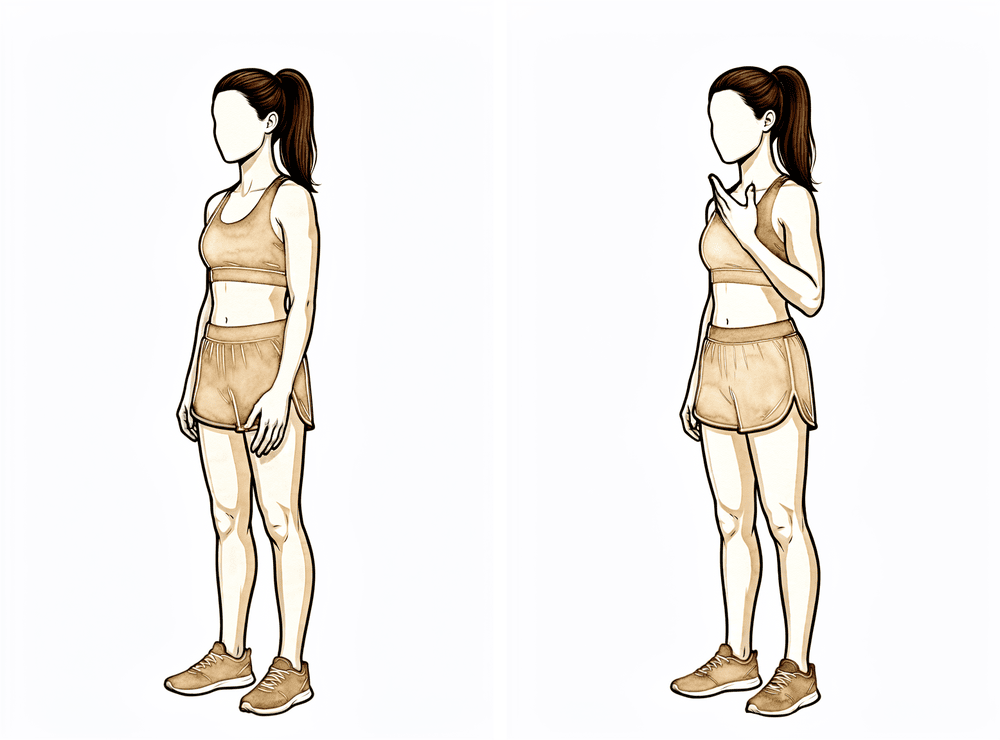
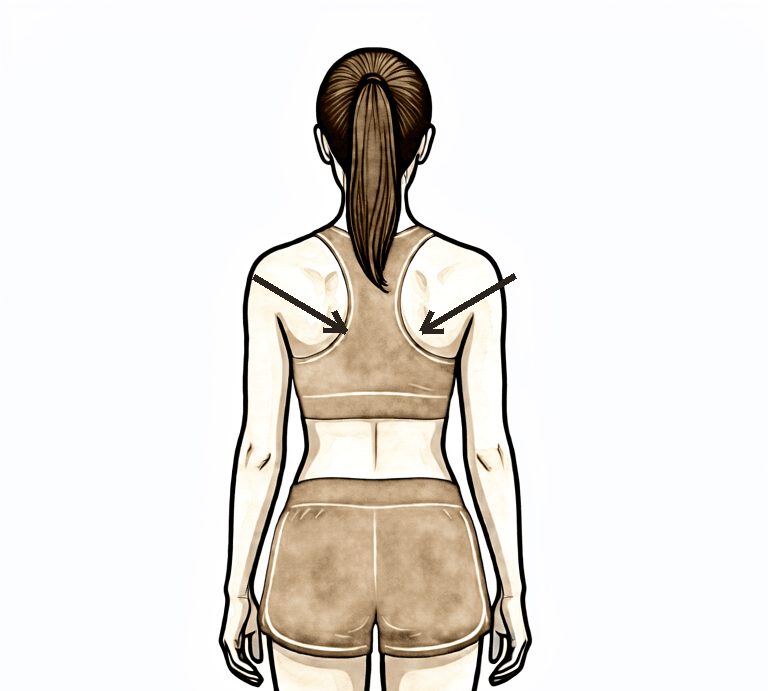
Scapular setting and shrugs
Sitting or standing tall, gently squeeze your shoulder blades down and together without arching your back, hold a few seconds, then relax. Add gentle shoulder shrugs — lift the shoulders toward the ears and let them settle. Keep your posture corrected through the day: ears, shoulders and hips in line.
As guided by your physiotherapist
The first six weeks are about one thing: letting the tuberosity fragments heal onto the bone and the prosthesis, undisturbed. You stay in the sling day and night, keep your elbow, wrist and hand moving, and let the shoulder itself be moved only passively — gently, by your physiotherapist or with the arm completely relaxed — within the limits below. The rules that matter most: do not move the shoulder actively, do not rotate the arm outwards past the limits, do not reach behind your back, do not lift anything, and do not push up through your hands. If you have a reverse replacement, these rules also protect the new joint against dislocation while the soft tissues heal. When lying on your back, keep a small pillow or rolled towel under your elbow so the shoulder does not stretch backwards.
For your physiotherapist:
Goals
- Protect the tuberosity repair and prosthesis
- Reduce swelling, minimise pain
- Maintain active range of motion (ROM) in the elbow, wrist and hand
- Gentle protective shoulder passive range of motion (PROM) within the safe zone
- Maintain scapular and postural awareness
- Patient education
Sling
- 6 weeks, including while sleeping
- Removed only for washing and exercises; arm stays by the side when out of the sling
Management
- Swelling management: ice, compression
- Range of motion / mobility:
- PROM only, within the safe zone: elevation in the scapular plane ≤ 90 degrees; external rotation (ER) to neutral (0 degrees) for the first 4 weeks, then ≤ 30 degrees; no internal rotation (IR) behind the back
- Pendulums, performed fully relaxed as a passive exercise
- Active-assisted range of motion (AAROM): none for the shoulder
- Active range of motion (AROM): elbow, wrist, hand and fingers; cervical spine
- Scapular setting, shoulder shrugs and postural correction
- Encourage light use of the hand while in the sling (writing, eating, phone)
- Analgesia before exercises and physiotherapy sessions
Precautions
- No shoulder AROM or AAROM
- No passive or active ER past the limits above — the greater tuberosity repair is loaded by external rotation
- No resisted internal rotation — the lesser tuberosity (subscapularis) repair is loaded by internal rotation
- No reaching behind the back; no combined adduction, internal rotation and extension (reverse replacement dislocation position)
- No lifting of objects; no supporting of body weight through the hands (for example pushing up from a chair or bed)
- Place a small pillow or towel roll under the elbow while lying on the back, so the shoulder does not fall into extension
- Do not force any movement into pain
Criteria to progress
- 6 weeks have passed AND X-rays show the tuberosities healing in position, as confirmed at your review with Dr Hirpara
- Pain controlled with oral analgesia
- No wound concerns and no signs of instability
Phase II — Restoring movement (Weeks 6–12)
Kieran Hirpara 4.0
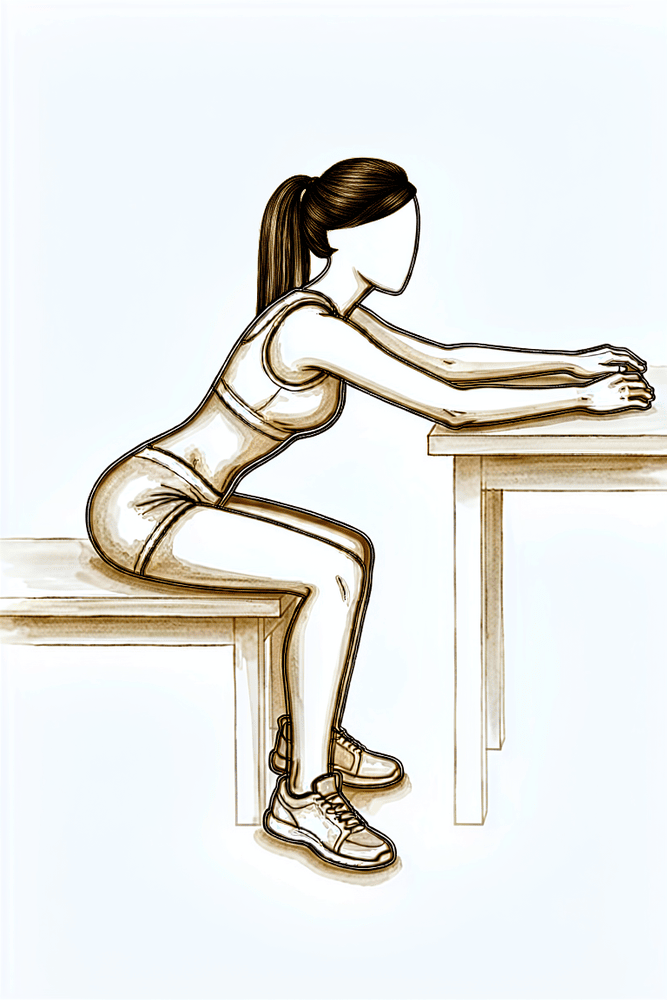
Table slides
Sit at a table with your forearm resting on it. Lean gently forward so your hand slides along the table, letting the table support the weight of the arm, then sit back up. Progress within comfort — do not push into pain.
As guided by your physiotherapist
Kieran Hirpara 4.0
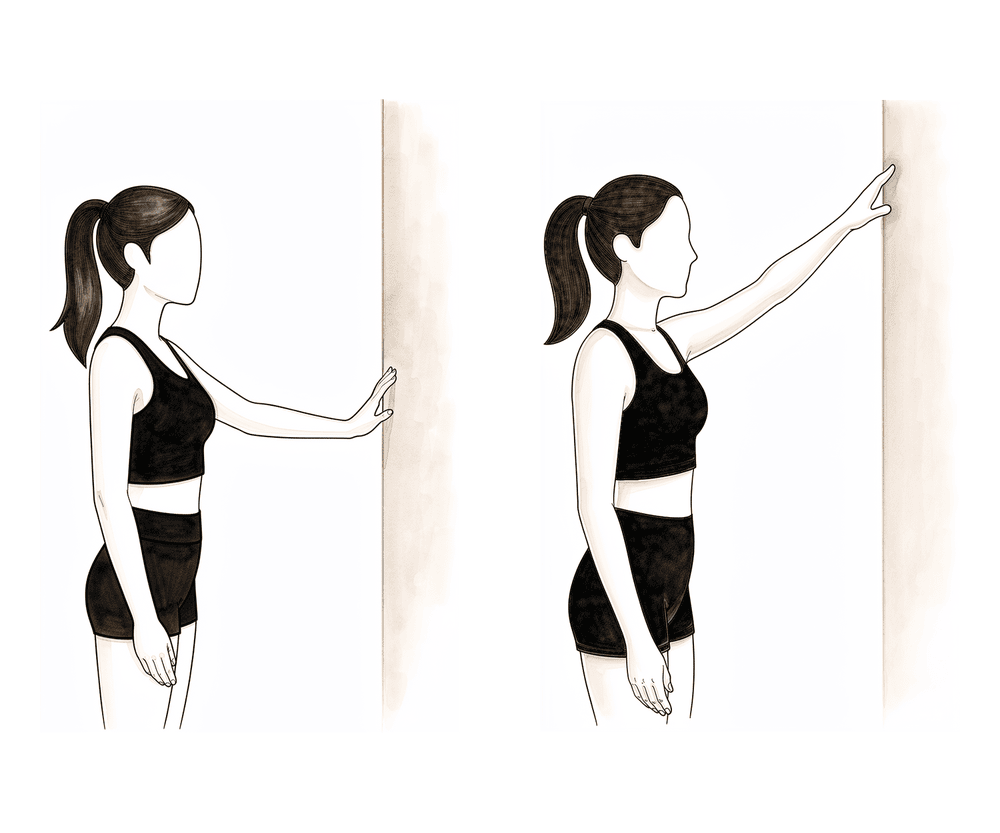
Wall climbs (finger walk)
Stand facing a wall and walk your fingers slowly up it, letting the wall take the weight of the arm, then walk them back down with control. Go only as high as comfort allows, without shrugging the shoulder or arching your back.
As guided by your physiotherapist
Kieran Hirpara 4.0
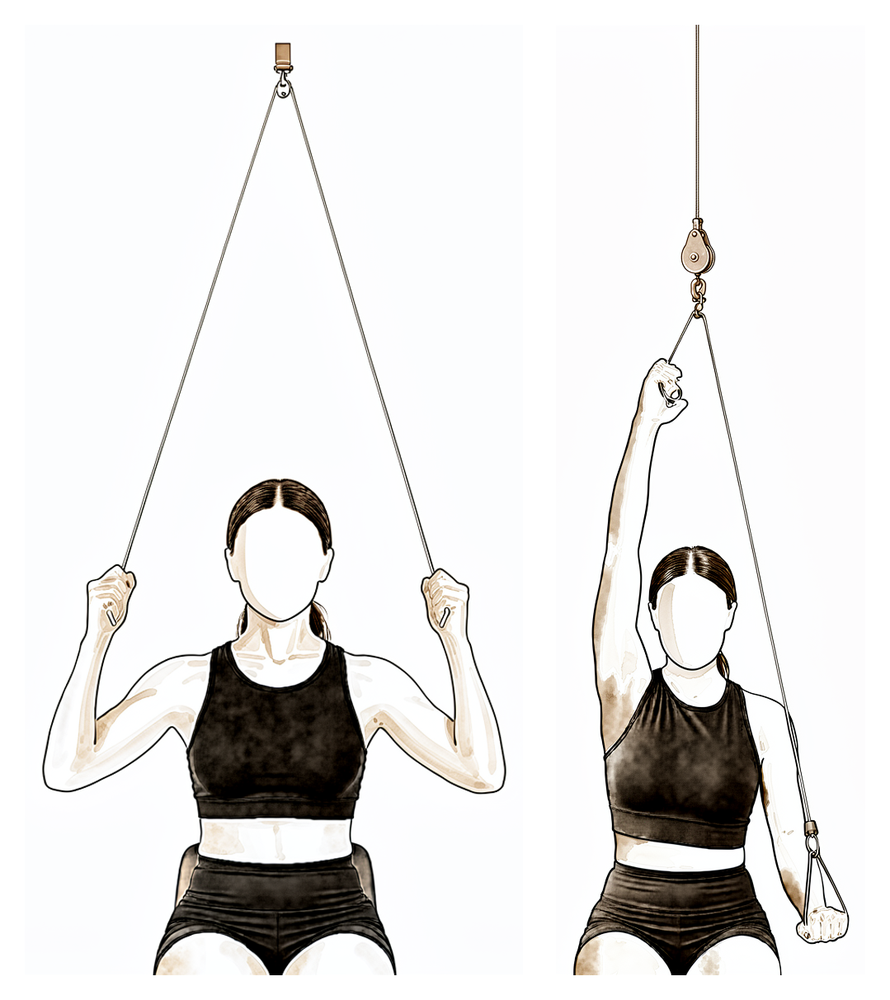
Pulley-assisted flexion
Sit beneath an over-door pulley. With the operated arm relaxed, pull down with your other hand so the rope gently raises the operated arm in front of you, then lower it slowly. The good arm does the work — do not force the range.
As guided by your physiotherapist
Kieran Hirpara 4.0
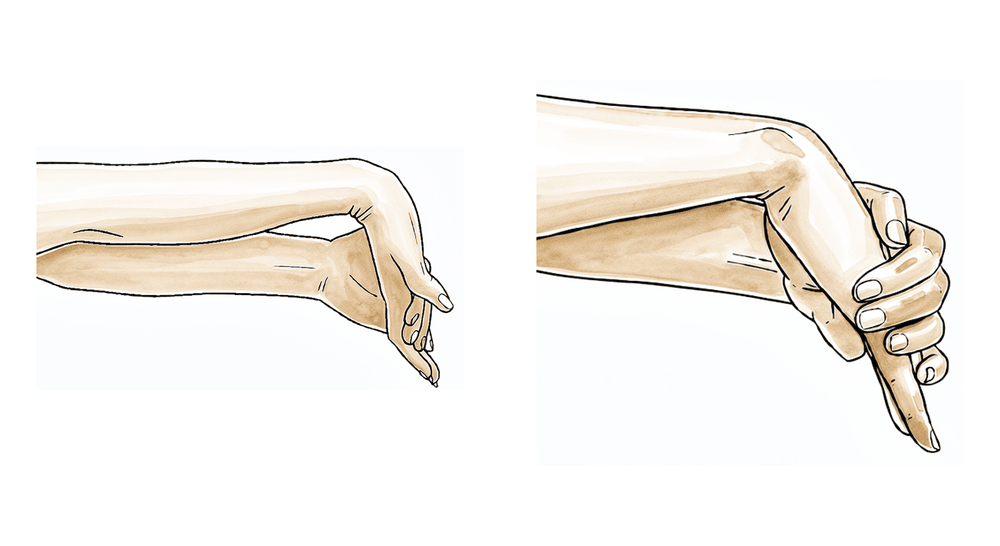
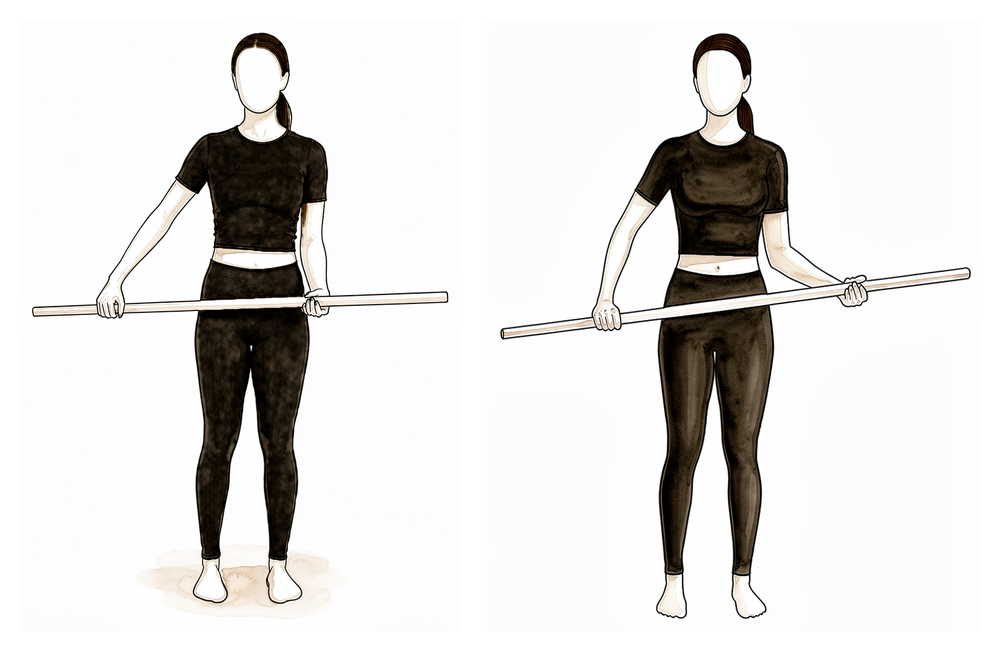
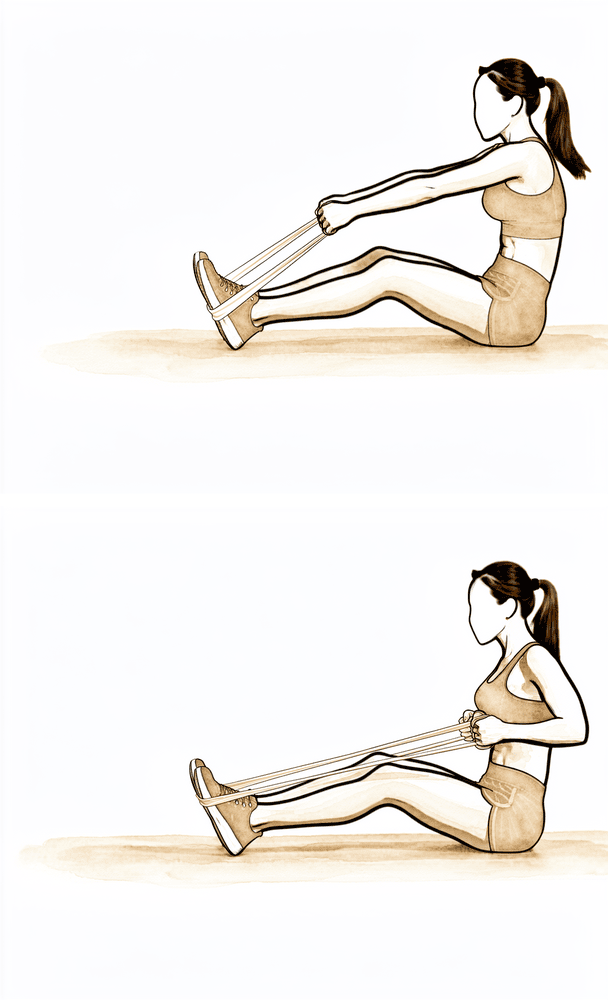
Stick-assisted external rotation
Lie on your back holding a stick in both hands, elbows bent to 90 degrees and tucked at your sides. Push with the good arm so the operated forearm rotates outwards, staying within the limit agreed at your review, then return. The operated arm stays relaxed — never force the movement.
As guided by your physiotherapist
Kieran Hirpara 4.0
Assisted flexion (lying)
Lie on your back and use your good arm — or a stick held in both hands — to help lift the operated arm up in front of you, as far as comfort allows, then lower it back down with the good arm still helping. The operated shoulder stays relaxed and the good arm does the work, helping range return without straining the healing repair.
As guided by your physiotherapist

Kieran Hirpara 4.0
Active scaption (full can)
Once your physiotherapist has cleared active movement, raise the arm out at about a 45-degree angle between front and side, thumb pointing up as if holding a full can. Lift only as high as you have good control, then lower slowly. This begins active elevation once the tuberosities have started to heal — do not begin it earlier.
As guided by your physiotherapist
Kieran Hirpara 4.0
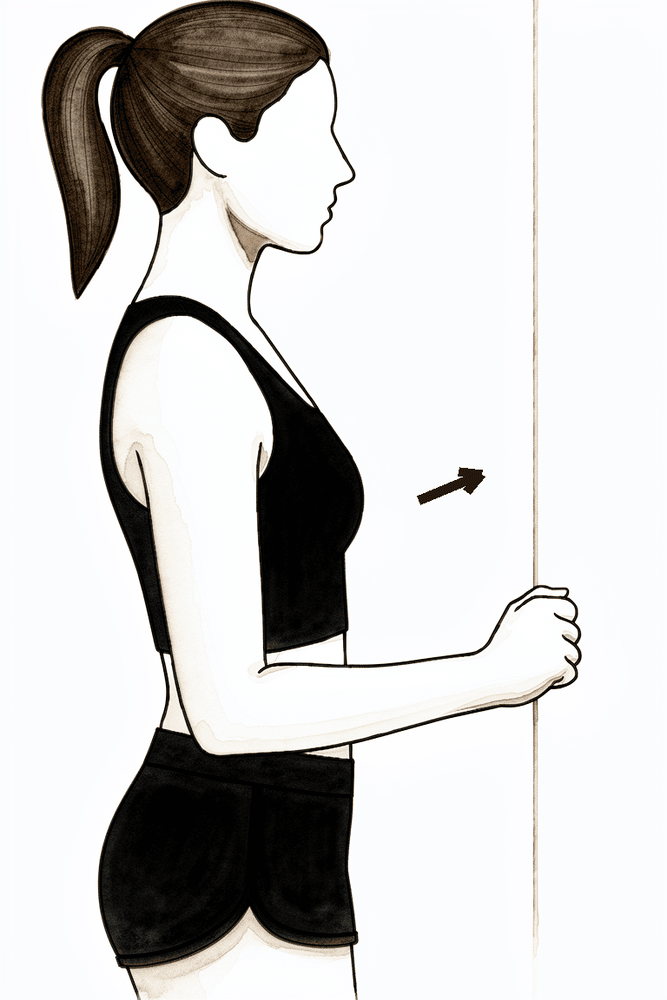
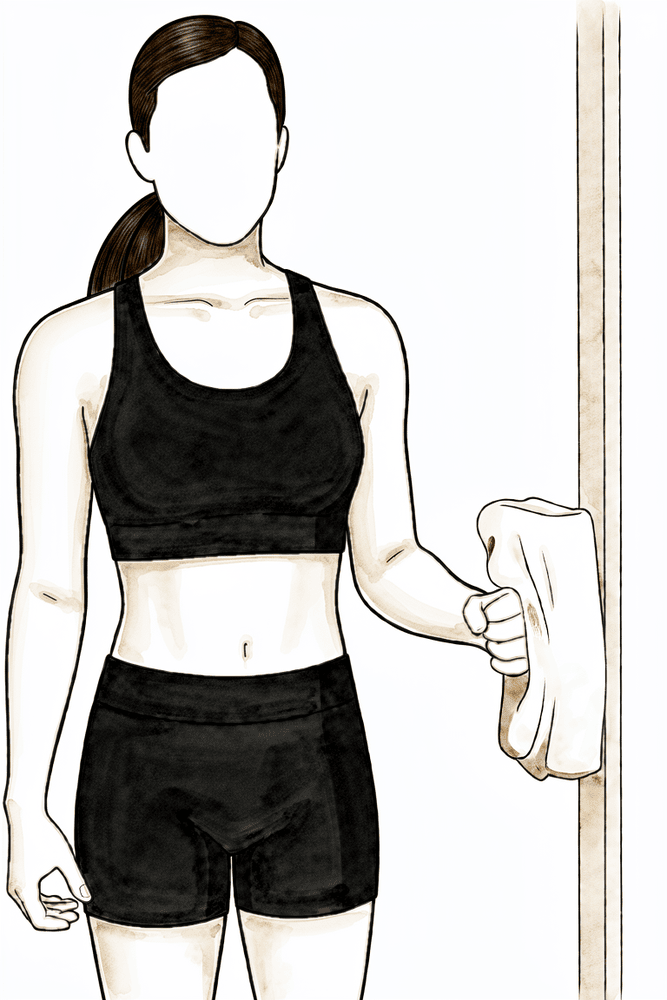
Isometric forward press (deltoid)
Stand facing a wall with the elbow bent and a folded towel between your fist and the wall. Press the fist gently forwards into the wall without letting the arm move, hold a few seconds, then relax. This wakes up the deltoid with no movement — start it only late in this phase, gently and pain-free.
As guided by your physiotherapist
Kieran Hirpara 4.0
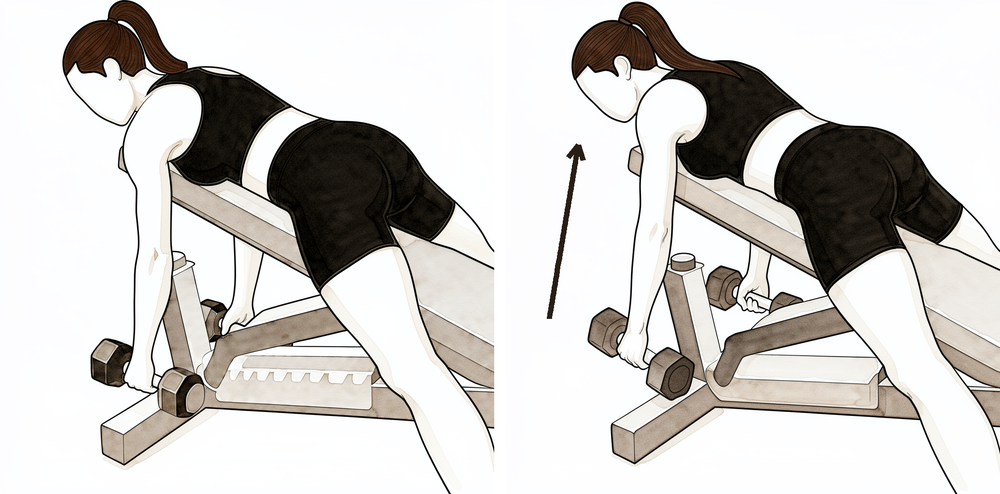
Low row
Sitting or standing tall, draw the elbow back and down towards your hip, squeezing the shoulder blade down and back, hold a moment, then release. This sets the shoulder-blade muscles that support the shoulder — keep it light and gentle in this phase.
As guided by your physiotherapist
Kieran Hirpara 4.0
Isometric external rotation
Stand with your elbow tucked at your side and bent to a right angle, the back of your hand against a wall or doorframe. Press gently outwards into it without letting the arm move, hold a few seconds, then relax. Introduce this only late in this phase, gently and pain-free, as the rotator cuff repair allows.
As guided by your physiotherapist

Kieran Hirpara 4.0
Isometric internal rotation
Stand with your elbow tucked at your side and bent to a right angle, the palm against a doorframe. Press gently inwards into it without letting the arm move, hold a few seconds, then relax. Begin this only once cleared at your review — the lesser tuberosity repair is loaded by internal rotation, so it is left until last.
As guided by your physiotherapist

Kieran Hirpara 4.0
Wall walk out to the side
Stand side-on to a wall with your fingertips resting on it. Walk your fingers up the wall out to the side, raising the arm as far as is comfortable, then walk them back down with control. The wall supports the arm as you regain movement out to the side.
As guided by your physiotherapist
At your six-week review, X-rays check that the bone fragments are healing in position. If they are, the sling comes off and the shoulder begins to move for itself — assisted at first, using your other arm, a cane or a pulley, then actively. Passive range progresses towards full over these weeks, and the rotation limits ease. The first gentle muscle-activation work starts for the deltoid and the shoulder-blade (periscapular) muscles. What does not start yet is strengthening: the repair is still consolidating, so the lifting rule stays at nothing heavier than a cup of coffee, and there is still no pushing up through the hands.
For your physiotherapist:
Goals
- Wean from the sling following the six-week review
- Progress shoulder PROM towards full range as comfort allows
- Initiate shoulder AAROM, progressing to AROM
- Initiate gentle deltoid and periscapular activation
- Restore use of the arm for light activities of daily living at waist and chest height
- Patient education
Sling
- Discontinue after the six-week review; may be worn out of the house for protection in crowds during the first week or two of weaning
Management
- Continue Phase I interventions as needed
- Range of motion / mobility:
- PROM: progress towards full range in all planes by about weeks 8–10, respecting pain
- AAROM: table slides, wall climbs, pulleys, cane-assisted flexion and external rotation, supine progressing to sitting
- AROM: begin once AAROM is comfortable and movement quality is good — supine flexion progressing to upright flexion and scaption
- ER: progress beyond 30 degrees as comfort allows once healing is confirmed
- Gentle functional hand-behind-back and extension introduced late in this phase, as cleared — do not stretch into these positions
- Strengthening:
- Pain-free sub-maximal isometrics only: deltoid in the scapular plane, periscapular setting, low row, scapular retraction
- Gentle pain-free rotator cuff isometrics late in this phase; introduce resisted internal rotation only once cleared at review
- Motor control: emphasise scapular control and avoid hitching or other compensatory patterns
Precautions
- No lifting of objects heavier than a cup of coffee
- No supporting of body weight through the hands
- No resistance or strengthening work beyond gentle isometrics
- Avoid forcing range — stretch to firm discomfort only, never sharp pain
Criteria to progress
- Comfortable active movement below shoulder height with good scapular control and minimal compensation
- Continued healing of the tuberosities on X-ray, as confirmed at your review with Dr Hirpara
- Pain settled enough to begin resistance work
Phase III — Strengthening (Weeks 12–24)
Kieran Hirpara 4.0
Rows with elastic band
Anchor an elastic band in front of you at waist height. Standing tall, pull the band towards you, drawing the shoulder blade down and back, then release with control. Start with light resistance — low load and higher repetitions, progressing as guided.
As guided by your physiotherapist
Kieran Hirpara 4.0
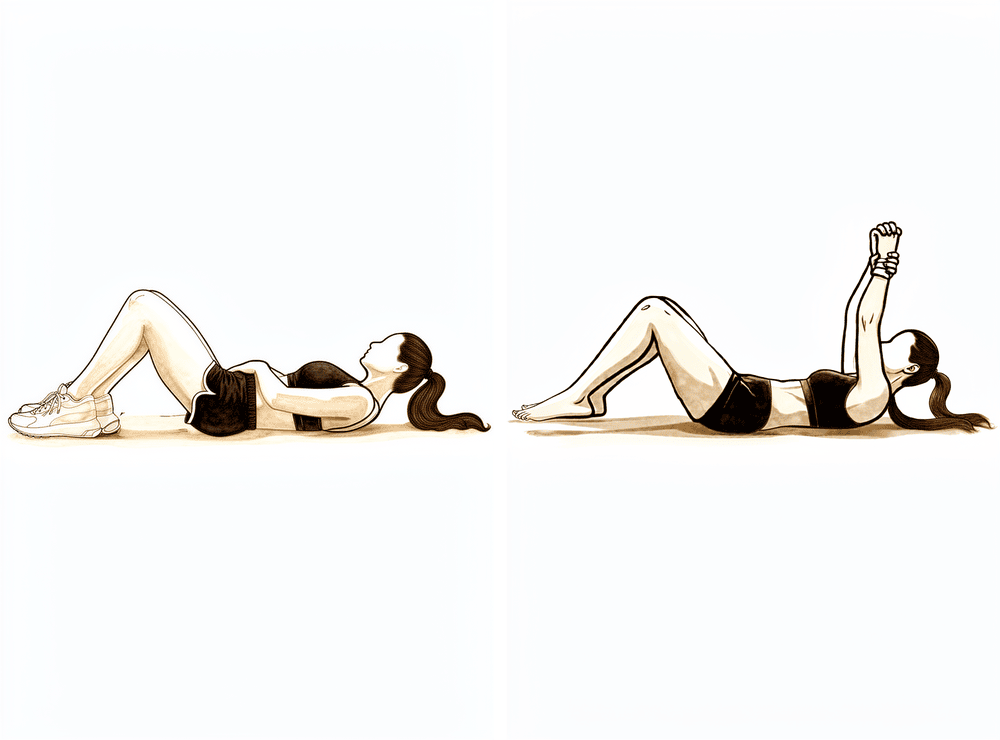
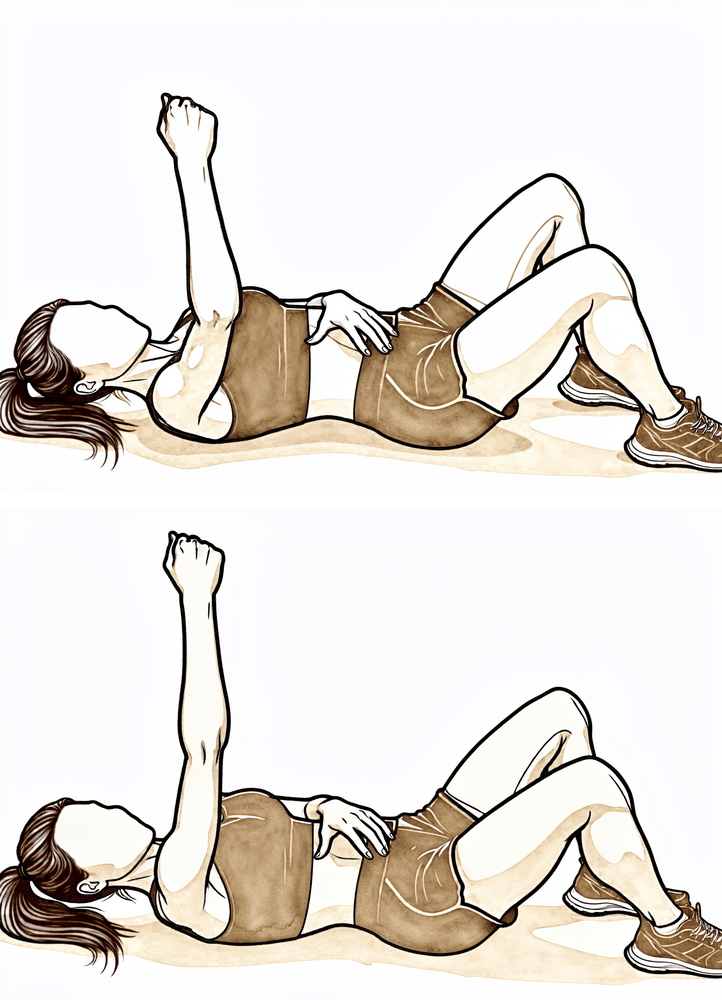
Serratus punch
Lie on your back with the operated arm reaching straight up towards the ceiling. Without bending the elbow, push the hand a little higher so the shoulder blade lifts off the floor, then settle it back. This strengthens the muscle that anchors the shoulder blade to the ribs.
Low load, higher repetitions
Kieran Hirpara 4.0
Scapular retraction with weight
Bending forward from the hips with a light weight in each hand, draw the elbows back and squeeze the shoulder blades together, then lower with control. This builds the shoulder-blade muscles against resistance — keep the load light and the movement smooth.
Low load, higher repetitions
Kieran Hirpara 4.0
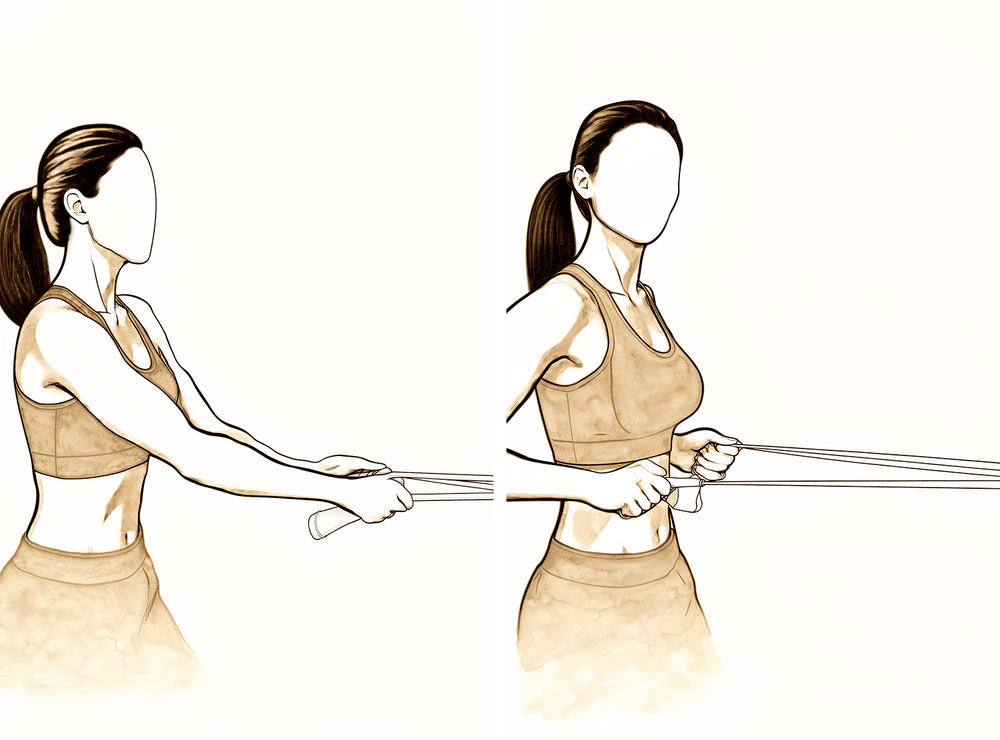
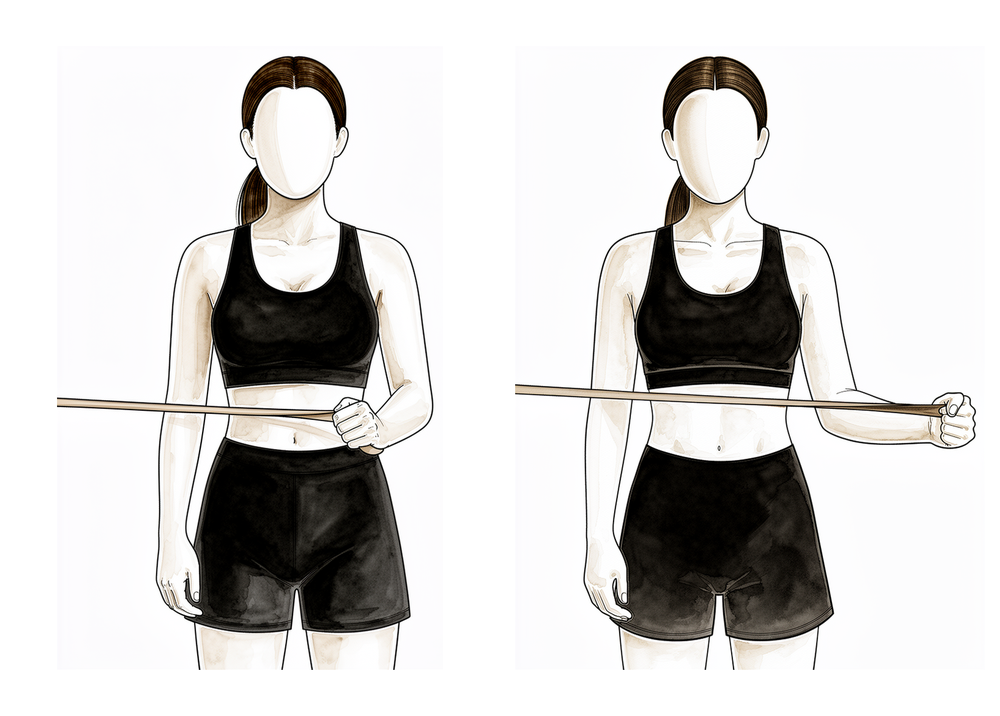
External rotation with band
Stand with your elbow tucked into your side and bent to a right angle, holding an elastic band anchored at waist height. Keeping the elbow at your side, rotate the forearm outwards against the band, then return slowly. Strengthen the rotator cuff progressively, as the healed tuberosities allow.
Low load, higher repetitions
Kieran Hirpara 4.0
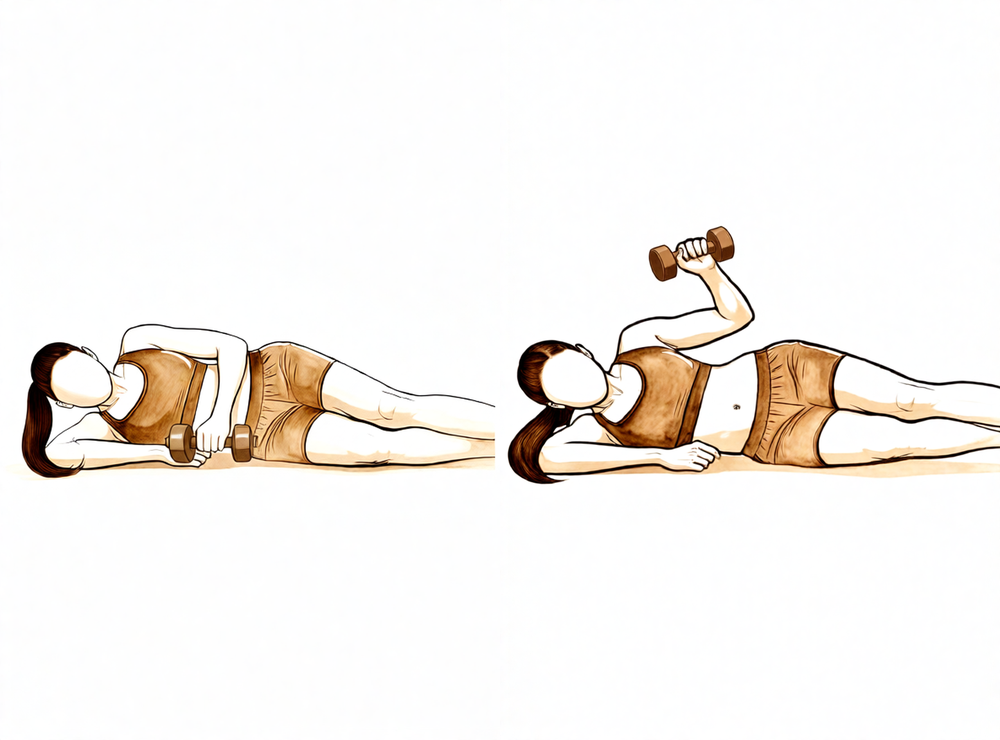
Side-lying external rotation with weight
Lie on your non-operated side with the operated elbow bent to a right angle and tucked against your body. Holding a light weight, rotate the forearm up towards the ceiling, then lower slowly. Part of the graduated rotator cuff strengthening — keep mobility work going alongside it.
Low load, higher repetitions

Kieran Hirpara 4.0
PNF diagonal with band (lift)
Anchor an elastic band low and to the side of your operated arm. Draw the hand diagonally up and across the body, from near the opposite hip towards the shoulder, then return slowly. These diagonal patterns train the shoulder to work in the directions used in everyday life.
As guided by your physiotherapist
Kieran Hirpara 4.0
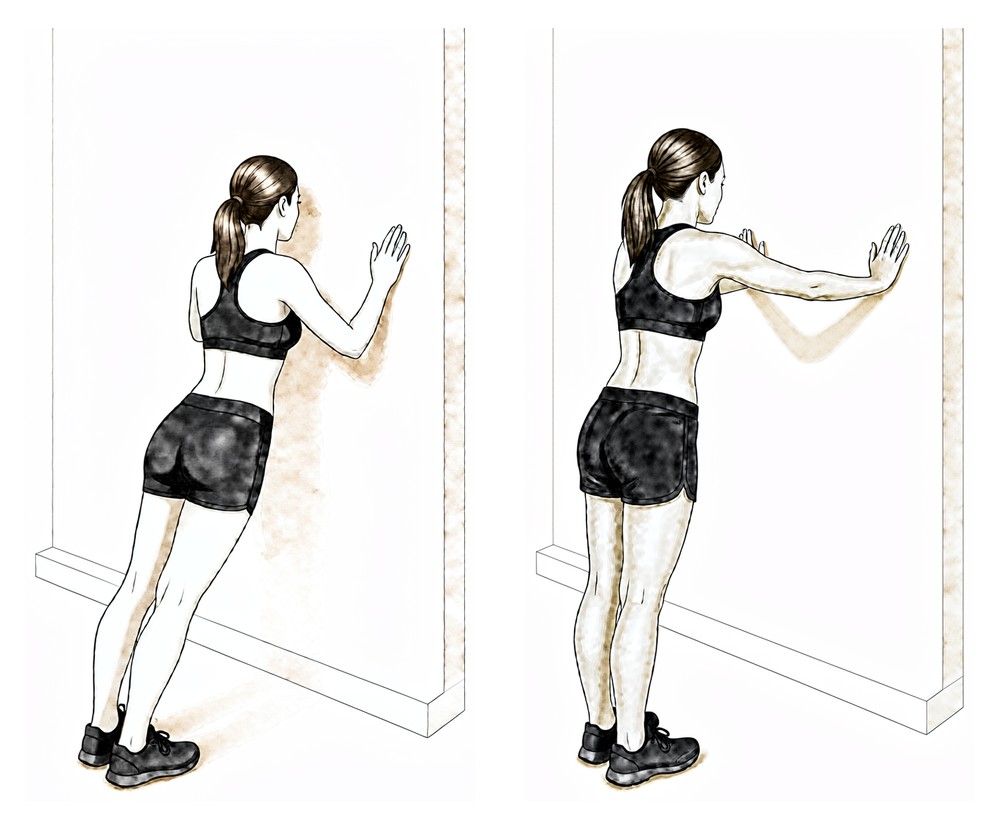
Weight bearing through the arm
Place your hands on a wall or a sturdy bench and gently push your upper back away so the shoulder blades round forward, then return. This reintroduces taking weight through the arm — bring it in only once cleared during this phase, building up gradually.
As guided by your physiotherapist
Kieran Hirpara 4.0
External rotation with the arm raised
With your arm out to the side at shoulder height and your elbow bent to 90°, rotate your forearm upwards and back, then return with control. Keep the movement smooth and within a comfortable range. This trains outward rotation in the raised position.
As guided by your physiotherapist — light and controlled
By about twelve weeks the tuberosities are usually well on the way to union, and your review with Dr Hirpara confirms whether the shoulder is ready to be loaded. Strengthening then begins — gently, starting with elastic bands and light weights, and concentrating on the deltoid and shoulder-blade muscles that drive the shoulder (after a reverse replacement, the deltoid does much of the work the rotator cuff used to do). The rotator cuff itself is strengthened as the healed tuberosities allow. Light lifting builds gradually through this phase, daily activities should feel close to normal at waist and shoulder height, and driving is usually back during this phase if it has not resumed already.
For your physiotherapist:
Goals
- Maintain pain-free PROM and progress AROM in all planes
- Graduated restoration of strength and endurance: deltoid, periscapular muscles, then rotator cuff
- Improve dynamic stability, motor control and proprioception
- Return to most daily activities, including light lifting
Management
- Continue range-of-motion and mobility work in all planes
- Strengthening, progressing from isometrics to elastic bands and then light weights — low load, higher repetitions:
- Periscapular: rows, serratus punches, scapular retraction with resistance
- Deltoid: resisted flexion and scaption in functional positions, with controlled eccentric lowering
- Rotator cuff: ER and IR with elastic resistance, side-lying ER, progressing as the healed tuberosities allow
- Motor control: rhythmic stabilisation, proprioceptive neuromuscular facilitation (PNF) diagonal patterns, ball stabilisation work
- Graduated lifting: from about 2 kg early in the phase towards about 5 kg by the end, as control allows
- Gradual reintroduction of weight bearing through the arm (for example pushing up from a chair) during this phase, as cleared
Precautions
- No heavy lifting — keep loads under about 5 kg during this phase
- Avoid forceful end-range stretching, and avoid loaded combined abduction and external rotation
- Progression remains symptom-guided — if pain or swelling flares, step back a level
Criteria to progress
- Tuberosity union confirmed at review with Dr Hirpara
- Pain-free activities of daily living, with strengthening tolerated without flare-up
- Good movement quality through available range
Phase IV — Return to full activity (6 months onwards)
The final phase is a graduated return to heavier tasks, manual work and recreation, guided by your strength and control rather than the calendar. Heavier household and garden tasks come back progressively; manual work is guided by Dr Hirpara; swimming and golf typically resume around the four- to six-month mark. Very heavy lifting is best avoided long term after a shoulder replacement — published protocols suggest keeping regular lifting under about 10 kg. The shoulder keeps improving well beyond this phase: most people continue to gain movement, strength and confidence for 12–24 months after surgery, so it is worth keeping up your home exercise program well after formal physiotherapy finishes.
For your physiotherapist:
Goals
- Optimise functional strength and endurance for the patient's daily demands
- Graduated return to work, recreation and sport
- Long-term joint-protection education and an independent home exercise program
Management
- Continue progressive resistance work at light weight and higher repetitions, emphasising rotator cuff and periscapular strengthening
- Neuromuscular and proprioceptive training; functional and work-specific tasks as needed
- Stage the return to swimming, golf and other recreation around the four- to six-month mark, as cleared at review
- Customised home exercise program to continue once formal physiotherapy is completed
Precautions
- Avoid heavy lifting for 6 months from surgery; keep regular lifting under about 10 kg long term
- Manual work and contact or load-bearing sport only as cleared by Dr Hirpara
Criteria to complete the protocol
- Clearance at review with Dr Hirpara, with tuberosity union confirmed
- Pain-controlled, functional range of motion that meets the patient's daily demands
- Independent with the long-term home exercise program
After your protocol
The phases above are adapted from published rehabilitation protocols for shoulder replacement performed for proximal humerus fracture — Texas Health Orthopedic Specialists, North Tees and Hartlepool NHS Foundation Trust (hemiarthroplasty for trauma and reverse shoulder arthroplasty) and the Robert Jones and Agnes Hunt Orthopaedic Hospital — with the emphasis on tuberosity healing drawn from the surgical literature. The week ranges are typical rather than fixed, and your rehabilitation is progressed individually by your physiotherapist, working with the practice, gated on your reviews with Dr Hirpara. This page works alongside the practice's general recovery advice — see managing post-operative pain and wound care. For the operation itself, see shoulder replacement for fracture; for the elective version of this journey, see the reverse shoulder replacement protocol. The evidence behind this protocol — why tuberosity healing sets the pace, the hemiarthroplasty-versus-reverse comparison, and the published rehabilitation guidelines — is summarised in the evidence section, available as a PDF from the top of this page.
Evidence & references
Shoulder Replacement for Proximal Humerus Fracture — Evidence Behind the Rehabilitation Protocol
Topic scope: The evidence underpinning rehabilitation after shoulder arthroplasty performed for an acute proximal humerus fracture — covering both the implant options used in this setting: reverse total shoulder arthroplasty (rTSA) for fracture and stemmed hemiarthroplasty for fracture. The defining feature of both, and the reason this is a slow, protected pathway, is that the greater and lesser tuberosities are broken free and stitched back around the prosthesis at operation — they must heal as fractures before the shoulder can be actively moved or loaded. This contrasts with elective arthroplasty (for arthritis or cuff arthropathy), where the bone is intact and rehabilitation can move at the pace of soft-tissue healing.
Defining principle of this rehab: Replacement-for-fracture is a PROTECT pathway driven by TUBEROSITY HEALING, not by implant type. At operation the greater tuberosity (with supraspinatus/infraspinatus) and lesser tuberosity (with subscapularis) are reattached around the stem. Until those bone fragments unite — typically the first 6 weeks, confirmed on X-ray — the shoulder is moved passively only and within a restricted arc: forward elevation kept low, external rotation limited (it loads the greater-tuberosity repair), resisted/active internal rotation avoided (it loads the lesser-tuberosity/subscapularis repair), and no reaching behind the back. Active range and strengthening are deferred, not just reduced. This is the opposite of an early-motion pathway such as capsular release (where immediate aggressive motion is the treatment) or calcific excision (early movement below shoulder height from day 1). The whole pace is set by the fractured tuberosities, not the new joint surface.
The operation, and why the tuberosities matter
A displaced three- or four-part proximal humerus fracture in an older patient may be unreconstructable with plate-and-screw fixation, and arthroplasty is then offered. Two implants are used:
- Hemiarthroplasty (HA) — replaces the ball (humeral head) only. It relies on the surgeon reconstructing the head–tuberosity–shaft relationship and, critically, on the tuberosities healing back in anatomical position so the rotator cuff can pull on them. Where the tuberosities fail to heal, function is poor.
- Reverse total shoulder arthroplasty (rTSA) — reverses the ball-and-socket so the deltoid, not the rotator cuff, drives elevation. This makes rTSA less dependent on tuberosity healing than HA, which is the main reason it has largely supplanted hemiarthroplasty for fracture in the elderly. Tuberosity healing still improves the result (it adds rotation), but a workable shoulder is achievable even when the greater tuberosity does not unite.
In both operations the surgeon repairs the tuberosities, and in both the rehabilitation protects that repair. That shared dependence — not the choice of implant — is why the protocol has one shape for both.
Evidence by theme
1. Tuberosity healing drives the functional result (the rationale for protection)
This is the best-supported principle in the topic, and the reason rehabilitation protects the repair for ~6 weeks.
- A large systematic review and meta-analysis of 21 studies (1,616 reverse arthroplasties) found a pooled greater-tuberosity non-healing rate of ~32% (anatomic healing in roughly two-thirds). Healed tuberosities had significantly better active abduction, anterior elevation and external rotation, and better functional scores, without any increase in pain — confirming that attempting and protecting the repair is worthwhile [meta-analysis, 2025; Schmalzl 2020].
- In the corpus, a dedicated study asked "can a healed tuberosity improve the functional outcomes?" after reverse arthroplasty for four-part fracture and answered yes — healing was associated with better rotation and outcome scores. DOI: 10.1016/j.jse.2016.11.034.
- For hemiarthroplasty, the dependence is even stronger: reported greater-tuberosity healing rates range widely (~30–91%), and tuberosity malunion/nonunion/migration is the dominant cause of a poor result. This is precisely why HA is now reserved and rTSA preferred in older patients [web review literature].
Strength: MODERATE–STRONG for "healing predicts outcome" (large pooled cohorts/meta-analysis); the link is consistent and direction-of-effect is not in dispute. It is observational, not randomised.
2. Hemiarthroplasty vs reverse arthroplasty for fracture
- A corpus multicentre randomised controlled trial (the SHeRPA trial) found superior functional outcome with reverse arthroplasty compared with hemiarthroplasty for displaced three- and four-part fractures in patients 65 and older. DOI: 10.1016/j.jse.2024.05.016.
- An earlier corpus comparative study (JBJS) likewise compared HA and rTSA for elderly proximal humeral fractures. DOI: 10.2106/jbjs.l.01637.
- Reverse-for-fracture does carry a caveat: one corpus study asked whether rTSA for fracture does worse than rTSA for elective indications, reflecting that the fracture setting (broken tuberosities, frailer patients) is more demanding than an elective replacement — the same reason this rehab runs more slowly than the elective pathway. DOI: 10.1016/j.jse.2020.03.053.
Strength: MODERATE–STRONG (an RCT plus comparative cohorts) that rTSA generally outperforms HA for fracture in the elderly. This is a surgeon's intra-operative decision, made per patient and per fracture pattern.
3. Early vs delayed motion, and the rehabilitation protocol itself
This is where the evidence is thinnest and least standardised — honestly, the phase timings below are consensus and protocol-derived, not RCT-derived.
- A JOSPT systematic review of proposed rehabilitation guidelines after anatomic and reverse arthroplasty found substantial heterogeneity between published protocols — sling use ranged from "comfort only" to a full 6 weeks; permitted motion ranged from none to precautionary limits; early external rotation was commonly capped (e.g. to ~30° in the scapular plane) to protect the repair. There is no single agreed regimen.
- A corpus randomised single-blinded trial of early rehabilitation vs immobilisation after reverse arthroplasty exists (DOI: 10.1016/j.jse.2019.10.005), and the 2025 Neer Award SHORT trial compared surgeon-directed home therapy with formal outpatient physiotherapy after rTSA (DOI: 10.1016/j.jse.2025.10.005) — but these are largely elective rTSA populations, where the tuberosities are not broken. They do not licence early active motion in the fracture setting, where the repair must be protected first.
- A corpus network meta-analysis explicitly examined the optimal combination of arthroplasty type, fixation method and post-operative rehabilitation protocol for complex proximal humerus fractures (DOI: 10.1016/j.jse.2024.03.040), and a corpus survey found that trauma and shoulder surgeons differ in their rehabilitation preferences (DOI: 10.1016/j.jse.2021.12.045) — both confirm that the protocol is an area of genuine, unresolved variation rather than settled science.
Strength: WEAK / CONSENSUS for the specific phase structure and week ranges. The principle "protect the tuberosity repair, defer active motion and load until union" is well grounded; the exact timings are typical, not trial-proven.
Phased post-op timeline (consistent with the patient protocol)
| Phase | Window | Sling | Shoulder ROM | Strengthening | What's healing / why |
|---|---|---|---|---|---|
| I — Protection | Weeks 0–6 | Full-time, including sleep | Passive only, within a safe zone: scapular-plane elevation ≤ 90°; external rotation to neutral (0°) for ~4 weeks then ≤ 30°; no internal rotation behind the back; pendulums (fully relaxed). Active elbow/wrist/hand. | None for the shoulder | Tuberosity fragments uniting onto bone + prosthesis; ER loads the greater-tuberosity repair, resisted IR loads the lesser-tuberosity (subscapularis) repair. In rTSA this window also protects against early dislocation. |
| II — Restoring movement | Weeks 6–12 | Wean after the 6-week X-ray review | Progress passive → active-assisted → active; ease the rotation limits as healing is confirmed | Gentle sub-maximal isometrics (deltoid, periscapular) late in phase; resisted IR only once cleared | Tuberosities consolidating; lifting still limited to ~a cup of coffee; no weight-bearing through the hands |
| III — Strengthening | Weeks 12–24 | Off | Maintain/progress active range in all planes | Banded → light weights; deltoid + periscapular first, rotator cuff as the healed tuberosities allow | Tuberosity union usually well advanced and confirmed at review before loading begins |
| IV — Return to activity | 6 months onwards | Off | Functional range for daily demands | Progressive, guided by control not the calendar; lifting kept moderate long-term | Strength/movement keep improving for 12–24 months; full uninjured-shoulder range is not expected |
The pacing is gated on two things together at each step: enough time, AND X-rays showing the tuberosities healing, confirmed at review with Dr Hirpara. Approximate functional milestones (subject to healing): driving ~6–12 weeks (never in the sling); breaststroke swimming ~4 months; nothing heavier than a cup of coffee until ~12 weeks; heavy lifting avoided for 6 months.
Key controversies / evidence quality
- Implant choice (HA vs reverse). An RCT and comparative cohorts favour reverse over hemiarthroplasty for displaced fractures in older patients, chiefly because rTSA is less hostage to tuberosity healing. This is a per-patient surgical decision — and either way the rehabilitation protects the tuberosity repair. Moderate–strong.
- Does the tuberosity actually need to heal? For hemiarthroplasty, effectively yes — non-union/malunion is the main failure mode. For reverse, healing is beneficial but not essential (the deltoid drives elevation), though healed tuberosities add rotation and reduce complications. The protection strategy is justified for both because attempting healing is worthwhile and forced early motion can disrupt it. Moderate.
- Early vs delayed motion / the protocol itself. The single weakest area. Published protocols vary widely (JOSPT review), the trials that test early motion are mostly in elective reverse populations, and surgeons genuinely disagree on the optimum. The conservative, tuberosity-led timeline used here reflects the fracture-specific protocols and the healing biology rather than a defining RCT. Weak / consensus.
Evidence-strength flags (summary)
- MODERATE–STRONG: tuberosity healing predicts better range/function after reverse arthroplasty for fracture (21-study meta-analysis, 1,616 cases; ~32% non-healing); reverse > hemiarthroplasty for elderly displaced fractures (SHeRPA RCT + comparative cohorts).
- MODERATE: hemiarthroplasty outcome is strongly tuberosity-dependent (healing ~30–91%; malunion the dominant failure mode); reverse-for-fracture more demanding than elective reverse.
- WEAK / CONSENSUS: the specific phased rehabilitation protocol and its week ranges — published guidelines are heterogeneous (JOSPT review); early-motion trials are mostly elective populations; the tuberosity-protective timeline is derived from fracture-specific protocols and healing biology, not a defining rehab RCT.
Citations
RAG corpus (180,000+ Orthopaedic articles) — real DOIs, returned by search
- Reverse shoulder arthroplasty for four-part proximal humerus fracture in elderly patients: can a healed tuberosity improve the functional outcomes? J Shoulder Elbow Surg. DOI: 10.1016/j.jse.2016.11.034
- Superior functional outcome following reverse shoulder arthroplasty compared to hemiarthroplasty for displaced three- and four-part fractures in patients 65 and older — the SHeRPA randomized controlled trial. J Shoulder Elbow Surg. 2024. DOI: 10.1016/j.jse.2024.05.016
- Comparison of Hemiarthroplasty and Reverse Shoulder Arthroplasty for the Treatment of Proximal Humeral Fractures in Elderly Patients. J Bone Joint Surg Am. DOI: 10.2106/jbjs.l.01637
- Does reverse total shoulder arthroplasty for proximal humeral fracture portend poorer outcomes than for elective indications? J Shoulder Elbow Surg. DOI: 10.1016/j.jse.2020.03.053
- A randomized single-blinded trial of early rehabilitation versus immobilization after reverse total shoulder arthroplasty. J Shoulder Elbow Surg. 2019. DOI: 10.1016/j.jse.2019.10.005
- Optimal combination of arthroplasty type, fixation method, and postoperative rehabilitation protocol for complex proximal humerus fractures in the elderly: a network meta-analysis. J Shoulder Elbow Surg. 2024. DOI: 10.1016/j.jse.2024.03.040
- Understanding postoperative rehabilitation preferences in operatively managed proximal humerus fractures: do trauma and shoulder surgeons differ? J Shoulder Elbow Surg. DOI: 10.1016/j.jse.2021.12.045
- 2025 Neer Award Part 1: The SHORT trial — surgeon-directed home therapy vs. outpatient rehabilitation after reverse total shoulder arthroplasty. J Shoulder Elbow Surg. 2025. DOI: 10.1016/j.jse.2025.10.005
- Acute versus delayed reverse total shoulder arthroplasty for proximal humeral fractures in the elderly: a systematic review and meta-analysis. J Shoulder Elbow Surg. DOI: 10.1016/j.jse.2018.10.004
- Ten-year follow-up of stemmed hemiarthroplasty for acute proximal humeral fractures. Bone Joint J. DOI: 10.1302/0301-620x.103b6.bjj-2020-1753.r1
Literature (URLs)
- Anatomic healing of greater tuberosity improves range of motion and functional outcomes after reverse total shoulder arthroplasty for proximal humerus fractures: an updated systematic review and meta-analysis on 21 studies (1,616 rTSAs; ~32% GT non-healing). PubMed. https://pubmed.ncbi.nlm.nih.gov/39914739/
- Schmalzl J, et al. Tuberosity healing improves functional outcome following primary reverse shoulder arthroplasty for proximal humeral fractures with a 135° prosthesis. Eur J Orthop Surg Traumatol. 2020. https://pubmed.ncbi.nlm.nih.gov/32162048/
- Tuberosity healing after reverse shoulder arthroplasty for proximal humerus fractures: is there clinical improvement? PubMed. https://pubmed.ncbi.nlm.nih.gov/33364654/
- Prosthesis designs and tuberosity fixation techniques in reverse total shoulder arthroplasty: influence on tuberosity healing in proximal humerus fractures. PMC. https://pmc.ncbi.nlm.nih.gov/articles/PMC8468418/
- A Systematic Review of Proposed Rehabilitation Guidelines Following Anatomic and Reverse Shoulder Arthroplasty. JOSPT 2019. https://www.jospt.org/doi/10.2519/jospt.2019.8616
Published rehab protocols (patient-guidance — basis for the phase structure)
- Frantz T. Proximal Humerus Fracture Rehabilitation Protocol (reverse shoulder arthroplasty). Texas Health Orthopedic Specialists. https://www.frantzorthopedics.com/pdf/proximal-humerus-fracture-reverse-shoulder-arthroplasty-updnew.pdf
- North Tees and Hartlepool NHS Foundation Trust. Shoulder Hemi-Arthroplasty (trauma) — post-operative protocol. Reviewed April 2023. https://www.nth.nhs.uk/resources/shoulder-hemi-arthroplasty-trauma/
- North Tees and Hartlepool NHS Foundation Trust. Reverse shoulder arthroplasty — post-operative protocol. Reviewed April 2023. https://www.nth.nhs.uk/resources/reverse-shoulder-arthroplasty/
- Maddocks C, Lloyd Evans J. Rehabilitation guide following reverse total shoulder replacement. Robert Jones and Agnes Hunt Orthopaedic Hospital NHS Foundation Trust. February 2024. https://www.rjah.nhs.uk/media/qctjsd1w/reverse-shoulder-replacement-guideline-2024.pdf