Patients › Ankle
ایڑی کے ٹینڈن کی مرمت (Achilles tendon repair)
یہ آپریشن کیوں تجویز کیا گیا ہے
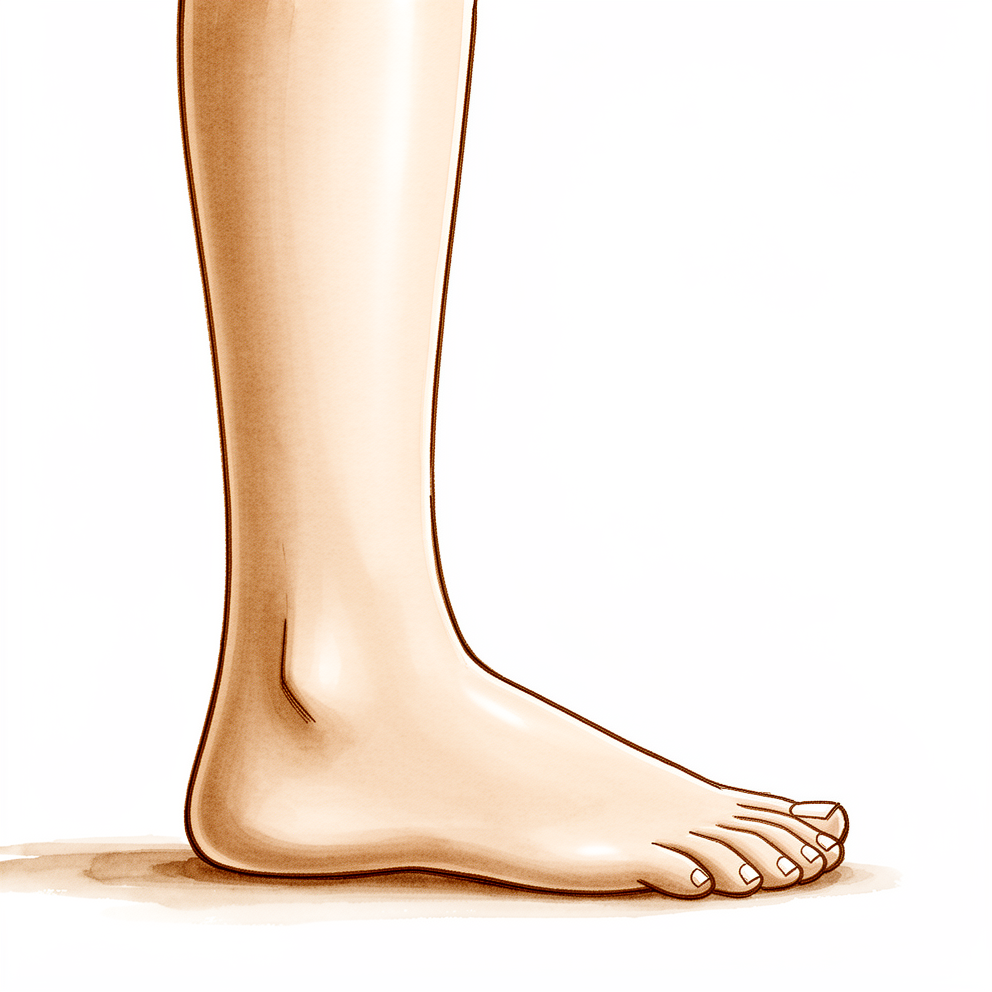
ایڑی کا ٹینڈن (Achilles tendon) آپ کے ٹخنے کے پیچھے وہ مضبوط ڈوری ہے جو چلتے یا دوڑتے وقت آپ کو پاؤں سے زمین کو دھکیل کر آگے بڑھنے دیتی ہے۔ ٹینڈن (tendon)، یعنی وہ مضبوط ڈوری جو پٹھے کو ہڈی سے جوڑتی ہے، جب پوری طرح پھٹ جائے تو یہ آپریشن اس کے دونوں پھٹے ہوئے سروں کو ٹانکوں سے دوبارہ جوڑ دیتا ہے۔ اگر پھٹاؤ حال ہی میں ہوا ہو تو ہو سکتا ہے کہ پہلے آپریشن کے بغیر علاج آزمائے بنا فوراً سرجری کا مشورہ دیا جائے۔ ایک سال کے نتائج کے لحاظ سے بریس یا بوٹ میں بغیر سرجری کا علاج سرجری سے کم تر نہیں ہے، اس لیے ہم دونوں راستوں پر آپ کے ساتھ بات کریں گے۔ کھلے آپریشن (open repair) سے ٹینڈن کے دوبارہ پھٹنے کا امکان کم ہوتا ہے، البتہ اس میں زخم کے مسائل کا امکان زیادہ ہوتا ہے۔ اصل مقصد ایک ایسا ٹینڈن ہے جو مضبوطی سے جڑا رہے، تاکہ آپ پاؤں پر وزن ڈال سکیں اور اپنی معمول کی سرگرمیوں پر واپس آ سکیں۔
آپریشن سے پہلے
سرجری سے پہلے کے دنوں میں ہماری دی ہوئی تیاری کی ہدایات پر عمل کریں۔ آپ کو آپریشن سے سات گھنٹے پہلے کھانا پینا بند کرنا ہو گا۔ ہم سات گھنٹے اس لیے کہتے ہیں تاکہ اگر آپریشن کی فہرست وقت سے پہلے چل رہی ہو تو آپ کو پہلے بلایا جا سکے۔ آپ کے سرجن آپ کو بتائیں گے کہ آپ اپنی باقاعدہ دواؤں میں سے کون سی اور کب بند کریں۔ جو کچھ بھی آپ لیتے ہیں اس کی لکھی ہوئی فہرست ساتھ لائیں، اور بعد میں آپ کو گھر لے جانے کے لیے کسی کا بندوبست کریں جو گاڑی چلائے۔ ڈھیلے اور آرام دہ کپڑے پہنیں۔ آپریشن کی منصوبہ بندی کے لیے ایکسرے، الٹراساؤنڈ یا ایم آر آئی جیسے اسکین استعمال ہو سکتے ہیں۔ اگر آپ کو دوسری طبی بیماریاں ہیں تو سرجری سے پہلے آپ کو خون کے ٹیسٹ یا بے ہوشی کے ڈاکٹر (anaesthetist) سے معائنے کی ضرورت پڑ سکتی ہے۔
آپریشن کے دن
آپ ہسپتال کے سرجری کے داخلے کے شعبے میں پہنچتے ہیں، جہاں آپ کا اندراج ہوتا ہے اور آپ کو آپریشن تھیٹر کے لیے تیار کیا جاتا ہے۔ پھر آپ بے ہوشی کے ڈاکٹر سے ملیں گے، یعنی وہ ڈاکٹر جو آپ کو بے ہوش کرتے ہیں اور آپ کے درد کا خیال رکھتے ہیں۔ یہ آپریشن جنرل اینستھیزیا (مکمل بے ہوشی) میں کیا جاتا ہے۔ آپریشن کے بعد درد میں آرام کے لیے کبھی کبھی ساتھ میں اعصابی بلاک (nerve block)، یعنی ایک انجکشن جو جسم کے ایک حصے کو سُن کر دیتا ہے، بھی لگایا جاتا ہے؛ بے ہوشی کے ڈاکٹر اس دن آپ سے اس پر بات کریں گے۔ پھر آپ کو آپریشن تھیٹر میں لے جایا جاتا ہے، جہاں آپریشن کیا جاتا ہے۔
جب آپریشن ختم ہو جاتا ہے تو آپ ریکوری روم میں ہوش میں آتے ہیں۔ جب تک بے ہوشی کی دوا کا اثر ختم ہوتا ہے، نرسیں وہاں آپ کے ساتھ رہتی ہیں۔ جب آپ کی حالت مستحکم ہو جائے تو آپریشن کی قسم اور آپ کی صحت یابی کے لحاظ سے آپ یا تو وارڈ میں جاتے ہیں یا گھر چلے جاتے ہیں۔
آپریشن میں کیا کیا جاتا ہے
ایڑی کا ٹینڈن آپ کے ٹخنے کے پیچھے مضبوط ڈوری ہے۔ جب یہ پھٹتا ہے تو اس کے دونوں سرے ادھڑی ہوئی رسی کی طرح ایک دوسرے سے دور کھنچ جاتے ہیں۔ یہ آپریشن ان سروں کو ٹانکوں سے دوبارہ جوڑ دیتا ہے۔
آپ کے سرجن ٹخنے کے پیچھے ٹینڈن کے اوپر ایک چھوٹا چیرا لگاتے ہیں۔ کم چیر پھاڑ والی مرمت (minimally invasive repair) میں چیرا اور چھوٹا ہوتا ہے، اور ٹانکے جلد کے اندر سے گزارے جاتے ہیں، جس میں ٹینڈن کا غلاف بہت کم یا بالکل نہیں کھولا جاتا۔ سرجن یہ دیکھنے کے لیے ایک پتلا کیمرا استعمال کر سکتے ہیں کہ پھٹے ہوئے سرے ٹھیک طرح جڑے ہیں۔ مضبوط ٹانکے اوپر کے صحت مند ٹینڈن اور نیچے ایڑی کی ہڈی کے درمیان کے فاصلے کو پاٹ دیتے ہیں، اور جب تک سرے جڑ کر ٹھیک نہ ہو جائیں انہیں آپس میں تھامے رکھتے ہیں۔
جب ٹینڈن کے سرے جڑ جاتے ہیں تو ٹانکوں کو گرہ لگا کر باندھ دیا جاتا ہے اور چیرے کو ٹانکوں اور زخم کی پٹی سے بند کر دیا جاتا ہے۔ آپ آپریشن تھیٹر سے اس حالت میں نکلیں گے کہ آپ کا ٹخنہ ایک حفاظتی پوزیشن میں ہو گا تاکہ مرمت پر زور نہ پڑے۔
کچھ مرمتوں میں ایسا طریقہ استعمال ہوتا ہے جس سے آپ روایتی کھلے آپریشن کے مقابلے میں جلدی پاؤں پر وزن ڈال سکتے ہیں۔ آپ کے سرجن آپ کو بتائیں گے کہ آپ کے لیے کون سا طریقہ طے کیا گیا ہے اور کیوں۔
آپریشن کے بعد
جب بے ہوشی کی دوا کا اثر ختم ہو رہا ہو گا تو آپ ریکوری روم میں ہوش میں آئیں گے اور نرسیں قریب ہوں گی۔ آپ کے ٹخنے پر زخم کی پٹی ہو گی اور وہ ایک حفاظتی پوزیشن میں رکھا ہو گا تاکہ مرمت پر زور نہ پڑے۔ ہم آپ کو آرام میں رکھنے کے لیے درد کش دوا دیتے ہیں، اور آپ کے جانے سے پہلے پاؤں میں خون کی فراہمی، احساس اور حرکت کو چیک کریں گے۔ گھر پہنچنے کے بعد پہلے 24 گھنٹے کسی کو آپ کے ساتھ رہنا چاہیے۔ آپ کی ٹیم آپ کو بتائے گی کہ آپ اسی دن گھر جائیں گے یا ایک رات ہسپتال میں رہیں گے۔ پہلے دو ہفتے پاؤں پر وزن نہ ڈالیں، سوائے اس کے کہ آپ کی ٹیم آپ کو کچھ اور بتائے۔ ہم زخم کی پٹی تقریباً 10 دن تک لگی رہنے دیتے ہیں؛ براہِ کرم اس سے پہلے اسے نہ اتاریں، سوائے اس کے کہ ہم آپ کو کہیں۔ جب ہم آپ کو دیکھتے ہیں تو ہم اسے بدلتے یا اتار دیتے ہیں۔
صحت یابی
پہلے چند دن آپ کے ٹخنے میں درد اور سوجن ہو گی۔ درد کش دوا اسے قابلِ برداشت رکھتی ہے، اور پاؤں اونچا رکھ کر آرام کرنے سے سوجن کم ہونے میں مدد ملتی ہے۔ ٹخنے کے اردگرد اور پاؤں تک کچھ نیل پڑنا عام بات ہے اور وقت کے ساتھ ختم ہو جاتا ہے۔
آپ ہسپتال سے اس حالت میں جائیں گے کہ آپ کا ٹخنہ ایک حفاظتی پوزیشن میں ہو گا تاکہ مرمت پر زور نہ پڑے۔ پہلے دو ہفتے پاؤں پر وزن نہ ڈالیں، سوائے اس کے کہ آپ کی ٹیم آپ کو کچھ اور بتائے۔ ہم زخم کی پٹی تقریباً 10 دن تک لگی رہنے دیتے ہیں اور جب آپ کو دیکھتے ہیں تو اسے بدلتے یا اتار دیتے ہیں۔ اس کے بعد آپ کے فزیوتھراپسٹ ٹخنے کی ہلکی پھلکی حرکتوں میں آپ کی رہنمائی کریں گے۔ آپ شروع میں پاؤں کو آزادی سے نیچے کی طرف جھکائیں گے، لیکن اسے اوپر کی طرف زیادہ مڑنے نہیں دیں گے۔ جیسے جیسے زخم بھرتا ہے، آپ پاؤں پر زیادہ وزن ڈالیں گے اور زیادہ فاصلہ چلنا شروع کریں گے۔ کچھ مرمتوں میں آپ دوسروں کی نسبت جلدی وزن ڈال سکتے ہیں؛ آپ کے سرجن آپ کو بتائیں گے کہ آپ کے لیے کیا طے کیا گیا ہے۔
روزمرہ زندگی میں شروع میں آپ کو سیڑھیوں، خریداری اور نہانے میں مدد کی ضرورت ہو گی۔ پاؤں اونچا رکھ کر کمر کے بل سونا اکثر زیادہ آرام دہ ہوتا ہے۔ عام طور پر جیسے جیسے آپ کی حرکت اور آرام اجازت دے، آپ دفتری کام اور روزمرہ معمولات پر واپس آ سکتے ہیں، اور جب آپ کی طاقت اور توازن واپس آ جائے تو آہستہ آہستہ کھیل کی طرف لوٹ سکتے ہیں۔ کم چیر پھاڑ والی مرمت کے بعد بہت سے لوگ تقریباً چار ماہ سے کھیل پر واپس آ جاتے ہیں۔
صحت یابی ہر شخص میں مختلف ہوتی ہے۔ آپ کا وقت مختلف ہو سکتا ہے، اور آپ کے سرجن اور فزیوتھراپسٹ ہر قدم پر آپ کی رہنمائی کریں گے۔
کیا مسائل پیدا ہو سکتے ہیں
زیادہ تر مریض ٹھیک رہتے ہیں، لیکن کبھی کبھار مسائل پیدا ہو سکتے ہیں۔ آپ کے سرجن اور ٹیم آپ پر قریب سے نظر رکھتے ہیں تاکہ کوئی بھی مسئلہ جلد پکڑا جا سکے۔
زخم کے مسائل وہ ہیں جن پر نظر رکھنی ہے۔ ایڑی کے ٹینڈن کے اوپر کی جلد میں خون کی فراہمی کم ہوتی ہے، اس لیے چیرا دیر سے بھر سکتا ہے یا اس کے کنارے کھل سکتے ہیں۔ زخم سے باہر کی طرف پھیلتی ہوئی سرخی، رسنے یا زخم سے رطوبت کے اخراج، بڑھتے ہوئے درد، یا بخار پر نظر رکھیں۔ اگر آپ ان میں سے کچھ بھی محسوس کریں تو اگلی ملاقات کا انتظار کرنے کے بجائے کلینک کو فون کریں۔ کچھ طبی حالتیں، جن میں ذیابیطس (شوگر) اور تمباکو نوشی شامل ہیں، زخم کے مسائل کا امکان بڑھا دیتی ہیں، اس لیے ہم سرجری سے پہلے آپ کے اپنے خطرات کے بارے میں آپ سے بات کریں گے۔
انفیکشن زخم میں یا ٹینڈن کے اردگرد گہرائی میں پیدا ہو سکتا ہے۔ عام طور پر یہ ایک گہرے، دھڑکتے ہوئے درد کی طرح محسوس ہوتا ہے جو عام درد کش دواؤں سے کم نہیں ہوتا، اور ساتھ میں گرمائش، سوجن اور سرخی ہوتی ہے۔ اس کے ساتھ بخار یا عمومی طور پر طبیعت خراب محسوس ہو سکتی ہے۔ گہرے انفیکشن کا فوری علاج ضروری ہے، اس لیے اسی دن کلینک سے رابطہ کریں، یا اگر آپ ہم سے رابطہ نہ کر سکیں تو ہسپتال کی ایمرجنسی جائیں۔
ٹانکے ٹینڈن کے سروں کو جڑنے تک آپس میں تھامے رکھتے ہیں، اور پوری طرح مضبوط ہونے سے پہلے ٹینڈن دوبارہ پھٹ سکتا ہے۔ یہ عام طور پر اچانک پاؤں سے زور لگانے، لڑکھڑانے یا گرنے سے ہوتا ہے۔ آپ کو ٹخنے کے پیچھے ایک تیز جھٹکے یا چٹخنے کی آواز جیسا احساس ہو گا، ساتھ میں اچانک کمزوری اور پاؤں سے زور لگانے میں دشواری ہو گی۔ اگر ایسا ہو تو فوراً کلینک سے رابطہ کریں یا ہسپتال کی ایمرجنسی جائیں۔
ٹخنے کی باہر والی طرف سے گزرنے والے عصب میں مرمت کے دوران جلن (irritation) پیدا ہو سکتی ہے۔ اس سے آپ کے پاؤں کی باہر والی طرف نیچے تک سُن پن، جھنجھناہٹ یا جلن والا احساس ہو سکتا ہے۔ اپنے اگلے معائنے پر اس کا ذکر کریں، یا اگر یہ شدید ہو تو اس سے پہلے فون کریں۔
اس چوٹ اور سرجری کے بعد پنڈلی کی گہری رگوں میں خون کے لوتھڑے بن سکتے ہیں۔ خطرے کی علامات میں پنڈلی کے پچھلے حصے میں اچانک سوجن، چھونے پر درد یا بھاری پن شامل ہیں، اور اگر لوتھڑا پھیپھڑوں تک پہنچ جائے تو سانس پھولنا یا سینے میں درد۔ سانس پھولنے یا سینے میں درد کا مطلب ہے کہ آپ کو فوراً ہسپتال کی ایمرجنسی جانا ہے۔ پنڈلی کی علامات کا مطلب ہے کہ بلا تاخیر کلینک کو فون کریں۔
کبھی کبھی زخم بھرنے سے بننے والا سخت ریشہ (scar tissue) ٹینڈن کو آس پاس کے ٹشو سے چپکا دیتا ہے، جس سے حرکت کے ساتھ کلک یا رگڑ جیسا احساس یا اکڑاؤ ہوتا ہے۔ اپنے اگلے معائنے پر اس کا ذکر کریں۔
اگر آپ تفصیلات جاننا چاہتے ہیں تو اس صفحے پر پیچیدگیوں کا جدول عام شرحیں دکھاتا ہے۔
ہمیں کب فون کریں
اگر آپ کو بخار ہو، یا زخم کے اردگرد سرخی، رطوبت کا اخراج یا درد بڑھ رہا ہو تو فوراً ہمیں فون کریں۔ اگر آپ کی پنڈلی کا پچھلا حصہ سوج جائے، چھونے پر درد کرے یا بھاری محسوس ہو تو بلا تاخیر ہمیں فون کریں۔ اگر آپ کا سانس پھولنے لگے یا سینے میں درد ہو، اگر آپ کو ٹخنے میں اچانک جھٹکے یا چٹخنے جیسا احساس ہو اور ساتھ کمزوری ہو، یا اگر آپ کے پاؤں میں احساس ختم ہو جائے یا آپ اسے حرکت نہ دے سکیں تو ہسپتال کی ایمرجنسی جائیں۔ اگر آپ ہم سے رابطہ نہ کر سکیں تو ہسپتال کی ایمرجنسی جائیں۔
Evidence & references
This is the clinical evidence summary written for health professionals. It is technical, and it lists the research this page was built from. You do not need to read it to understand your treatment or to make a decision about it.
Anatomy & Pathophysiology
Bony Anatomy
- The ankle mortise is formed by the tibial plafond, medial malleolus, and lateral malleolus [3].
- The ankle mortise articulates with the dome of the talar body [3].
- The talar dome is wider anteriorly and narrower posteriorly [3].
- The ankle mortise widens 1 to 1.5 mm during motion from plantar flexion to dorsiflexion [3].
- Medial and superior clear spaces appear wider with the foot in plantar flexion [3].
- The distal fibula has a convex medial surface that articulates with the concave incisura fibularis of the distal lateral tibia [3].
- The fibula rotates approximately 2 degrees within the incisura during ankle motion and ambulation [3].
- Ankle dorsiflexion results in external rotation and proximal translation of the fibula [3].
Ligamentous Anatomy
- The lateral ankle ligaments function as restraints to varus and inversion forces at the ankle [3].
- The anterior talofibular ligament (ATFL) originates from the anteroinferior aspect of the lateral malleolus, 1 cm proximal to its tip, and extends to the lateral aspect of the talar neck [3].
- The calcaneofibular ligament (CFL) extends from the tip of the lateral malleolus to the lateral aspect of the calcaneus [3].
- The posterior talofibular ligament (PTFL) extends from the posterior lateral malleolus to the posterolateral talus [3].
- The ATFL is the weakest ankle ligament [3].
- The PTFL is the strongest ankle ligament [3].
- The distal tibiofibular joint and fibula provide stability against lateral talar translation [3].
- The deltoid ligament complex is the primary ankle stabilizer during stance [3].
- The deep deltoid ligament extends from the apex of the medial malleolus to the medial talar body [3].
- The deep deltoid ligament functions primarily to resist lateral talar translation and external rotation [3].
- The posterior deep deltoid is the most important component of the deep deltoid ligament [3].
- The superficial deltoid ligament extends from the distal medial malleolus to the navicular bone, sustentaculum tali of the calcaneus, medial talus, and spring ligament [3].
- The superficial deltoid ligament functions primarily to resist valgus and eversion ankle forces [3].
- The deltoid ligament consists of superficial and deep layers, with at most six bands of which only three are constant: the tibionavicular ligament, tibiospring ligament, and deep posterior tibiotalar ligament [8].
- The tibiocalcaneal portion of the superficial deltoid ligament is the strongest component and resists eversion of the calcaneus [8].
- The deep portion of the deltoid ligament is organized into two short, thick, discrete bands: the anterior and posterior deep tibiotalar ligaments [8].
- The anterior and posterior deep tibiotalar ligaments are intra-articular but extrasynovial [8].
- The deep posterior band comprises the largest band of the deltoid complex [8].
- The deep deltoid ligament has the highest load to failure at 713.8 N ± 69.3 compared with the lateral collateral ligaments [8].
- The dominant mode of failure for the deep deltoid ligament is an intrasubstance rupture near its talar insertion [8].
- The failure of the superficial deltoid ligament is most commonly at its insertion on the anterior malleolus [8].
- Valgus tilting of the talus within the mortise requires complete rupture of both the superficial and deep deltoid ligaments [8].
Neurovascular Anatomy
- The superficial peroneal nerve penetrates the deep fascia and lies subcutaneously 8 to 10 cm proximal to the tip of the lateral malleolus, anterior to the subcutaneous border of the fibula shaft [6].
- The deep peroneal nerve accompanies the anterior tibial artery between the tendons of the anterior tibial and extensor digitorum longus muscles, just lateral to the extensor hallucis longus tendon [6].
- The saphenous nerve is located just medial or posterior to the saphenous vein in a slightly deeper plane, 3 to 5 cm proximal to the tip of the medial malleolus [6].
Biomechanics
- The ankle joint is responsible for most sagittal plane motion of the foot and ankle [3].
- Ankle plantar flexion ranges from 23 to 48 degrees [3].
- Ankle dorsiflexion ranges from 10 to 23 degrees [3].
- The ankle joint also contributes to inversion, eversion, and rotation [3].
Investigations
- MRI is sensitive for detecting osteochondral lesions of the ankle, but the edema pattern frequently overestimates the severity of the injury [12, 13].
- Linear fluid signal deep to subchondral bone on MRI indicates an unstable osteochondral lesion [12, 13].
- MRI has a sensitivity of 92% for predicting stable versus unstable osteochondral lesions [12, 13].
- CT scans are helpful for evaluating bony lesions, determining the integrity of subchondral bone, identifying cysts, and preoperative planning for osteochondral lesions [12, 13].
- AP, mortise, and lateral weight-bearing ankle x-rays may not demonstrate subtle osteochondral lesions [12, 13].
- Advanced imaging is often helpful in the diagnosis of foot and ankle injuries when combined with a thorough clinical examination [16].
- MRI is used for the evaluation of chronic Achilles tendon ruptures [1].
- MRI is used for the evaluation of traumatic ligamentous injuries of the ankle and foot [1].
- MRI is used for the evaluation of musculotendinous structures of the ankle [1].
- MRI is used for the evaluation of sports injuries involving the ankle [1].
- MRI is used for the pre-operative evaluation of the anterior talofibular ligament in chronic ankle instability [1].
- MRI is used for the evaluation of anterolateral soft tissue impingement of the ankle [1, 18].
- MRI is used for the evaluation of osteochondral lesions of the talus [1].
- MRI is used for the evaluation of posterior tibial tendon dysfunction [1].
- MRI is used for the diagnosis of plantar plate injury with reference to intraoperative findings [1].
- MRI is used for the evaluation of tibiofibular syndesmotic ligaments [1].
- MRI is used for the evaluation of chronic lateral ankle instability in conjunction with stress radiography [1].
- MRI is used for the evaluation of associations between imaging findings and symptoms in patients with chronic ankle sprain [1].
- MRI is used for the evaluation of accuracy in diagnosing ligamentous and chondral pathology in the ankle [1].
- MRI is used for the evaluation of peroneal tendon abnormalities on routine imaging of the foot and ankle [15].
- MRI is used for the evaluation of entrapment neuropathies of the lower extremity, including the knee, leg, ankle, and foot [19].
- Ultrasonography is used for the examination of the deltoid ligament in bimalleolar equivalent fractures [17].
- Ultrasonography is used for the point-of-care diagnosis and management of superficial peroneal nerve entrapment [19].
- MRI lacks additional diagnostic value for stability assessment of the ankle mortise in supination-external rotation-type ankle fractures [17].
- CT imaging is used to evaluate normal tibiofibular relationships at the syndesmosis [17].
- Preoperative computed tomography scans are used in operative planning for malleolar ankle fractures [17].
- Radiographic evaluation of the normal distal tibiofibular syndesmosis is a standard investigative approach [17].
- Fluoroscopy is used to assess if the syndesmosis is reduced [17].
- Radiographic identification of primary lateral ankle structures is possible [2].
- Gravity stress radiographs are used to assess the effect of ankle position on deltoid ligament integrity and medial clear space measurements [2].
- Stress radiography is used in the evaluation of chronic lateral ankle instability [1].
- The use of advanced imaging is often helpful in diagnosis when combined with a thorough clinical examination for foot and ankle disorders [16].
Treatment
Operative Technique: Lindholm Repair
- The patient is positioned prone for the procedure [14].
- A posterior curvilinear incision is made extending from the midcalf to the calcaneus [14].
- The deep fascia is incised in the midline to expose the tendon rupture [14].
- Ragged ends of the tendon are debrided [14].
- Tendon ends are apposed using a box type of mattress suture made of heavy nonabsorbable suture material or wire [14].
- Fine interrupted sutures are also used to appose the tendon ends [14].
- Two flaps are fashioned from the proximal tendon and gastrocnemius aponeurosis [14].
- Each flap is approximately 1 cm wide and 7 to 8 cm long [14].
- The flaps are left attached at a point 3 cm proximal to the site of rupture [14].
- Each flap is twisted 180 degrees on itself so that its smooth external surface lies next to the subcutaneous tissue [14].
- The flaps are turned distally over the rupture [14].
- Each flap is sutured to the distal stump of the tendon and to one another [14].
- The flaps cover the site of rupture completely [14].
- The wound is closed with care taken to approximate the tendon sheath over the site of repair [14].
Operative Technique: Lynn Repair
- The tendon sheath is opened in the midline [14].
- The foot is held in 20 degrees of plantar flexion during the repair [14].
- The ends of the Achilles tendon are sewn together with 2-0 absorbable sutures without excising the irregular edges [14].
- If the plantaris tendon is intact, its insertion on the calcaneus is divided [14].
- The plantaris tendon is fanned out to form a membrane using forceps, beginning distally [14].
- The fanned-out plantaris membrane is placed over the repair of the Achilles tendon [14].
- The plantaris membrane is sutured in place with interrupted sutures [14].
- When possible, the Achilles tendon is covered for 2.5 cm both proximal and distal to the repair [14].
- If the plantaris tendon is ruptured, it is dissected free from the Achilles tendon for several centimeters [14].
- The ruptured plantaris tendon is divided proximally using a tendon stripper [14].
- The plantaris tendon is pulled distally into the incision and fanned out as a free graft [14].
- The sheath of the Achilles tendon is closed as far distally as possible without tension [14].
Postoperative Care
- Postoperative care for these repairs is the same as that used after treatment of acute rupture of the Achilles tendon [14].
References
[1] Campbell S Operative Orthopaedics 4 Volume Set. REFERENCES > FOOT AND ANKLE.
[2] Campbell S Operative Orthopaedics 4 Volume Set. REPAIR OF ACUTE RUPTURE OF LATERAL LIGAMENTS > ACUTE ANKLE LIGAMENT INJURIES, CHRONIC ANKLE INSTABILITY.
[3] Miller S Review Of Orthopaedics. SECTION 16 PATELLAR TRACKING IN TOTAL KNEE ARTHROPLASTY > BIOMECHANICS OF THE FOOT AND ANKLE.
[6] Campbell S Operative Orthopaedics 4 Volume Set. MULTIPLE Z-PLASTY RELEASE OF A CONGENITAL RING > ANKLE BLOCK.
[8] Orthopaedic Knowledge Update Sports Medicine 6. Ankle and Foot Injuries and Other Disorders > Ankle Sprains > Medial Ankle Injury.
[12] Miller S Review Of Orthopaedics. SECTION 16 PATELLAR TRACKING IN TOTAL KNEE ARTHROPLASTY > OSTEOCHONDRAL LESIONS.
[13] Miller S Review Of Orthopaedics. OSTEOCHONDRAL LESIONS.
[14] Campbell S Operative Orthopaedics 4 Volume Set. ULNAR COLLATERAL LIGAMENT REPAIR WITH AN INTERNAL BRACE > OPEN REPAIR OF ACHILLES TENDON RUPTURE—LINDHOLM.
[15] Campbell S Operative Orthopaedics 4 Volume Set. MULTIPLE Z-PLASTY RELEASE OF A CONGENITAL RING > PERONEAL TENDONS.
[16] Orthopaedic Knowledge Update Sports Medicine 6. Ankle and Foot Injuries and Other Disorders > Summary.
[17] Orthopaedic Knowledge Update Trauma. Ankle Fractures > Annotated References.
[18] Campbell S Operative Orthopaedics 4 Volume Set. ARTHROSCOPIC EXAMINATION AND DEBRIDEMENT OF THE ANKLE JOINT > IMPINGEMENT.
[19] Campbell S Operative Orthopaedics 4 Volume Set. COMBINED HAMMER TOE AND MALLET TOE DEFORMITY WITH ASSOCIATED DOUBLE CORNS > REFERENCES > TARSAL TUNNEL SYNDROME.