Patients › Elbow
کہنی کے پاس ٹرائسیپس ٹینڈن کی مرمت (Distal Triceps Repair)
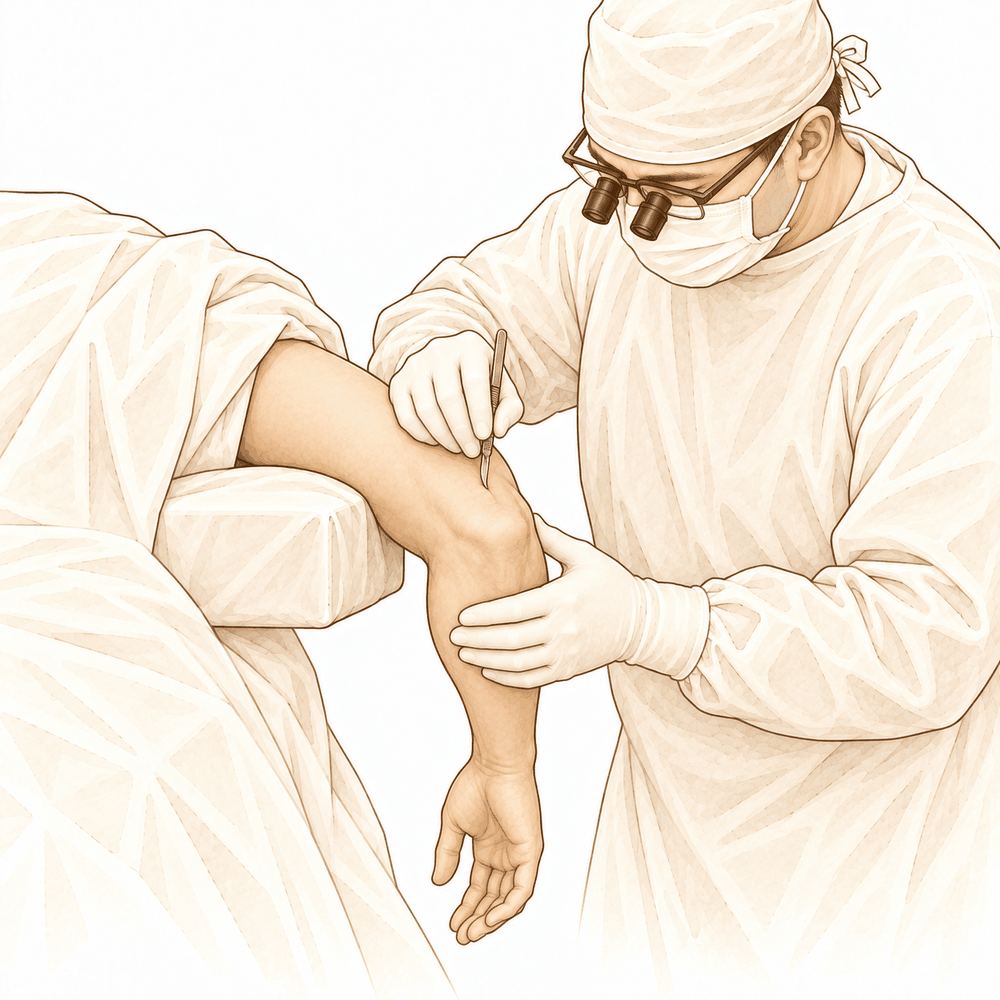
یہ آپریشن کیوں تجویز کیا گیا ہے
ڈاکٹر کیرن ہِرپرا، جو Mater Private Hospital Rockhampton میں بازو اور ہاتھ کے سرجن (upper-limb surgeon) ہیں، علاج کو آپ کی مخصوص چوٹ کے مطابق طے کرتے ہیں۔ ٹرائسیپس (triceps) آپ کے بازو کے اوپری حصے کے پیچھے کی طرف والا پٹھا ہے؛ اس کا ٹینڈن (tendon)، یعنی وہ مضبوط ڈوری جو پٹھے کو ہڈی سے جوڑتی ہے، آپ کی کہنی کی نوک سے جڑا ہوتا ہے اور یہی آپ کے بازو کو سیدھا کرتا ہے۔ جب یہ ٹینڈن ہڈی سے پوری طرح پھٹ کر الگ ہو جائے تو یہ حرکت بحال کرنے کے لیے عام طور پر سرجری کی ضرورت ہوتی ہے۔ یہ آپریشن، جسے کہنی کے پاس ٹرائسیپس ٹینڈن کی مرمت (distal triceps repair) کہتے ہیں، پھٹے ہوئے ٹینڈن کو دوبارہ جوڑ دیتا ہے۔
مریضوں کو عام طور پر ان کے فیملی ڈاکٹر (GP) ہمارے کلینک بھیجتے ہیں؛ اگر کسی فزیوتھراپسٹ نے آپ کو ہمیں دکھانے کا مشورہ دیا ہے، تب بھی میڈیکیئر (Medicare) سے رقم کی واپسی (rebate) کا اہل ہونے کے لیے آپ کو اپنے فیملی ڈاکٹر سے ریفرل (referral) کی ضرورت ہوگی۔ ہم آپ کی طبی تاریخ کا جائزہ لیتے ہیں، آپ کی کہنی کا معائنہ کرتے ہیں، اور تشخیص کی تصدیق کے لیے ضرورت ہو تو ایکسرے یا اسکین کرواتے ہیں۔
جزوی پھٹاؤ کی صورت میں پہلے آپریشن کے بغیر علاج، جیسے فزیوتھراپی، آزمایا جا سکتا ہے۔ سرجری تب کی جاتی ہے جب اس سے کافی بہتری نہ ہوئی ہو، یا جب پھٹاؤ مکمل ہو۔ یہ اکثر متحرک لوگوں، اپنے بازوؤں سے بھاری کام لینے والے کارکنوں، اور مقابلوں میں واپس جانے کے خواہشمند کھلاڑیوں کے لیے تجویز کی جاتی ہے۔ مرمت کا مقصد طاقت اور کارکردگی کو بحال کرنا ہے؛ زیادہ تر لوگ تقریباً 2.2 ماہ میں کام پر واپس آ جاتے ہیں اور 89.3 فیصد کھیل میں واپس آ جاتے ہیں۔
آپریشن سے پہلے
آپ کے سرجن مرمت کی منصوبہ بندی سے پہلے اسکین کے ذریعے پھٹاؤ کی تصدیق کریں گے۔ یہ عام طور پر ایکسرے سے شروع ہوتا ہے، جو دکھاتا ہے کہ کیا ٹینڈن کے ساتھ ہڈی کا کوئی چھوٹا ٹکڑا بھی اکھڑ آیا ہے۔ خود ٹینڈن کو قریب سے دیکھنے کے لیے ایم آر آئی اسکین کیا جا سکتا ہے۔
سرجری سے پہلے آپ کو سات گھنٹے تک کھانا پینا بند کرنا ہوگا۔ ہم چھ کے بجائے سات گھنٹے کا کہتے ہیں تاکہ اگر آپریشن کی فہرست وقت سے پہلے چل رہی ہو تو آپ کا آپریشن پہلے کیا جا سکے۔ آپ کے سرجن آپ کو بتائیں گے کہ کون سی دوائیں کب بند کرنی ہیں۔ آپ جو کچھ بھی لیتے ہیں اس کی لکھی ہوئی فہرست ساتھ لائیں۔ آپریشن کے بعد آپ کو گاڑی میں گھر لے جانے کے لیے کسی کا انتظام کریں، اور اس دن ڈھیلے، آرام دہ کپڑے پہنیں۔ اگر آپ کو دیگر طبی مسائل ہیں تو ہو سکتا ہے آپ کو خون کے ٹیسٹ یا بے ہوشی کے ڈاکٹر (anaesthetist) سے معائنے کی ضرورت ہو۔
آپریشن کے دن
آپ ہسپتال کے سرجری کے داخلے کے شعبے میں پہنچیں گے، جہاں آپ کا اندراج کیا جاتا ہے اور آپ کو آپریشن تھیٹر کے لیے تیار کیا جاتا ہے۔ پھر آپ کی ملاقات بے ہوشی کے ڈاکٹر سے ہوگی، یعنی وہ ڈاکٹر جو آپریشن کے دوران آپ کو بے ہوش کرتے ہیں اور آپ کے درد کو سنبھالتے ہیں۔ یہ آپریشن جنرل اینستھیزیا (مکمل بے ہوشی) میں کیا جاتا ہے۔ آپریشن کے بعد درد میں آرام کے لیے کبھی کبھی اعصابی بلاک (nerve block)، یعنی ایک انجکشن جو جسم کے ایک حصے کو سُن کر دیتا ہے، بھی شامل کیا جاتا ہے؛ بے ہوشی کے ڈاکٹر اسی دن آپ سے اس پر بات کریں گے۔ پھر آپ کو آپریشن تھیٹر میں لے جایا جاتا ہے، جہاں مرمت کی جاتی ہے۔
بعد میں آپ ریکوری روم میں جاگیں گے، جہاں بے ہوشی کی دوا کا اثر ختم ہونے تک نرسیں آپ پر گہری نظر رکھتی ہیں۔ جب آپ کی حالت مستحکم ہو جائے تو آپریشن کی نوعیت اور آپ کی صحت یابی کی رفتار کے مطابق آپ یا تو وارڈ میں جائیں گے یا گھر۔ اگر آپ اسی دن گھر جائیں تو آپ کو اسی شخص کی ضرورت ہوگی جس کا آپ نے پہلے سے انتظام کیا تھا، تاکہ وہ آپ کو گاڑی میں گھر لے جائے۔
آپریشن میں کیا کیا جاتا ہے
ٹرائسیپس ٹینڈن آپ کی کہنی کی نوک پر ہڈی کے ایک چھوٹے سے حصے سے جڑا ہوتا ہے۔ مکمل پھٹاؤ میں ٹینڈن اس ہڈی سے اکھڑ چکا ہوتا ہے، کچھ ایسے جیسے کوئی رسی اپنے بندھنے کی جگہ سے کھل جائے۔ آپریشن کا مقصد ٹینڈن کو ٹانکوں سے دوبارہ ہڈی پر اسی جگہ جوڑنا ہے جہاں اسے ہونا چاہیے۔
آپ کے سرجن پھٹے ہوئے ٹینڈن تک پہنچنے کے لیے آپ کی کہنی کے پیچھے چیرا لگاتے ہیں۔ پھر ٹینڈن کو ہڈی پر اس کی قدرتی جڑنے کی جگہ پر دوبارہ جوڑا جاتا ہے؛ اس کے لیے ہڈی میں چھوٹے اینکر (anchor)، یعنی ہڈی میں لگائے جانے والے چھوٹے پرزے جو ٹانکوں کے دھاگے کو تھامتے ہیں، لگائے جاتے ہیں، اور مضبوط ٹانکے ٹینڈن کو یکساں کھنچاؤ کے ساتھ نیچے تھامے رکھتے ہیں۔ اس سے ٹینڈن کے جڑنے کی جگہ کی معمول کی شکل اور مقام بحال ہو جاتا ہے، اور یہی مرمت کو مضبوطی دیتا ہے۔
کچھ مرمتوں میں ایسا طریقہ استعمال ہوتا ہے جو اینکروں کی دو قطاروں سے جڑنے کی پوری جگہ کو ڈھانپ لیتا ہے، جیسے کپڑے کی تُرپائی کو دو متوازی لائنوں سے سی دیا جائے۔ کچھ دوسری مرمتوں میں ایسے اینکر استعمال ہوتے ہیں جو پوری طرح ٹانکوں کے دھاگے کے مواد سے بنے ہوتے ہیں، اور یہ ٹینڈن کو عام اینکروں جتنی ہی مضبوطی سے تھامتے ہیں۔ آپ کے سرجن وہ طریقہ منتخب کریں گے جو آپ کی چوٹ کے لیے مناسب ہو۔
جب ٹینڈن مضبوطی سے جڑ جائے تو سرجن جانچتے ہیں کہ مرمت ہموار طریقے سے حرکت کرتی ہے، پھر چیرے کو ٹانکوں سے بند کر کے زخم کی پٹی لگا دیتے ہیں۔ یہ پٹی تقریباً 10 دن تک لگی رہے گی، جیسا کہ صحت یابی والے حصے میں بتایا گیا ہے۔
آپریشن کا تصور بذاتِ خود سیدھا سادہ ہے: پھٹے ہوئے ٹینڈن کو واپس ہڈی تک لانا اور اسے اتنی مضبوطی سے وہاں تھامے رکھنا کہ وہ بھر سکے۔ اس کے بعد کیا ہوتا ہے، یعنی آپ کتنی جلدی بازو ہلا اور استعمال کر سکتے ہیں، یہ آگے آنے والے صحت یابی کے حصے میں بتایا گیا ہے۔
آپریشن کے بعد
آپ ریکوری روم میں جاگیں گے، جہاں بے ہوشی کی دوا کا اثر ختم ہونے تک نرسیں آپ کی قریب سے نگرانی کرتی ہیں۔ آرام کے لیے آپ کا بازو ایک سادہ سلنگ (sling)، یعنی گلے سے لٹکی اس پٹی میں رہے گا جو بازو کو سہارا دیتی ہے۔ کہنی کو ایک جگہ جکڑا نہیں جاتا؛ ہلکی حرکت جلد شروع ہو جاتی ہے۔ درد کی دوا آپ کی ضرورت کے مطابق دی جاتی ہے، اور نرسیں آپ کے آرام کا خیال رکھیں گی۔ گھر پہنچنے کے بعد پہلے 24 گھنٹے کسی کو آپ کے ساتھ رہنا چاہیے۔ آپ کی ٹیم آپ کو بتائے گی کہ آپ اسی دن گھر جائیں گے یا ایک رات ہسپتال میں رہیں گے۔ ہم پٹی تقریباً 10 دن تک لگی رہنے دیتے ہیں؛ براہ کرم اس سے پہلے اسے نہ اتاریں، جب تک ہم آپ کو ایسا کرنے کو نہ کہیں۔ جب ہم آپ کو دیکھتے ہیں تو اسے بدل دیتے ہیں یا اتار دیتے ہیں۔ زیادہ تر لوگ سرجری کے دن ہی آرام آرام سے چلتے پھرتے ہیں۔
صحت یابی
پہلے چند دن آپ کی کہنی میں درد اور سوجن ہوگی۔ یہ آہستہ آہستہ کم ہو جاتی ہے۔ آرام، بیٹھتے وقت ہاتھ کو اونچا رکھنا، اور آپ کے لیے تجویز کی گئی درد کی دوا، سب سے مدد ملتی ہے۔ آرام کے لیے آپ کا بازو ایک سادہ سلنگ میں رہتا ہے، لیکن کہنی کو ساکن جکڑا نہیں جاتا، اور ہلکی حرکت جلد شروع ہو جاتی ہے۔
ہینڈ تھراپی (hand therapy، ہاتھ اور بازو کی بحالی کا علاج) آپ کی صحت یابی کا ایک بڑا حصہ ہے۔ آپ کے سیشن Extend Rehabilitation میں Ruby Doolan کے ساتھ ہوں گے۔ وہ ہینڈ تھراپسٹ (ہاتھ کی بحالی کی ماہر) ہیں: وہ آپ کی ورزشوں کی رہنمائی کرتی ہیں اور آپ کو جس اسپلنٹ کی ضرورت ہو وہ بناتی ہیں۔ شروع میں توجہ مرمت کی حفاظت پر ہوتی ہے جبکہ آپ کی کہنی اپنی حرکت واپس حاصل کرتی ہے۔ جیسے جیسے ٹینڈن بھرتا ہے، ورزشیں بڑھتی جاتی ہیں تاکہ مزاحمت کے خلاف بازو سیدھا کرنے کی طاقت بحال ہو۔
روزمرہ میں، جب تک مرمت ٹھہر نہ جائے، آپ گھر کے ہلکے کام دوسرے ہاتھ سے کریں گے۔ جب تک آپ کا بازو سلنگ میں ہے آپ گاڑی نہیں چلائیں گے، اور دوبارہ گاڑی چلانے سے پہلے ضروری ہے کہ آپ دونوں ہاتھوں سے اسٹیئرنگ تھام سکیں اور ہنگامی حالت میں اچانک بریک لگا سکیں، اور آپ نے کوئی تیز درد کش دوا نہ لی ہو۔ ہماری رہنمائی بازو اور ہاتھ کی سرجری کے بعد گاڑی چلانا میں اس کی مزید تفصیل ہے۔
بہتری کے مراحل تاریخوں کے بجائے واقعات سے طے ہوتے ہیں۔ جب سوجن کم ہو جاتی ہے تو موڑنا اور سیدھا کرنا آسان محسوس ہوتا ہے۔ جب آپ کا تھراپسٹ طاقت کی ورزشوں کی اجازت دے تو آپ بازو پر بوجھ ڈالنا شروع کرتے ہیں۔ زیادہ تر لوگ کام اور کھیل پر اسی شدت کے ساتھ واپس آ جاتے ہیں جو چوٹ سے پہلے تھی۔ آپ کا وقت مختلف ہو سکتا ہے؛ آپ کے سرجن اور Ruby آپ کی رہنمائی کریں گے۔
کیا مسائل پیدا ہو سکتے ہیں
زیادہ تر مریض ٹھیک رہتے ہیں، لیکن کبھی کبھار مسائل پیدا ہو سکتے ہیں۔ آپ کے سرجن اور ٹیم آپ کی قریب سے نگرانی کرتے ہیں تاکہ کسی بھی مسئلے کو جلد پکڑا جا سکے۔
سب سے سنگین مسئلہ مرمت کا دوبارہ پھٹ جانا ہے۔ آپ کو کہنی کے پیچھے اچانک کچھ چٹخنے یا ڈھیلا پڑنے کا احساس ہو سکتا ہے، جس کے بعد کسی چیز کے خلاف بازو سیدھا کرنے کی کوشش میں کمزوری محسوس ہو۔ کچھ لوگ کہنی کی نوک پر سوجن اور نیل دیکھتے ہیں، ویسا ہی جیسا ٹینڈن پہلی بار پھٹنے پر محسوس ہوا تھا۔ اگر ایسا ہو تو فوراً کلینک سے رابطہ کریں۔ آپ کے سرجن کہنی کا معائنہ کریں گے اور یہ جانچنے کے لیے اسکین کروائیں گے کہ مرمت قائم ہے یا نہیں۔
کچھ مسائل خود زخم کے آس پاس ظاہر ہوتے ہیں۔ ایسے درد پر نظر رکھیں جو کم ہونے کے بجائے بڑھتا جائے، زخم سے باہر کی طرف پھیلتی ہوئی سرخی، یا زخم کی پٹی میں سے رطوبت کا رسنا۔ ان علامات کے ساتھ بخار یا عمومی طور پر طبیعت خراب محسوس ہونا بھی اہم ہے۔ اگر آپ ان میں سے کچھ بھی محسوس کریں تو اپنی اگلی ملاقات کا انتظار کرنے کے بجائے اسی دن کلینک کو فون کریں۔
کبھی کبھار مرمت کے لیے مزید آپریشن کی ضرورت پڑتی ہے۔ اس کی وجہ یہ ہو سکتی ہے کہ ٹینڈن دوبارہ پھٹ گیا ہو، یا مرمت کے بارے میں کوئی اور بات اس طرح ٹھیک نہ ہو رہی ہو جیسے ہونی چاہیے۔ عام طور پر آپ کو اس کا پتا مسلسل درد، کمزوری، یا اس احساس سے چلتا ہے کہ کہنی توقع کے مطابق ٹھیک نہیں ہو رہی۔ اپنی معائنے کی ملاقات پر یہ بات اٹھائیں، یا اگر چیزیں واضح طور پر غلط لگیں تو اس سے پہلے ہی ہم سے رابطہ کریں۔
ان مسائل سے صحت یابی اصل منصوبے سے زیادہ وقت لے سکتی ہے، اور کچھ لوگوں کو کام یا معمول کی سرگرمیوں سے اس سے زیادہ وقت دور رہنا پڑتا ہے جتنا انہوں نے شروع میں سوچا تھا۔ اگر آپ کے ساتھ ایسا ہو تو آپ کے سرجن آپ کو بتائیں گے کہ کیا ہوا ہے اور اگلے اقدامات کیا ہیں۔
اگر آپ تفصیل جاننا چاہیں تو اس صفحے پر پیچیدگیوں کا جدول ان کی عام شرحیں بتاتا ہے۔
ہمیں کب فون کریں
زیادہ تر لوگوں کی صحت یابی آسانی سے ہو جاتی ہے، لیکن کچھ علامات پر جلد توجہ کی ضرورت ہوتی ہے۔ اگر آپ کو بخار ہو، یا زخم کے ارد گرد سرخی یا رطوبت کا اخراج بڑھتا جائے تو ہمیں فون کریں۔ اگر بازو سیدھا کرتے وقت آپ کو اچانک کچھ چٹخنے کے ساتھ کمزوری محسوس ہو تو فوراً ہمیں فون کریں، یا اگر دفتری اوقات کے بعد کا وقت ہو تو ہسپتال کی ایمرجنسی جائیں۔ اگر آپ کی کہنی میں اچانک شدید درد ہو جو آپ کی درد کش دوا سے کم نہ ہو تو ہسپتال کی ایمرجنسی جائیں۔ اگر آپ کی پنڈلی (calf) سوج جائے یا اس میں درد ہو، یا آپ کی سانس پھولنے لگے تو ہسپتال کی ایمرجنسی جائیں۔ اگر آپ کے بازو یا ہاتھ میں احساس ختم ہو جائے، یا آپ اسے حرکت نہ دے سکیں تو ہسپتال کی ایمرجنسی جائیں۔
Evidence & references
This is the clinical evidence summary written for health professionals. It is technical, and it lists the research this page was built from. You do not need to read it to understand your treatment or to make a decision about it.
Anatomy & Pathophysiology
Bony Anatomy
- The elbow is a trocho-ginglymoid joint consisting of medial and lateral articulations that provide bony stability [3].
- The trochlea articulates with the ulna within the greater sigmoid notch to form the ulnohumeral, hinged, or trochoid portion of the elbow joint [3].
- The ulnohumeral articulation provides highly congruent anatomy through almost 180° of articular contact [3].
- The greater sigmoid notch of the ulna contains a bare area devoid of cartilage [3].
- The coronoid process has medial and lateral facets that buttress the trochlea anteriorly [3].
- The sublime tubercle is located just distal and medial to the coronoid and serves as the attachment site for the anterior bundle of the medial ulnar collateral ligament [3].
- The medial epicondyle is larger and more posteriorly oriented than the lateral epicondyle [3].
- The capitellum and radial head form the radiocapitellar joint [3].
- The radius is held in close approximation to the ulna at the proximal radioulnar joint by the annular ligament [3].
- The lesser sigmoid notch is the area of the ulna that articulates with the margin of the radial head at the proximal radioulnar joint [3].
- The radial head is a concave elliptical structure covered with articular cartilage along the radiocapitellar joint and approximately 270° of the articular margin [3].
- The lateral epicondyle is the origin of the lateral extensor musculature [3].
- The origin of the lateral ulnar collateral ligament complex is located just distal to the lateral epicondyle at the geometric center of the radiocapitellar articulation [3].
- The distal humeral articulation is angled 30° from the longitudinal axis [3].
- The anterior humeral line should pass through the center of the axis of rotation [3].
- The axis of rotation is angulated 5° to 7° in the coronal plane relative to the epicondylar axis, with the medial side more distal than the lateral side [3].
- The olecranon provides a broad attachment site for the triceps [3].
- The ulna bends approximately 8° medially at 8 cm from the tip of the olecranon [3].
- The articulation to the tip of the coronoid is approximately 30° from the long axis of the ulna in the sagittal plane [3].
Ligaments and Soft Tissue
- The medial ulnar collateral ligament is comprised of the anterior bundle, posterior bundle, and transverse ligament [2].
- The anterior bundle of the medial ulnar collateral ligament is the strongest component and the primary restraint to valgus stress [2].
- The anterior bundle of the medial ulnar collateral ligament is subdivided into anterior and posterior bands that provide reciprocal function, with the anterior band tight in extension and the posterior band tight in flexion [2].
- The lateral ulnar collateral ligament origin center is 10.7 mm from the lateral epicondyle [2].
- The lateral ulnar collateral ligament insertion is 3.3 mm from the apex of the supinator crest [2].
- The triceps muscle insertions have three distinct insertional areas to the olecranon: posterior capsular insertion, deep muscular portion, and superficial tendinous portion [2].
- The deep muscular head of the triceps corresponds to the medial head of the triceps [2].
- The superficial tendinous portion of the triceps corresponds to the long and lateral heads [2].
- The width of the triceps insertion is 2.6 cm [2].
- The triceps insertion is located 1.1 cm from the tip of the olecranon [2].
- The primary elbow extensor, the triceps, inserts on the olecranon process [4].
- The brachialis is the strongest elbow flexor and attaches to the coronoid 11 mm distal to the tip [4].
- The biceps brachii inserts at the ulnar margin of the radial tuberosity, with the long head inserting proximally and the short head distally [4].
- The biceps brachii is a powerful supinator of the forearm [4].
- The mobile wad consists of the brachioradialis, extensor carpi radialis longus, and extensor carpi radialis brevis [4].
- The flexor-pronator mass consists of the pronator teres, flexor carpi radialis, palmaris longus, flexor carpi ulnaris, and flexor digitorum superficialis [4].
- Tensile forces are present at the medial elbow while compressive forces are present at the lateral elbow [4].
- The elbow capsule allows maximum distension at approximately 70 to 80 degrees of flexion [4].
- The anterior capsule attaches at a point approximately 6 mm distal to the tip of the coronoid [4].
- The coronoid tip is an intraarticular structure visualized during elbow arthroscopy [4].
- The medial or ulnar collateral ligament is the primary valgus stabilizer [4].
- The anterior bundle of the medial ulnar collateral ligament is the most important component for stability [4].
- The posterior bundle of the medial ulnar collateral ligament has the greatest change in length and becomes taut at flexion beyond 120 degrees [4].
- The lateral ulnar collateral ligament is the posterolateral stabilizer [4].
- Osborne’s ligament stabilizes the ulnar nerve in the cubital tunnel [4].
- The ligament of Struthers is a variant anatomy arising from the supracondylar process to attach to the medial epicondyle and is a potential site of median nerve compression [4].
Biomechanics and Motion
- The normal elbow has a range of motion from 0° to 140° from extension to flexion [1].
- The normal elbow has a range of motion of 75° in pronation and 85° in supination [1].
- A functional arc for flexion and extension is 100° [1].
- A functional arc for forearm rotation is 100° [1].
- Elbow stability is determined by primary and secondary stabilizers [1].
- The three primary stabilizers of the elbow are the ulnohumeral articulation, the medial ulnar collateral ligament, and the lateral ulnar collateral ligament complex [1].
- Secondary stabilizers of the elbow include the radiocapitellar articulation, the common flexor tendon, the common extensor tendon, and the joint capsule [1].
Investigations
Physical Examination
- The physical examination of the elbow is directed by the history and the location of the patient's pain in the anterior, posterior, medial, or lateral aspect [1].
- Active and passive flexion, extension, supination, and pronation should be evaluated using a goniometer for accurate measurement [9].
- The contralateral elbow should be examined for comparison during range of motion assessment [9].
- If the elbow has less than 90° to 100° of flexion, the posterior bundle of the medial collateral ligament is contracted and must be released to restore flexion [9].
- Pain during the mid-arc of motion is more common with intrinsic disease and may not improve with contracture release alone [9].
- The ulnar nerve is of utmost importance in the physical examination due to its anatomic proximity to the elbow [9].
- The posterior bundle of the medial collateral ligament forms the floor of the cubital tunnel along the course of the ulnar nerve [9].
- Electromyography and nerve conduction velocity studies should be performed if there is any question about neurologic dysfunction [9].
- An assessment for ulnar nerve subluxation should be performed, as subluxation is a relative contraindication for an arthroscopic procedure secondary to possible iatrogenic nerve injury [9].
- The soft tissue surrounding the elbow should be examined for previous skin incisions, grafts, eschar, or infection [9].
Imaging
- Plain radiographs remain the hallmark and the best screening test for elbow evaluation [1].
- Standard radiographic views include AP, lateral, and oblique views [9].
- Serial radiography is used as follow-up when heterotopic ossification is present [9].
- Primary bony landmarks assessed on radiographs include the ulnohumeral joint, coronoid process, radial head, capitellum, radiocapitellar joint, olecranon tip, coronoid/olecranon fossae, and trochlear ridge [9].
- CT is helpful when assessing for malunion architecture and the location and pattern of osteophytes and/or loose bodies [9].
- Three-dimensional CT is used to check for heterotopic ossification [9].
- CT is not necessary when the stiffness is entirely soft-tissue related [9].
- CT is beneficial if any joint incongruity or abnormal bony anatomy is present [9].
- MRI can be used to evaluate ligaments and tendons, but it is rarely indicated for elbow stiffness [9].
- AP, lateral, oblique, and axillary views of the elbow may reveal posteromedial olecranon osteophytes and/or loose bodies in valgus extension overload syndrome [11].
- CT with two-dimensional reconstruction and three-dimensional surface rendering best visualizes the pathology of valgus extension overload syndrome [11].
- MRI may be most helpful in evaluating associated injuries including partial or complete tears of the medial collateral ligament in valgus extension overload syndrome [11].
- Radiographic evaluations are essential when diagnosing an osteochondritis dissecans lesion of the elbow [12].
- Important aspects of osteochondritis dissecans lesions may be better seen with MRI [12].
References
[1] Orthopaedic Knowledge Update 13 Ebook Without Multimedia. Anatomy, Biomechanics, Physical Examination, and Imaging of the Elbow > Summary and Conclusions.
[2] Orthopaedic Knowledge Update 13 Ebook Without Multimedia. Anatomy, Biomechanics, Physical Examination, and Imaging of the Elbow > Annotated References.
[3] Orthopaedic Knowledge Update 13 Ebook Without Multimedia. Anatomy, Biomechanics, Physical Examination, and Imaging of the Elbow > Anatomy > Bony Anatomy.
[4] Miller S Review Of Orthopaedics. SECTION 16 PATELLAR TRACKING IN TOTAL KNEE ARTHROPLASTY > TABLE 2.3 Shoulder Spaces.
[9] Aaos Comprehensive Orthopaedic Review 3. Elbow Stiffness* > IV. Evaluation.
[11] Aaos Comprehensive Orthopaedic Review 3. Elbow Injuries in the Athlete* > III. Valgus Extension Overload Syndrome and Posterior Impingement.
[12] Orthopaedic Knowledge Update. Osteochondritis Dissecans of the Knee and Elbow* > Summary.