Patients › Shoulder
فروزن شولڈر کے لیے جوڑ کی جھلی کھولنے کا آپریشن (Capsular Release)
Arthroscopic capsular release frees a stiff shoulder (frozen shoulder) when physiotherapy and injections fail.
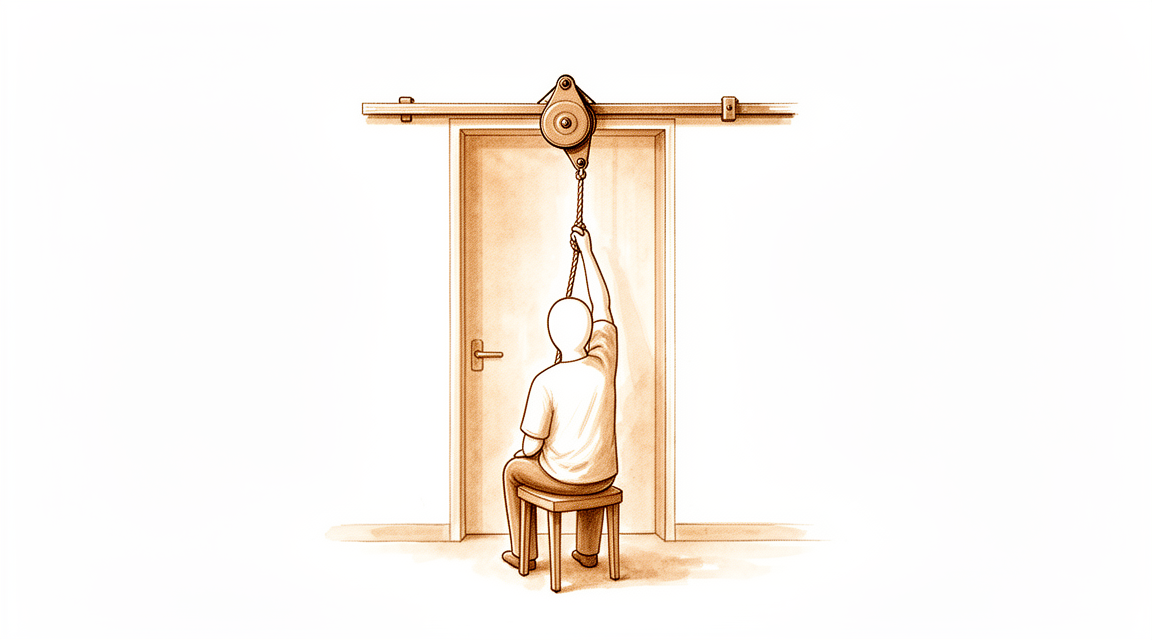
یہ آپریشن کیوں تجویز کیا گیا ہے
ڈاکٹر کیرن ہِرپرا، جو Mater Private Hospital Rockhampton میں بازو اور ہاتھ کے سرجن (upper-limb surgeon) ہیں، آپ کی حالت کے مطابق سب سے کم چیر پھاڑ والے طریقوں سے علاج شروع کرتے ہیں۔ مریض عام طور پر اپنے فیملی ڈاکٹر (GP) کے ریفرل (referral) پر ہمارے کلینک آتے ہیں؛ اگر کسی فزیوتھراپسٹ نے آپ کو ہمارے پاس آنے کا مشورہ دیا ہے، تب بھی میڈیکیئر (Medicare) سے رقم کی واپسی (rebate) کا حق دار ہونے کے لیے آپ کو اپنے فیملی ڈاکٹر سے ریفرل لینا ہوگا۔ آپ کی ملاقات پر ہم آپ سے آپ کی تکلیف کی تفصیل پوچھتے ہیں، آپ کے کندھے کا معائنہ کرتے ہیں، اور اگر تشخیص کی تصدیق کے لیے ضرورت ہو تو امیجنگ (ایکسرے یا اسکین جیسے ٹیسٹ) کرواتے ہیں۔
فروزن شولڈر (کندھے کا جم جانا) میں درد اور اکڑاؤ اس لیے ہوتا ہے کہ جوڑ کی جھلی (capsule)، یعنی جوڑ کے گرد لچکدار استر، میں سوزش ہو جاتی ہے اور وہ تنگ ہو جاتی ہے۔ ہم عام طور پر آپریشن کے بغیر علاج سے شروع کرتے ہیں، جیسے فزیوتھراپی، اسٹریچ اور انجکشن۔ سرجری پر اس وقت غور کیا جاتا ہے جب اس سے کافی بہتری نہ آئی ہو۔ جوڑ کی جھلی کھولنے کے آپریشن (capsular release) کا مطلب ہے اس استر کے تنگ حصوں کو کاٹنا تاکہ کندھا دوبارہ آزادی سے حرکت کر سکے۔ ہم یہ آپریشن اس وقت تجویز کرتے ہیں جب اسٹیرائیڈ کے انجکشن سے آپ کو کافی آرام نہ ملا ہو، بجائے اس کے کہ آپ کو مقررہ مہینوں تک انتظار کروایا جائے، اور یہ کندھے کے اردگرد چھوٹے چیروں کے ذریعے دوربین کے ذریعے آپریشن (keyhole) کے طور پر کیا جاتا ہے۔ زیادہ تر لوگ سرجری کے جلد بعد درد میں کمی اور زیادہ آزاد حرکت محسوس کرتے ہیں، اور اس آپریشن کا مقصد حرکت بحال کرنا، درد کم کرنا اور آپ کے کندھے کو روزمرہ استعمال کے قابل بنانا ہے۔
آپریشن سے پہلے
آپ کے سرجن سرجری سے پہلے کے ہفتوں میں آپ کو واضح ہدایات دیں گے۔ آپ کو آپریشن سے سات گھنٹے پہلے کھانا پینا بند کرنا ہوگا۔ ہم چھ کے بجائے سات گھنٹے اس لیے کہتے ہیں تاکہ اگر آپریشن کی فہرست وقت سے پہلے چل رہی ہو تو آپ کا آپریشن پہلے کیا جا سکے۔ اپنے سرجن کو وہ تمام دوائیں بتائیں جو آپ لیتے ہیں، بشمول خون پتلا کرنے والی دوائیں، کیونکہ ہو سکتا ہے کچھ کو عارضی طور پر روکنا پڑے۔ آپریشن کے دن ان کی لکھی ہوئی فہرست ساتھ لائیں۔ آپریشن کے بعد آپ کو گھر لے جانے کے لیے کسی کا انتظام کریں، اور ڈھیلے، آرام دہ کپڑے پہنیں جو آسانی سے اتارے جا سکیں۔ ایکسرے، الٹراساؤنڈ یا ایم آر آئی اسکین جیسی امیجنگ آپریشن کی منصوبہ بندی میں مدد دیتی ہے اور آپ کے کندھے کی حالت دکھاتی ہے۔ اگر آپ کو کوئی اور بیماری ہے تو ہو سکتا ہے آپ کو خون کے ٹیسٹ یا بے ہوشی کے ڈاکٹر (anaesthetist) سے معائنے کی ضرورت ہو۔
آپریشن کے دن
آپ ہسپتال کے سرجری کے داخلے کے شعبے میں پہنچتے ہیں، جہاں آپ کا اندراج کیا جاتا ہے اور آپ کو آپریشن تھیٹر کے لیے تیار کیا جاتا ہے۔ پھر آپ کی ملاقات بے ہوشی کے ڈاکٹر سے ہوتی ہے، یعنی وہ ڈاکٹر جو آپ کی بے ہوشی اور درد سے آرام کا خیال رکھتے ہیں۔ یہ آپریشن جنرل اینستھیزیا (مکمل بے ہوشی) کے ساتھ ساتھ ریجنل اعصابی بلاک (nerve block) کے تحت کیا جاتا ہے۔ آپریشن کے دوران آپ مکمل طور پر بے ہوش ہوں گے، اور یہ بلاک (ایک انجکشن جو آپ کے جاگنے سے پہلے بازو کو جانے والے اعصاب کو سُن کر دیتا ہے) سرجری کے بعد پہلے 12 سے 24 گھنٹے تک درد سے آرام دیتا ہے۔ بے ہوشی کے ڈاکٹر آپریشن سے پہلے آپ سے ملیں گے اور آپ کو دونوں حصوں کے بارے میں سمجھائیں گے۔
پھر آپ کو آپریشن تھیٹر میں لے جایا جاتا ہے، جہاں آپریشن کیا جاتا ہے۔ آپریشن ختم ہونے پر آپ ریکوری روم میں جاگتے ہیں، جہاں نرسیں بے ہوشی کی دوا کا اثر ختم ہونے تک آپ کی نگرانی کرتی ہیں۔ جب آپ کی حالت مستحکم ہو جائے تو آپریشن کی نوعیت اور آپ کی صحت یابی کے مطابق آپ یا تو وارڈ میں چلے جاتے ہیں یا گھر۔
آپریشن میں کیا کیا جاتا ہے
آپ کے سرجن یہ آپریشن دوربین کے ذریعے (keyhole) کرتے ہیں۔ آپ کے کندھے کے اردگرد چند چھوٹے چیرے لگائے جاتے ہیں، جن میں سے ایک پیچھے کی طرف ہوتا ہے۔ ایک پتلی نلکی جس میں چھوٹا کیمرہ لگا ہوتا ہے، جوڑ کے اندر ڈالی جاتی ہے تاکہ سرجن اسکرین پر جوڑ کی جھلی، یعنی جوڑ کے گرد تنگ استر، کو دیکھ سکیں۔
پھر کندھے کو آزاد کرنے کے لیے ٹشو کی تنگ پٹیوں کو کاٹا جاتا ہے۔ سرجن استر کے تنگ حصوں کو کھولتے ہیں، عام طور پر کندھے کے اگلے اور اوپری حصے سے شروع کر کے نیچے اور چاروں طرف اتنا آگے تک جاتے ہیں جتنا اکڑاؤ کے لیے ضروری ہو۔ جھلی کے ایک حصے کو کاٹنے سے صرف ایک سمت میں حرکت آزاد ہوتی ہے، اس لیے جھلی کو اتنا کھولا جاتا ہے جتنا ضروری ہو؛ کم حصہ کھولنا بظاہر پوری جھلی کو کاٹنے جتنا ہی یا اس سے بہتر نتیجہ دیتا ہے۔ جوڑ کے اندر سوزش والا ٹشو بھی صاف کیا جا سکتا ہے۔ جوڑ کے نچلے حصے کے قریب سے گزرنے والے اعصاب کے پاس احتیاط برتی جاتی ہے، اور انہیں بچانے کے لیے جھلی کو تہہ در تہہ کھولا جاتا ہے۔
تنگ ٹشو کھل جانے کے بعد، حرکت کی نئی حد جانچنے کے لیے آپ کے کندھے کو آہستگی سے حرکت دی جاتی ہے۔ پھر چھوٹے چیروں کو ٹانکوں سے بند کر کے ان پر زخم کی پٹی رکھ دی جاتی ہے۔
مقصد سادہ ہے: جو تنگ ہے اسے کاٹ دیا جائے تاکہ جوڑ دوبارہ آزادی سے حرکت کر سکے۔
آپریشن کے بعد
اس آپریشن کے بعد زیادہ تر مریض ایک رات ہسپتال میں رہتے ہیں، اگرچہ کچھ اسی دن گھر جا سکتے ہیں۔ آپ ریکوری روم میں جاگتے ہیں، پھر وارڈ میں منتقل ہو جاتے ہیں۔ پہلے ایک دو دن آرام کے لیے آپ کو ایک سادہ سلنگ (sling)، یعنی گلے سے لٹکی وہ پٹی جو بازو کو سہارا دیتی ہے، دی جا سکتی ہے؛ کسی مرمت کو بچانے کی ضرورت نہیں ہوتی، اس لیے آپ بازو کو آزادی سے استعمال کر سکتے ہیں۔ ایک فزیوتھراپسٹ آپ کو وہ حرکات دکھائیں گے جو آپ کو فوراً شروع کرنی ہیں، اور آپ انہیں دن بھر کرتے رہتے ہیں۔ آپ کے جاگنے سے پہلے ہی درد سے آرام کی منصوبہ بندی کر لی جاتی ہے، اس لیے زیادہ تر لوگوں کو پہلے ایک دو دن قابلِ برداشت لگتے ہیں۔ پہلے 24 گھنٹے کسی کو آپ کے ساتھ رہنا چاہیے۔ ہم زخم کی پٹی تقریباً 10 دن تک لگی رہنے دیتے ہیں؛ براہ کرم اس سے پہلے اسے نہ اتاریں، جب تک ہم آپ کو ایسا کرنے کو نہ کہیں۔ جب ہم آپ کو دیکھتے ہیں تو ہم اسے بدل دیتے ہیں یا ہٹا دیتے ہیں۔
صحت یابی
زیادہ تر لوگ فوراً فرق محسوس کرتے ہیں۔ وہ تنگ، اٹکنے والا درد جو سونے اور کپڑے پہننے کو مشکل بناتا تھا، اکثر پہلے دنوں سے ہی بہت کم ہو جاتا ہے۔ آپ کا بازو پھر بھی دکھے گا، اور جہاں کام کیا گیا ہے وہاں کندھے پر نیل پڑا ہوا اور سوجا ہوا محسوس ہو سکتا ہے۔ یہ پہلے ایک دو ہفتوں میں ٹھیک ہو جاتا ہے۔ اپنی حرکات جاری رکھنا، دی گئی درد کی دوا استعمال کرنا، اور ورزش کے اوقات کے درمیان بازو کو آزادی سے استعمال کرنا، یہ سب مدد کرتے ہیں۔
آپ کے دن سادہ اور بار بار کی جانے والی ورزش کے گرد گزریں گے۔ ہسپتال سے جانے سے پہلے ایک فزیوتھراپسٹ آپ کو پہلی حرکات دکھائیں گے، اور آپ انہیں دن بھر دہراتے رہیں گے تاکہ نئی حاصل ہونے والی حرکت دوبارہ اکڑ نہ جائے۔ پھر آپ کے فزیوتھراپسٹ آپ کے پروگرام کی رہنمائی کرتے ہیں، جو مدد کے ساتھ ہلکے اسٹریچ سے شروع ہو کر ان حرکات تک جاتا ہے جو آپ خود کرتے ہیں۔ سلنگ اگر دی جائے تو صرف پہلے ایک دو دن آرام کے لیے ہوتی ہے۔ آپ گھر میں آزادی سے گھوم پھر سکتے ہیں، لیکن گاڑی چلانے سے پہلے اپنے سرجن کی اجازت کا انتظار کریں، جو عام طور پر چھ ہفتے والے معائنے پر ملتی ہے۔ ہماری رہنمائی بازو اور ہاتھ کی سرجری کے بعد گاڑی چلانا میں اس کی مزید تفصیل دی گئی ہے۔
جیسے جیسے حرکت واپس آتی ہے، روزمرہ کے کام مرحلہ وار واپس آتے ہیں: پہلے پیچھے کی طرف ہاتھ بڑھانا، پھر بازو کو سر سے اوپر اٹھانا، پھر کام اور اپنی پسندیدہ سرگرمیوں پر واپسی۔ صحت یابی ہر شخص میں مختلف ہوتی ہے، اور آپ کا وقت مختلف ہو سکتا ہے۔ آپ کے سرجن اور فزیوتھراپسٹ ہر معائنے پر آپ کی رہنمائی کریں گے۔
کیا مسائل پیدا ہو سکتے ہیں
زیادہ تر مریض ٹھیک رہتے ہیں، لیکن کبھی کبھار مسائل پیدا ہو سکتے ہیں۔ آپ کے سرجن اور ٹیم آپ کی قریبی نگرانی کرتے ہیں تاکہ کسی بھی مسئلے کو جلد پہچانا جا سکے۔
آپ کے کندھے کے اردگرد کے چھوٹے چیروں میں انفیکشن ہو سکتا ہے۔ ان علامات پر نظر رکھیں: زخم سے باہر کی طرف پھیلتی ہوئی سرخی، بڑھتی ہوئی سوجن، یا اس جگہ سے رطوبت کا رسنا۔ گہرا، دھڑکتا ہوا درد جو عام درد کش دوا سے کم نہ ہو، ایک اور خطرے کی علامت ہے۔ اگر آپ کو ان میں سے کچھ بھی نظر آئے تو اگلی ملاقات کا انتظار کرنے کے بجائے کلینک کو فون کریں۔ جلد پکڑا جانے والا انفیکشن عام طور پر رطوبت نکالنے (drainage) اور اینٹی بائیوٹک گولیوں کے کورس سے ٹھیک ہو جاتا ہے۔
کندھے کے قریب سے اعصاب گزرتے ہیں، اور ان کے قریب سرجری سے عارضی جلن (irritation) ہو سکتی ہے۔ آپ کو بازو میں جھنجھناہٹ، سوئیاں چبھنے جیسا احساس، یا کچھ جگہوں پر سُن پن محسوس ہو سکتا ہے۔ کچھ لوگوں کو بازو کا کوئی حصہ کمزور یا دیر سے ردِعمل دینے والا محسوس ہوتا ہے۔ یہ تبدیلیاں عام طور پر عارضی ہوتی ہیں اور چند دنوں سے لے کر چند مہینوں میں خود ہی ٹھیک ہو جاتی ہیں۔ کسی بھی نئے سُن پن یا جھنجھناہٹ کا ذکر اپنے معائنے پر کریں، یا اگر یہ اچانک ظاہر ہو تو کلینک کو فون کریں۔
آپریشن کے دوران ہڈی اور جوڑ کی چکنی سطح کو نقصان پہنچ سکتا ہے۔ آپ اسے ایسے درد کے طور پر محسوس کریں گے جو آپریشن کے بعد کی عام دکھن سے مختلف ہو، یا حرکت کرتے وقت کلک کی آواز یا رگڑ کا احساس۔ اپنے اگلے معائنے پر اس کا ذکر کریں تاکہ اس کی جانچ ہو سکے۔
روٹیٹر کف (rotator cuff)، یعنی ٹینڈنوں (tendon، وہ مضبوط ڈوریاں جو پٹھے کو ہڈی سے جوڑتی ہیں) کا وہ گروپ جو آپ کو بازو اٹھانے اور گھمانے میں مدد دیتا ہے، بھی متاثر ہو سکتا ہے۔ یہ کندھے کے پہلو میں گہری دکھن کی طرح محسوس ہوتا ہے، ساتھ بازو اٹھاتے یا سر سے اوپر ہاتھ بڑھاتے وقت کمزوری ہوتی ہے۔ کپڑے پہننے جیسے سادہ کام توقع سے زیادہ مشکل لگ سکتے ہیں۔ اگر یہ توقع کے مطابق بہتر نہ ہو تو اپنے سرجن یا فزیوتھراپسٹ کو بتائیں، تاکہ وہ اس کا معائنہ کر کے آپ کا پروگرام بدل سکیں۔
اگر معائنوں کے درمیان کوئی بات آپ کو پریشان کرے تو کلینک کو فون کریں۔ اگر آپ تفصیلات جاننا چاہیں تو اس صفحے پر پیچیدگیوں کا جدول عام شرحیں بتاتا ہے۔
ہمیں کب فون کریں
اگر آپ کو بخار ہو، یا زخم سے سرخی، سوجن یا رطوبت کا رسنا بڑھ رہا ہو تو فوراً کلینک کو فون کریں۔ اگر آپ کو اچانک شدید درد ہو، نیا سُن پن یا جھنجھناہٹ محسوس ہو، یا آپ اپنا بازو ہلا نہ سکیں تو ہمیں فون کریں۔ اگر آپ کی پنڈلی (calf) میں سوجن یا درد ہو، یا سانس پھولے تو ہسپتال کی ایمرجنسی جائیں، کیونکہ یہ خون کے لوتھڑے کی علامت ہو سکتی ہے۔ اگر کوئی بات آپ کو پریشان کرے اور آپ کو یقین نہ ہو تو ہمیں فون کریں۔ ہم اس کے بارے میں جلد سننا زیادہ پسند کریں گے۔
اس مسئلے کے بارے میں مزید کہاں پڑھیں
یہ صفحہ خود آپریشن کے بارے میں ہے۔ جس مسئلے کا یہ آپریشن علاج کرتا ہے، بشمول اس کے کہ شواہد کیا بتاتے ہیں کہ سرجری کب مدد کرتی ہے اور کب نہیں، اس کی تفصیل فروزن شولڈر کے صفحے پر دی گئی ہے۔
Evidence & references
This is the clinical evidence summary written for health professionals. It is technical, and it lists the research this page was built from. You do not need to read it to understand your treatment or to make a decision about it.
Anatomy & Pathophysiology
Bony Anatomy
- The proximal humerus comprises four main parts: the humeral head, greater tuberosity, lesser tuberosity, and humeral shaft [3].
- The articular head of the humerus is spherical with a diameter of 37 to 57 mm [3].
- The most superior portion of the articular surface of the humeral head averages 8 mm above the greater tuberosity [3].
- Humeral version averages 29.8 degrees, with a range of 10 to 55 degrees [3].
- The humeral head is inclined approximately 130 degrees with respect to the humeral shaft [3].
- The neck-shaft angle measures an average of 135 degrees [4].
- The humeral head is retroverted an average of 30 degrees [4].
- The glenoid is a convex structure of shallow depth shaped like an inverted pear [3].
- The glenoid cavity is a shallow socket, approximately one third the size of the humeral head [4].
- The subchondral bone of the glenoid is relatively flat, with the articular concavity augmented by cartilage and a circumferential labrum [6].
- The glenoid averages 5° of retroversion in relation to the axis of the scapular body [6].
- The acromion, coracoacromial ligament, and coracoid process form the coracoacromial arch, a rigid bony-ligamentous structure that imparts stability to the shoulder girdle [3].
- The scapula is attached to the axial skeleton by the acromioclavicular and sternoclavicular joints [5].
- The scapula is separated from the chest wall by thin gliding fibro-fatty tissue, allowing its smooth excursion over the chest wall [5].
- The lateral pillar connects the inferior border of the glenoid with the inferior angle of the scapula [5].
- The spinal pillar arises from the central part of the glenoid and continues medially to become part of the base of the scapular spine [5].
- The two bony pillars connected by a markedly thinner medial border form the basic load-bearing structure of the scapular body, known as the biomechanical body of the scapula [5].
- The weakest bone in the scapula is located primarily in the central part of the biomechanical body, specifically in the infraspinous fossa [5].
- The weakest area of the circumference of the biomechanical body of the scapula is the spinomedial angle, which is the connection of the scapular spine and the medial border of the scapula [5].
Soft Tissue Anatomy
- The greater tuberosity serves as the attachment site for the supraspinatus, infraspinatus, and teres minor tendons of the rotator cuff [3].
- The lesser tuberosity serves as the attachment site for the subscapularis tendon [3].
- The bicipital groove lies between the greater and lesser tuberosities and serves as a pathway for the long head of the biceps [3].
- The rotator cuff consists of four muscles: the subscapularis, supraspinatus, infraspinatus, and teres minor [4].
- The infraspinatus and teres minor are external rotators, while the subscapularis is an internal rotator of the humerus [4].
- The rotator cuff muscles serve as depressors of the humeral head to allow the deltoid to efficiently abduct the humerus [4].
- The subscapular bursa lies between the subscapularis tendon and the neck of the scapula and communicates with the joint cavity between the superior and middle glenohumeral ligaments [7].
- The rotator interval is defined medially by the base of the coracoid, superiorly by the supraspinatus tendon, and inferiorly by the subscapularis tendon [6].
- The rotator interval contains the coracohumeral ligament, the superior glenohumeral ligament, and the intra-articular portion of the long head of the biceps tendon [6].
- The coracohumeral ligament restricts external rotation in adduction and is a static restraint to inferior and posterior translation in adduction and external rotation [6].
- The superior glenohumeral ligament is a primary static restraint against anterior translation with the arm at the side [6].
- The middle glenohumeral ligament is a primary static restraint against anterior translation with the arm in external rotation and 45° of abduction [6].
- The anterior band of the inferior glenohumeral ligament is a primary static restraint against anterior-inferior dislocation of the glenohumeral joint in 90° of abduction and external rotation [6].
- The posterior band of the inferior glenohumeral ligament is a primary static restraint against posterior-inferior translation in internal rotation and adduction [6].
- The glenoid labrum provides concavity and up to 50% of marginal glenoid socket depth [6].
Vascular Anatomy
- The proximal humerus receives its blood supply from the anterior and posterior humeral circumflex branches from the third division of the axillary artery [3].
- The anterior humeral circumflex artery provides vascular inflow to the humeral head by way of its terminal anterolateral branch known as the artery of Laing, also known as the arcuate artery [3].
- The ascending branch of the anterior humeral circumflex artery courses parallel to the lateral aspect of the long head biceps tendon and enters the humeral head at the interface of the bicipital groove and greater tuberosity [3].
- The anterolateral ascending branch of the anterior humeral circumflex artery provides the primary blood supply to the humeral head [6].
- Injury to the arcuate artery may result in osteonecrosis of the humeral head [3].
- Additional extraosseous collateral branches can permit humeral head perfusion despite complete ligation of the arcuate artery [3].
Pathophysiology of Frozen Shoulder
- Frozen shoulder, also known as adhesive capsulitis, is characterized by pain and restricted glenohumeral joint motion, especially external rotation [15].
- The essential lesion in frozen shoulder involves the coracohumeral ligament and the rotator interval capsule [15].
- Histologically, frozen shoulder shows evidence of inflammation and fibrosis with a dense matrix of type III collagen containing fibroblasts and myofibroblasts [15].
- The histological findings in frozen shoulder appear similar to findings in Dupuytren disease [15].
- Laxity of the rotator interval results in inferior laxity, while contracture of the interval is seen with adhesive capsulitis [6].
- Posttraumatic or postsurgical stiffness results from excessive scar formation [15].
- Motion loss in posttraumatic or postsurgical stiffness may involve the humeroscapular motion interface between the proximal humerus and overlying deltoid and conjoined tendon, as well as contracture of the rotator cuff and capsule [15].
- The pathogenesis of a stiff shoulder is still elusive, though ongoing basic science research has provided insight into cellular and biochemical pathways resulting in shoulder stiffness [1].
Investigations
General Principles
- The diagnosis of a stiff shoulder depends on awareness of the problem, with history and physical examination being paramount [1].
- Ancillary studies may be helpful in certain circumstances for the diagnosis of a stiff shoulder [1].
- The purpose of imaging the shoulder is to help establish the diagnosis, determine the severity of the pathoanatomy, assist in surgical planning, and enable the surgeon to illustrate the condition to the patient [2].
- Unless a specific research protocol is in place, the temptation to "overimage" should be resisted by obtaining only the scans or reconstructions necessary for patient care [2].
- Proper radiographic technique is as important as proper surgical technique to achieve the desired outcome [2].
- A robust approach to imaging the shoulder must recognize that the shoulder is a three-dimensional structure that cannot be represented by a single planar view [13].
- Critical relationships, such as the degree of centering of the humeral head, change with the position of the arm [13].
- Shoulder pathology may be found in a large number of different bones and soft tissues [13].
- Overlying and superimposed structures as well as metallic implants may complicate imaging the structures of interest [13].
- Surgeons need to develop a judicious approach to imaging that yields necessary information while avoiding the tendency to "over-image" [13].
Radiographic Evaluation
- Standardized plain films are almost always sufficient to garner the information needed for shoulder care [2].
- CT scans may offer a few degrees of increased precision in the measurement of glenoid version, but this precision does not improve the quality of the surgery or the clinical outcome [2].
- There is information that can be gathered from properly taken plain films that cannot be obtained from CT scans [2].
- The first key radiographic view is the anteroposterior (AP) view in the plane of the scapula taken so that the x-ray beam passes through the glenohumeral joint [2].
- The AP view in the plane of the scapula shows the superoinferior position of the humeral head relative to the glenoid [2].
- The AP view in the plane of the scapula shows the presence of osteophytes on the humeral head and glenoid [2].
- The AP view in the plane of the scapula shows narrowing of the joint space [2].
- The AP view in the plane of the scapula shows the degree of medial displacement of the humerus in relation to the lateral acromial line [2].
- The AP view in the plane of the scapula shows the quality of the humeral and glenoid bone [2].
- The AP view in the plane of the scapula shows the presence of loose bodies [2].
- The AP view in the plane of the scapula shows whether there is humeral head collapse or deformity [2].
- The second key radiographic view is the axillary view taken with the arm in the functional position of elevation in the plane of the scapula [2].
- The axillary view is oriented so that both the spinoglenoid notch and the scapular neck are visible [2].
- The axillary view shows a different perspective of the humeral anatomy [2].
- The axillary view shows the amount of glenoid bone [2].
- The axillary view shows the shape of the glenoid [2].
- The axillary view shows the version of the glenoid in relation to the plane of the scapula [2].
- The axillary view shows the relationship of the humeral head to the glenoid fossa [2].
- The standardized axillary view is referred to as the "truth view" because it demonstrates glenohumeral relationships in the functional position of elevation [2].
- CT scans have the disadvantage of being taken with the arm in the adducted position [2].
- Many "axillary views" sent for consultation are taken without standardization, making it impossible to determine important features of the glenohumeral joint [2].
- When taken properly, standardized anteroposterior and axillary views indicate the thickness of the cartilage space between the humerus and the glenoid [2].
- When taken properly, standardized anteroposterior and axillary views indicate relative positions of the humeral head and the glenoid [2].
- When taken properly, standardized anteroposterior and axillary views indicate the presence of osteophytes [2].
- When taken properly, standardized anteroposterior and axillary views indicate the degree of osteopenia [2].
- When taken properly, standardized anteroposterior and axillary views indicate the extent of bony deformity and erosion [2].
- Joint space narrowing is most evident on the axillary truth view as opposed to images made with the arm at the side [2].
- The axillary truth view can show posterior subluxation or "functional decentering" that is not evident in images taken with the arm at the side [2].
- The degree of posterior subluxation can be measured as the position of the center of the humeral head in relation to the plane of the scapula [2].
- The degree of posterior subluxation can be measured as the position of the center of the humeral head in relation to the glenoid face [2].
- The degree of posterior subluxation can be measured as the point of contact of the humeral articular surface on the glenoid articular surface [2].
- The point of contact of the humeral articular surface on the glenoid articular surface reflects the degree of centering of the net humeral joint reaction force on the glenoid [2].
- Malcentering of the joint reaction force leads to posterior instability, posterior glenoid wear, and "rocking horse" loosening of prosthetic glenoid components [2].
- At least two X-ray views should be obtained: an anteroposterior in the plane of the glenoid and an axillary projection with the arm in abduction [11].
- The axillary projection with the arm in abduction shows the relationship of the humeral head to the glenoid [11].
Magnetic Resonance Imaging
- Magnetic resonance imaging (MRI) is useful to identify osteonecrosis of the humeral head [11].
- Magnetic resonance imaging (MRI) is useful to identify a bone tumour [11].
- Magnetic resonance imaging (MRI) can identify labral tears [11].
- Magnetic resonance imaging (MRI) can identify rotator cuff tears [11].
- The accuracy of MRI for identifying labral tears and rotator cuff tears is enhanced by combining the scan with arthrography [11].
- Findings of adhesive capsulitis and an intact labrum on magnetic resonance arthrography were independent predictors for pain relief after glenohumeral corticosteroid injections [14].
Computed Tomography
- Computed tomography (CT) is helpful for planning fracture surgery [11].
- Computed tomography (CT) is helpful for planning shoulder joint replacement [11].
Ultrasonography
- Ultrasonography is a simple and accurate test for identifying rotator cuff tears [11].
- Ultrasonography is a simple and accurate test for identifying calcific tendinitis [11].
- Ultrasonography can be useful in guiding injections [11].
- Ultrasonography can be useful in guiding barbotage, which involves aspirating calcific deposits in the rotator cuff [11].
- The most commonly performed joint examination using ultrasonography is the shoulder examination [9].
- The accuracy of shoulder ultrasonography depends on the skill of the scanner operator and an awareness of pitfalls that are encountered [9].
References
[1] Rockwood And Matsen S The Shoulder. Arthroscopic Management of Prearthritic and Arthritic Conditions of the Shoulder and the Postarthroplasty Shoulder > SUMMARY.
[2] Rockwood And Matsen S The Shoulder. Arthroscopic Management of Prearthritic and Arthritic Conditions of the Shoulder and the Postarthroplasty Shoulder > Radiographic Evaluation.
[3] Rockwood And Matsen S The Shoulder. Shoulder and Elbow Specialty Clinic Workers’ Survey > ANATOMY.
[4] A Lange Medical Book Current Diagnosis Treatment In Orthopedics Fifth Edition. 2Musculoskeletal Trauma Surgery > SHOULDER AND ARM INJURIES.
[5] Rockwood And Green S Fractures In Adults. 29: Principles of Nonunion and Bone Defect Treatment > Applied Anatomy Related to Scapular Fractures.
[6] Aaos Comprehensive Orthopaedic Review 3. Anatomy of the Shoulder, Arm, and Elbow > I. Shoulder.
[7] Rockwood And Matsen S The Shoulder. Developmental Anatomy of the Shoulder and Anatomy of the Glenohumeral Joint > Bursae.
[9] Orthopaedic Knowledge Update Sports Medicine 6. Diagnostic Ultrasonography and Ultrasonography-Guided Procedures > Annotated References.
[11] Apley And Solomon S Concise System Of Orthopaedics And Trauma. INVESTIGATION.
[13] Rockwood And Matsen S The Shoulder. Developmental Anatomy of the Shoulder and Anatomy of the Glenohumeral Joint > SENIOR EDITOR COMMENTARY.
[14] Orthopaedic Knowledge Update Sports Medicine 6. Magnetic Resonance Imaging of the Glenohumeral Joint > Annotated References.
[15] Miller S Review Of Orthopaedics. SECTION 16 PATELLAR TRACKING IN TOTAL KNEE ARTHROPLASTY > SHOULDER STIFFNESS > 1. A stiff shoulder may be posttraumatic, postsurgical, or the result of adhesive capsulitis.