¿Por qué se ha recomendado esta operación?
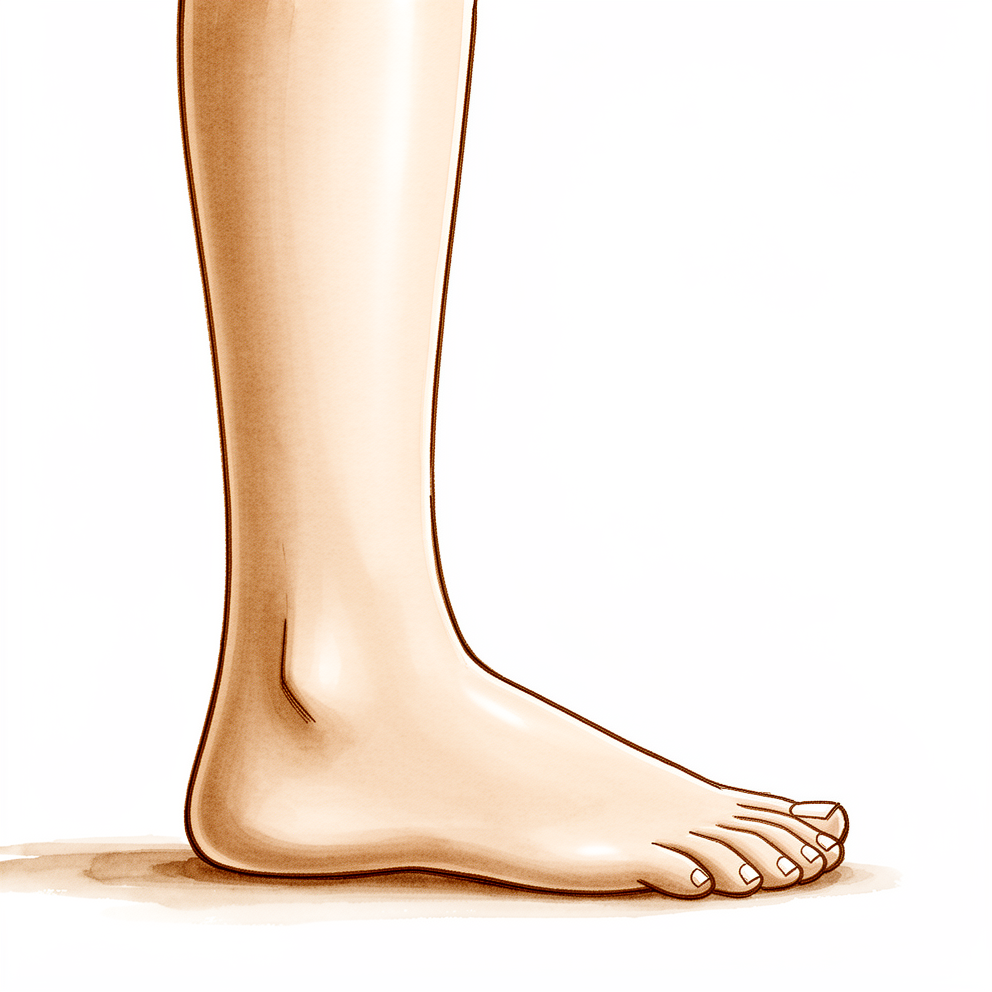
El tendón de Aquiles es el fuerte cordón situado en la parte posterior del tobillo que le permite impulsarse al caminar o correr. Cuando se desgarra por completo, esta operación une nuevamente los dos extremos desgarrados. En caso de un desgarro reciente, puede recomendarse la cirugía de inmediato, sin necesidad de probar primero un tratamiento no quirúrgico. El tratamiento no quirúrgico mediante férula o bota no resulta inferior a la cirugía en cuanto a resultados a un año, por lo que analizaremos ambas opciones con usted. La reparación abierta reduce la probabilidad de que el tendón se vuelva a desgarrar, aunque aumenta el riesgo de complicaciones en la herida. El objetivo principal es lograr un tendón estable, de modo que pueda soportar peso y volver a sus actividades habituales.
Antes de la operación
En los días previos a la cirugía, siga las instrucciones de preparación que le demos. Deberá dejar de comer y beber siete horas antes de la operación. Pedimos que sea siete horas para poder adelantar su turno si la lista de cirugías avanza antes de lo previsto. Su cirujano le indicará qué medicamentos habituales debe suspender y en qué momento. Lleve una lista por escrito de todos los fármacos que toma, y organice que alguien lo lleve a casa después de la intervención. Use ropa holgada y cómoda. Para planificar la operación, pueden utilizarse estudios como radiografías, ecografías o resonancias magnéticas. Si padece otras enfermedades, es posible que necesite análisis de sangre o una consulta con el anestesista antes de la cirugía.
El día de la intervención
Llega usted a la unidad de admisiones quirúrgicas del hospital, donde se le registra y se le prepara para la cirugía. A continuación, conocerá al anestesista, el médico encargado de sedarle y de controlar su dolor. Esta operación se realiza bajo anestesia general. En ocasiones, se añade un bloqueo nervioso regional para aliviar el dolor postoperatorio; el anestesista hablará con usted al respecto ese mismo día. Posteriormente, será conducido al quirófano, donde se llevará a cabo la intervención.
Una vez finalizada la operación, despertará en la sala de recuperación. Las enfermeras permanecerán a su lado mientras la anestesia va desapareciendo. Cuando su estado sea estable, será trasladado a una sala de hospitalización o podrá volver a casa, según el tipo de procedimiento y cómo evolucione su recuperación.
Descripción del procedimiento quirúrgico
El tendón de Aquiles es el fuerte cordón situado en la parte posterior del tobillo. Cuando se desgarra, sus dos extremos se separan, como una cuerda deshilachada. Esta operación consiste en coser esos extremos nuevamente.
El cirujano realiza una pequeña incisión sobre el tendón, en la parte posterior del tobillo. En una reparación mínimamente invasiva, la incisión es más pequeña y los puntos de sutura se pasan a través de la piel abriendo poco o nada la vaina del tendón. El cirujano puede utilizar una cámara fina para comprobar que los extremos desgarrados queden correctamente unidos. Puntos de sutura resistentes salvan el espacio entre el tendón sano situado por encima y el hueso del talón por debajo, manteniendo los extremos unidos mientras cicatrizan.
Una vez unidos los extremos del tendón, se anudan los puntos de sutura y la incisión se cierra con puntos y un vendaje. Al salir del quirófano, su tobillo se mantendrá en una posición protectora para evitar cualquier tensión sobre la reparación.
En algunas reparaciones se emplea una técnica que permite cargar peso sobre el pie antes que con la reparación abierta tradicional. Su cirujano le indicará qué método se ha previsto para usted y por qué.
Después de la operación
Despertará en la sala de recuperación, con enfermeras cerca, mientras el efecto de la anestesia desaparece. Su tobillo estará cubierto con un vendaje y mantenido en una posición protectora para evitar cualquier tensión sobre la zona operada. Le administraremos analgésicos para que se sienta cómodo, y antes de que se vaya comprobaremos el flujo sanguíneo, la sensibilidad y el movimiento del pie. Durante las primeras 24 horas después de volver a casa, debería haber alguien con usted. Su equipo médico le indicará si puede irse a casa el mismo día o si debe permanecer una noche en el hospital. Durante las dos primeras semanas, no cargue peso sobre el pie, a menos que su equipo le indique lo contrario. Dejaremos el vendaje puesto durante unos 10 días; por favor, no lo retire antes de ese plazo, a menos que se lo indiquemos. Lo cambiaremos o lo retiraremos cuando venga a su consulta.
Recuperación
Durante los primeros días, el tobillo le dolerá y se hinchará. Los analgésicos ayudan a mantener el confort, y el reposo con el pie elevado contribuye a reducir la hinchazón. Es normal que aparezcan hematomas alrededor del tobillo y en el pie; estos desaparecerán con el tiempo.
Al darle el alta, el tobillo quedará en una posición protectora para evitar tensiones sobre la zona reparada. Durante las primeras dos semanas, no debe apoyar peso en el pie, a menos que su equipo médico indique lo contrario. El vendaje se dejará puesto unos 10 días y luego se cambiará o retirará durante su siguiente visita. Posteriormente, su fisioterapeuta le guiará en ejercicios suaves para el tobillo. Empezará moviendo el pie hacia abajo libremente, procurando no flexionarlo demasiado hacia arriba. A medida que cicatrice, irá cargando más peso en el pie y comenzará a caminar distancias mayores. Algunas reparaciones permiten cargar peso antes que otras; su cirujano le indicará cuál es el plan para su caso.
En el día a día, al principio necesitará ayuda con las escaleras, hacer compras y ducharse. Dormir boca arriba con el pie elevado suele ser más cómodo. Normalmente podrá volver a trabajos de oficina y a sus actividades cotidianas en cuanto su movilidad y comodidad lo permitan, y retomar progresivamente el deporte una vez que haya recuperado la fuerza y el equilibrio. Muchas personas vuelven a practicar deporte alrededor de los cuatro meses tras una reparación mínimamente invasiva.
La recuperación varía según cada persona. Su cronograma puede ser distinto, y su cirujano y fisioterapeuta le guiarán en cada etapa.
Qué puede salir mal
La mayoría de los pacientes evolucionan bien, pero en ocasiones pueden surgir problemas. Su cirujano y el equipo lo vigilarán de cerca para detectar cualquier anomalía a tiempo.
Los problemas de la herida son lo que hay que observar con mayor atención. La piel que cubre el tendón de Aquiles tiene un flujo sanguíneo escaso, por lo que la incisión puede tardar en cicatrizar o los bordes pueden separarse. Esté atento a la aparición de enrojecimiento que se extienda desde la herida, secreción o exudado, aumento del dolor o fiebre. Si nota cualquiera de estos síntomas, llame a la clínica en lugar de esperar a su próxima cita. Algunas condiciones médicas, como la diabetes y el tabaquismo, incrementan el riesgo de complicaciones en la herida; por eso hablaremos con usted sobre sus propios riesgos antes de la cirugía.
Puede producirse una infección en la herida o en las estructuras más profundas alrededor del tendón. Generalmente se manifiesta como un dolor profundo y pulsátil que no mejora con analgésicos comunes, acompañado de calor, hinchazón y enrojecimiento. También puede ir acompañada de fiebre o sensación general de malestar. Una infección profunda requiere tratamiento inmediato; por ello, comuníquese con la clínica ese mismo día o acuda a urgencias si no puede contactarnos.
Los puntos de sutura mantienen unidos los extremos del tendón mientras este cicatriza; sin embargo, el tendón puede volver a romperse antes de haber ganado suficiente resistencia. Esto suele ocurrir al hacer un empuje brusco, tropezar o caerse. Sentiría un chasquido o estallido agudo en la parte posterior del tobillo, con debilidad repentina y dificultad para impulsarse. En tal caso, comuníquese de inmediato con la clínica o acuda a urgencias.
El nervio que discurre por la parte externa del tobillo puede irritarse durante la reparación. Esto puede provocar entumecimiento, hormigueo o sensación de ardor en el lateral del pie. Comente este síntoma en su próxima revisión; si es intenso, llame antes.
Tras esta lesión y cirugía, pueden formarse coágulos sanguíneos en las venas profundas de la pantorrilla. Las señales de alerta incluyen hinchazón repentina, sensibilidad o sensación de pesadez en la pantorrilla; si el coágulo llega a los pulmones, aparecerán dificultad para respirar o dolor torácico. En caso de dificultad respiratoria o dolor en el pecho, acuda de inmediato a urgencias. Si solo hay síntomas en la pantorrilla, llame a la clínica sin demora.
En ocasiones, el tejido cicatricial puede adherir el tendón a las estructuras circundantes, generando sensación de chasquido, roce o rigidez al mover el tobillo. Mencione esto en su próxima revisión.
En la tabla de complicaciones de esta página se detallan las tasas típicas; si desea conocer los datos exactos, puede consultarla.
¿Cuándo deben llamarnos?
Llámenos de inmediato si tiene fiebre, o si el enrojecimiento, la secreción o el dolor alrededor de la herida empeoran. Llámenos sin demora si la pantorrilla se hincha, está sensible al tacto o se siente pesada. Acuda a urgencias si le cuesta respirar o tiene dolor en el pecho, si siente un chasquido o estallido repentino en el tobillo con debilidad, o si pierde la sensibilidad en el pie o no puede moverlo. Si no logra contactarnos, acuda a urgencias.
Evidence & references
This is the clinical evidence summary written for health professionals. It is technical, and it lists the research this page was built from. You do not need to read it to understand your treatment or to make a decision about it.
Anatomy & Pathophysiology
Bony Anatomy
- The ankle mortise is formed by the tibial plafond, medial malleolus, and lateral malleolus [3].
- The ankle mortise articulates with the dome of the talar body [3].
- The talar dome is wider anteriorly and narrower posteriorly [3].
- The ankle mortise widens 1 to 1.5 mm during motion from plantar flexion to dorsiflexion [3].
- Medial and superior clear spaces appear wider with the foot in plantar flexion [3].
- The distal fibula has a convex medial surface that articulates with the concave incisura fibularis of the distal lateral tibia [3].
- The fibula rotates approximately 2 degrees within the incisura during ankle motion and ambulation [3].
- Ankle dorsiflexion results in external rotation and proximal translation of the fibula [3].
Ligamentous Anatomy
- The lateral ankle ligaments function as restraints to varus and inversion forces at the ankle [3].
- The anterior talofibular ligament (ATFL) originates from the anteroinferior aspect of the lateral malleolus, 1 cm proximal to its tip, and extends to the lateral aspect of the talar neck [3].
- The calcaneofibular ligament (CFL) extends from the tip of the lateral malleolus to the lateral aspect of the calcaneus [3].
- The posterior talofibular ligament (PTFL) extends from the posterior lateral malleolus to the posterolateral talus [3].
- The ATFL is the weakest ankle ligament [3].
- The PTFL is the strongest ankle ligament [3].
- The distal tibiofibular joint and fibula provide stability against lateral talar translation [3].
- The deltoid ligament complex is the primary ankle stabilizer during stance [3].
- The deep deltoid ligament extends from the apex of the medial malleolus to the medial talar body [3].
- The deep deltoid ligament functions primarily to resist lateral talar translation and external rotation [3].
- The posterior deep deltoid is the most important component of the deep deltoid ligament [3].
- The superficial deltoid ligament extends from the distal medial malleolus to the navicular bone, sustentaculum tali of the calcaneus, medial talus, and spring ligament [3].
- The superficial deltoid ligament functions primarily to resist valgus and eversion ankle forces [3].
- The deltoid ligament consists of superficial and deep layers, with at most six bands of which only three are constant: the tibionavicular ligament, tibiospring ligament, and deep posterior tibiotalar ligament [8].
- The tibiocalcaneal portion of the superficial deltoid ligament is the strongest component and resists eversion of the calcaneus [8].
- The deep portion of the deltoid ligament is organized into two short, thick, discrete bands: the anterior and posterior deep tibiotalar ligaments [8].
- The anterior and posterior deep tibiotalar ligaments are intra-articular but extrasynovial [8].
- The deep posterior band comprises the largest band of the deltoid complex [8].
- The deep deltoid ligament has the highest load to failure at 713.8 N ± 69.3 compared with the lateral collateral ligaments [8].
- The dominant mode of failure for the deep deltoid ligament is an intrasubstance rupture near its talar insertion [8].
- The failure of the superficial deltoid ligament is most commonly at its insertion on the anterior malleolus [8].
- Valgus tilting of the talus within the mortise requires complete rupture of both the superficial and deep deltoid ligaments [8].
Neurovascular Anatomy
- The superficial peroneal nerve penetrates the deep fascia and lies subcutaneously 8 to 10 cm proximal to the tip of the lateral malleolus, anterior to the subcutaneous border of the fibula shaft [6].
- The deep peroneal nerve accompanies the anterior tibial artery between the tendons of the anterior tibial and extensor digitorum longus muscles, just lateral to the extensor hallucis longus tendon [6].
- The saphenous nerve is located just medial or posterior to the saphenous vein in a slightly deeper plane, 3 to 5 cm proximal to the tip of the medial malleolus [6].
Biomechanics
- The ankle joint is responsible for most sagittal plane motion of the foot and ankle [3].
- Ankle plantar flexion ranges from 23 to 48 degrees [3].
- Ankle dorsiflexion ranges from 10 to 23 degrees [3].
- The ankle joint also contributes to inversion, eversion, and rotation [3].
Investigations
- MRI is sensitive for detecting osteochondral lesions of the ankle, but the edema pattern frequently overestimates the severity of the injury [12, 13].
- Linear fluid signal deep to subchondral bone on MRI indicates an unstable osteochondral lesion [12, 13].
- MRI has a sensitivity of 92% for predicting stable versus unstable osteochondral lesions [12, 13].
- CT scans are helpful for evaluating bony lesions, determining the integrity of subchondral bone, identifying cysts, and preoperative planning for osteochondral lesions [12, 13].
- AP, mortise, and lateral weight-bearing ankle x-rays may not demonstrate subtle osteochondral lesions [12, 13].
- Advanced imaging is often helpful in the diagnosis of foot and ankle injuries when combined with a thorough clinical examination [16].
- MRI is used for the evaluation of chronic Achilles tendon ruptures [1].
- MRI is used for the evaluation of traumatic ligamentous injuries of the ankle and foot [1].
- MRI is used for the evaluation of musculotendinous structures of the ankle [1].
- MRI is used for the evaluation of sports injuries involving the ankle [1].
- MRI is used for the pre-operative evaluation of the anterior talofibular ligament in chronic ankle instability [1].
- MRI is used for the evaluation of anterolateral soft tissue impingement of the ankle [1, 18].
- MRI is used for the evaluation of osteochondral lesions of the talus [1].
- MRI is used for the evaluation of posterior tibial tendon dysfunction [1].
- MRI is used for the diagnosis of plantar plate injury with reference to intraoperative findings [1].
- MRI is used for the evaluation of tibiofibular syndesmotic ligaments [1].
- MRI is used for the evaluation of chronic lateral ankle instability in conjunction with stress radiography [1].
- MRI is used for the evaluation of associations between imaging findings and symptoms in patients with chronic ankle sprain [1].
- MRI is used for the evaluation of accuracy in diagnosing ligamentous and chondral pathology in the ankle [1].
- MRI is used for the evaluation of peroneal tendon abnormalities on routine imaging of the foot and ankle [15].
- MRI is used for the evaluation of entrapment neuropathies of the lower extremity, including the knee, leg, ankle, and foot [19].
- Ultrasonography is used for the examination of the deltoid ligament in bimalleolar equivalent fractures [17].
- Ultrasonography is used for the point-of-care diagnosis and management of superficial peroneal nerve entrapment [19].
- MRI lacks additional diagnostic value for stability assessment of the ankle mortise in supination-external rotation-type ankle fractures [17].
- CT imaging is used to evaluate normal tibiofibular relationships at the syndesmosis [17].
- Preoperative computed tomography scans are used in operative planning for malleolar ankle fractures [17].
- Radiographic evaluation of the normal distal tibiofibular syndesmosis is a standard investigative approach [17].
- Fluoroscopy is used to assess if the syndesmosis is reduced [17].
- Radiographic identification of primary lateral ankle structures is possible [2].
- Gravity stress radiographs are used to assess the effect of ankle position on deltoid ligament integrity and medial clear space measurements [2].
- Stress radiography is used in the evaluation of chronic lateral ankle instability [1].
- The use of advanced imaging is often helpful in diagnosis when combined with a thorough clinical examination for foot and ankle disorders [16].
Treatment
Operative Technique: Lindholm Repair
- The patient is positioned prone for the procedure [14].
- A posterior curvilinear incision is made extending from the midcalf to the calcaneus [14].
- The deep fascia is incised in the midline to expose the tendon rupture [14].
- Ragged ends of the tendon are debrided [14].
- Tendon ends are apposed using a box type of mattress suture made of heavy nonabsorbable suture material or wire [14].
- Fine interrupted sutures are also used to appose the tendon ends [14].
- Two flaps are fashioned from the proximal tendon and gastrocnemius aponeurosis [14].
- Each flap is approximately 1 cm wide and 7 to 8 cm long [14].
- The flaps are left attached at a point 3 cm proximal to the site of rupture [14].
- Each flap is twisted 180 degrees on itself so that its smooth external surface lies next to the subcutaneous tissue [14].
- The flaps are turned distally over the rupture [14].
- Each flap is sutured to the distal stump of the tendon and to one another [14].
- The flaps cover the site of rupture completely [14].
- The wound is closed with care taken to approximate the tendon sheath over the site of repair [14].
Operative Technique: Lynn Repair
- The tendon sheath is opened in the midline [14].
- The foot is held in 20 degrees of plantar flexion during the repair [14].
- The ends of the Achilles tendon are sewn together with 2-0 absorbable sutures without excising the irregular edges [14].
- If the plantaris tendon is intact, its insertion on the calcaneus is divided [14].
- The plantaris tendon is fanned out to form a membrane using forceps, beginning distally [14].
- The fanned-out plantaris membrane is placed over the repair of the Achilles tendon [14].
- The plantaris membrane is sutured in place with interrupted sutures [14].
- When possible, the Achilles tendon is covered for 2.5 cm both proximal and distal to the repair [14].
- If the plantaris tendon is ruptured, it is dissected free from the Achilles tendon for several centimeters [14].
- The ruptured plantaris tendon is divided proximally using a tendon stripper [14].
- The plantaris tendon is pulled distally into the incision and fanned out as a free graft [14].
- The sheath of the Achilles tendon is closed as far distally as possible without tension [14].
Postoperative Care
- Postoperative care for these repairs is the same as that used after treatment of acute rupture of the Achilles tendon [14].
References
[1] Campbell S Operative Orthopaedics 4 Volume Set. REFERENCES > FOOT AND ANKLE.
[2] Campbell S Operative Orthopaedics 4 Volume Set. REPAIR OF ACUTE RUPTURE OF LATERAL LIGAMENTS > ACUTE ANKLE LIGAMENT INJURIES, CHRONIC ANKLE INSTABILITY.
[3] Miller S Review Of Orthopaedics. SECTION 16 PATELLAR TRACKING IN TOTAL KNEE ARTHROPLASTY > BIOMECHANICS OF THE FOOT AND ANKLE.
[6] Campbell S Operative Orthopaedics 4 Volume Set. MULTIPLE Z-PLASTY RELEASE OF A CONGENITAL RING > ANKLE BLOCK.
[8] Orthopaedic Knowledge Update Sports Medicine 6. Ankle and Foot Injuries and Other Disorders > Ankle Sprains > Medial Ankle Injury.
[12] Miller S Review Of Orthopaedics. SECTION 16 PATELLAR TRACKING IN TOTAL KNEE ARTHROPLASTY > OSTEOCHONDRAL LESIONS.
[13] Miller S Review Of Orthopaedics. OSTEOCHONDRAL LESIONS.
[14] Campbell S Operative Orthopaedics 4 Volume Set. ULNAR COLLATERAL LIGAMENT REPAIR WITH AN INTERNAL BRACE > OPEN REPAIR OF ACHILLES TENDON RUPTURE—LINDHOLM.
[15] Campbell S Operative Orthopaedics 4 Volume Set. MULTIPLE Z-PLASTY RELEASE OF A CONGENITAL RING > PERONEAL TENDONS.
[16] Orthopaedic Knowledge Update Sports Medicine 6. Ankle and Foot Injuries and Other Disorders > Summary.
[17] Orthopaedic Knowledge Update Trauma. Ankle Fractures > Annotated References.
[18] Campbell S Operative Orthopaedics 4 Volume Set. ARTHROSCOPIC EXAMINATION AND DEBRIDEMENT OF THE ANKLE JOINT > IMPINGEMENT.
[19] Campbell S Operative Orthopaedics 4 Volume Set. COMBINED HAMMER TOE AND MALLET TOE DEFORMITY WITH ASSOCIATED DOUBLE CORNS > REFERENCES > TARSAL TUNNEL SYNDROME.